Workspace Settings
Managing your workspace efficiently is integral to optimizing your workflow and productivity. Within Permit, we provide intuitive tools and features designed to help you seamlessly manage your team and their access, and maintain logs of all your essential tasks.
Member management
The team management tool ensures controlled access for team members. Depending on their roles, members might modify policies through the dashboard or the API.
For workspace access control, navigate to the Settings screen and choose the Members tab.
Understanding member roles
When adding a new member into your workspace, an invitation is sent to that user. As part of the invitation, you need to specify
whether the user will be assigned a Workspace Owner role or a Workspace Editor role or a Workspace Viewer.
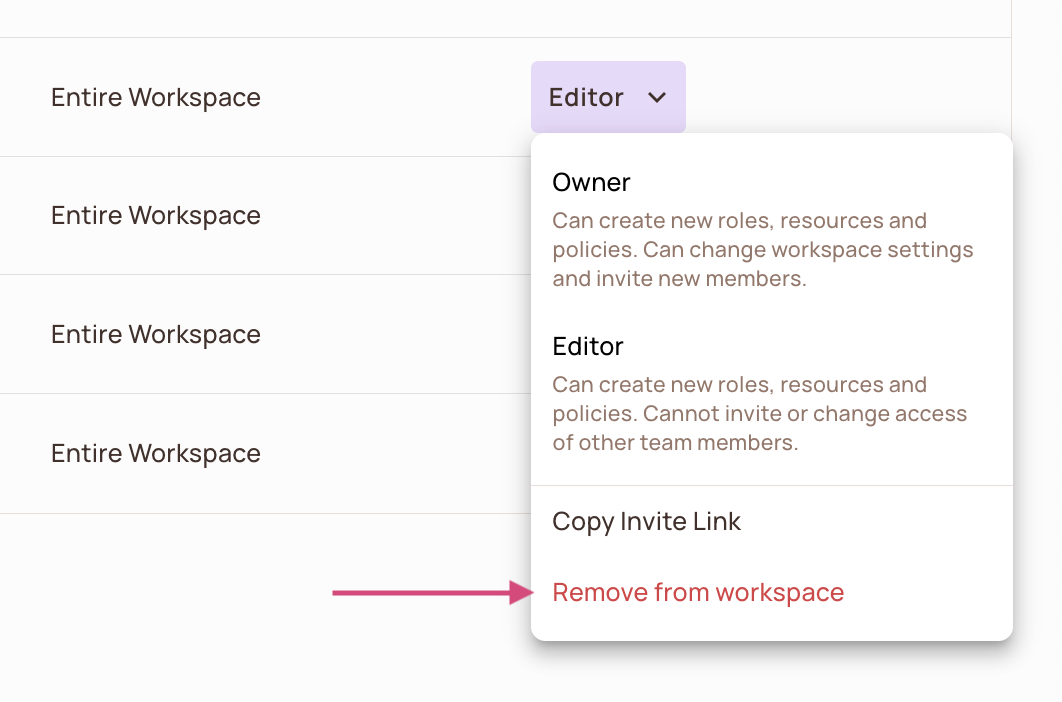
- Workspace Owner can create new roles, resources and policies. They can change workspace settings and invite new members to the workspace.
- Workspace Editor can create new roles, resources and policies. They cannot invite or change access of other team members.
- Workspace Viewer can only view roles, resources and policies. Cannot invite or change access of other team members.
A user can have access to an entire workspace, or they can have access to individual projects and/or environments. If you want a member to have different permissions for a particular project or environment, you can invite them directly into that specific project and environment with a new role. Their workspace owner permissions will continue to remain unchanged elsewhere.
If you don't invite a user into your workspace as a member, but only invite them directly into a specific project or environment,
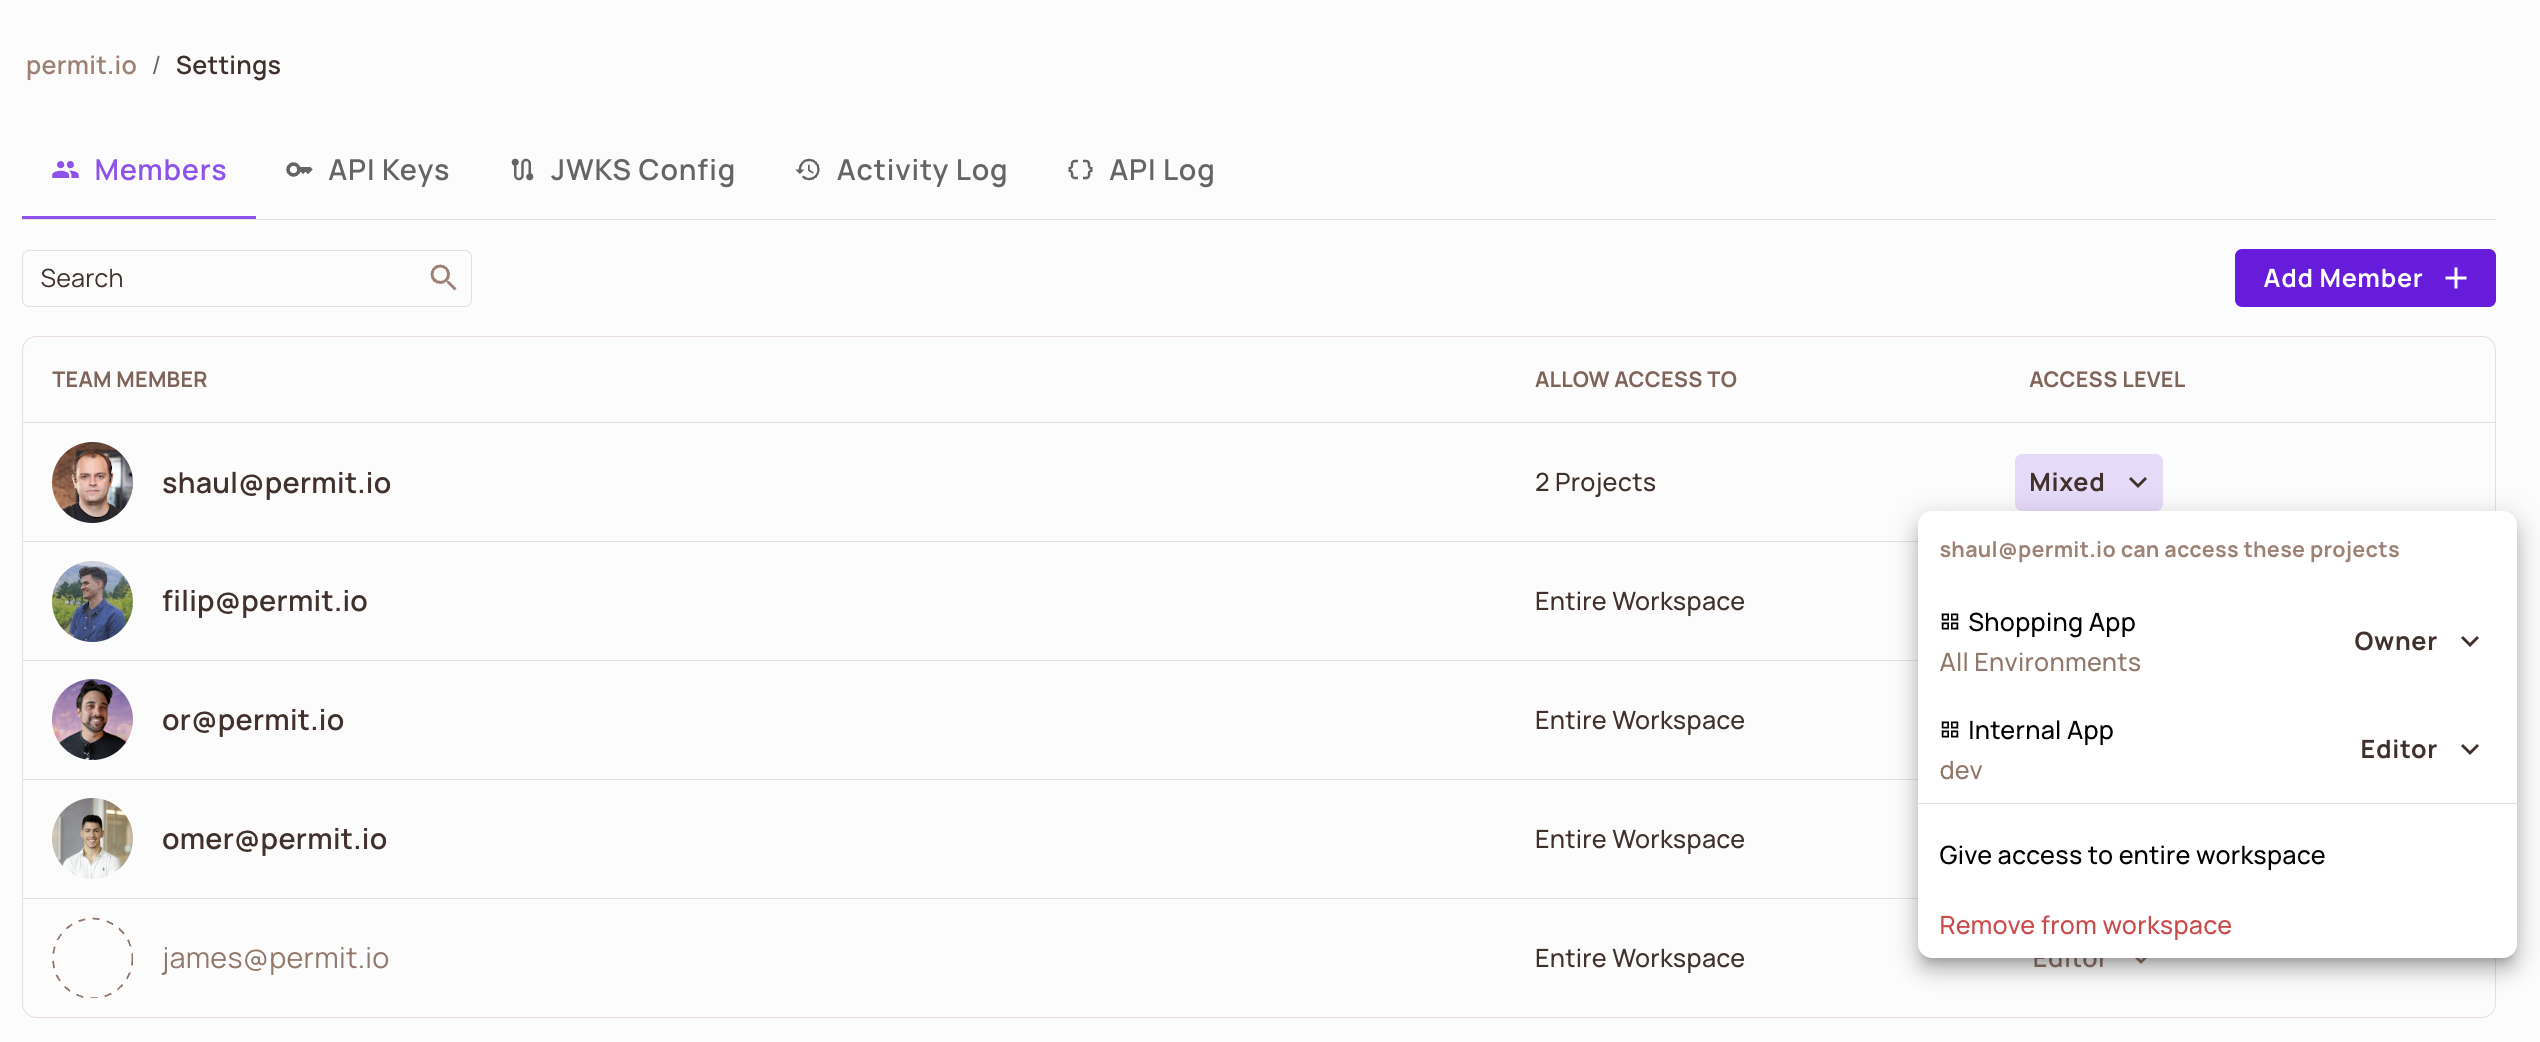
they would only be part of those projects, and their access level will be Mixed, if its more than two projects with different access.
Let's look at an example
Shaul, one of our talented engineers, has selective access within our workspace. While he has comprehensive access to the Shopping App project as its Project Owner, encompassing all its environments, his privileges are more limited in the Internal App project,
where he's an Environment Editor for just the dev environment.
Adding new members
You can either invite members individually or send bulk invitations to your workspace. However, currently, we can't send bulk invites with varied roles. If you want some users to be workspace owners and others to be workspace editors, you'll need to handle this in two separate invites.
Changing member roles
You can change the roles for each member, and for each project and environment they are assigned to, directly from the Members page.
If a user is part of more than two projects, but not of the workspace, you can also give him access to the entire workspace,
selecting either the Workspace Editor or Workspace Owner role or Workspace Viewer role.
Removing a member
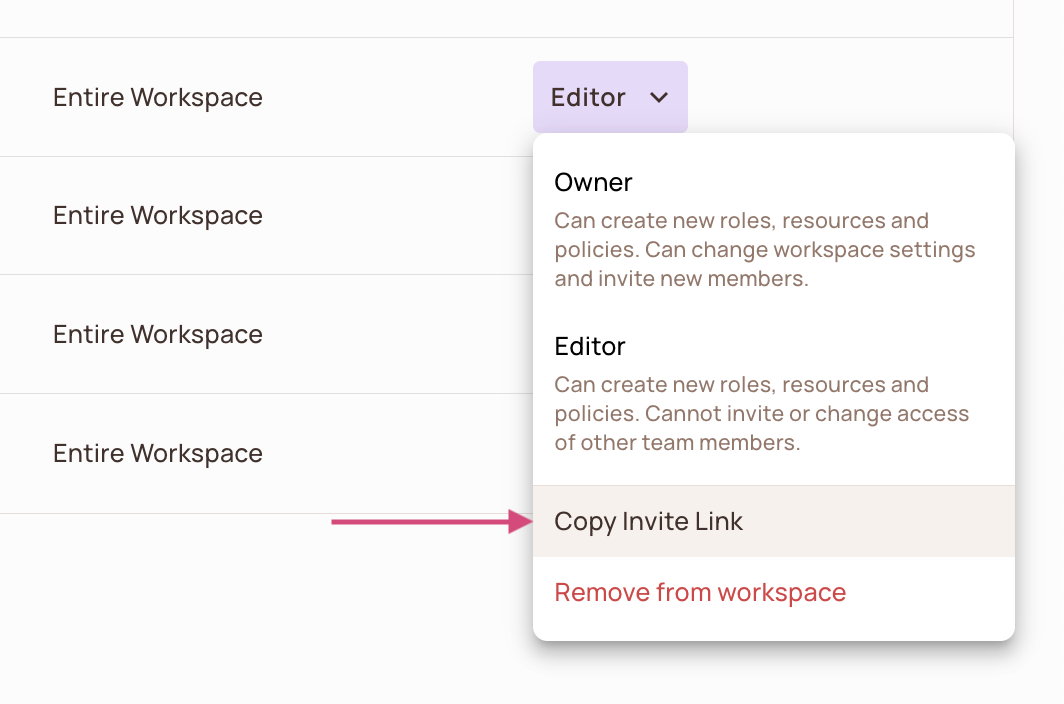
Sending an invitation link
By default, when you invite a new member to your workspace, they will be sent an email with a link to accept the invitation. While the invite is still pending, meaning the user has not yet accepted the invite, they will be shown as a blank user.

If for some reason the user has not received the email, you can manually copy the invitation link and send it directly to the user. Each link is bespoke to every added user.
API keys
The API Keys screen lets you create and oversee your API Keys. Using these keys, you can make requests to the Permit REST API at organizational, project and environment level.
For API key management, simply navigate to the Settings on the Sidebar and click on the API Keys tab.
Organization vs Project vs Environment keys
In the hierarchy of key management, Organization Keys reside at the top, governing all organizational assets and projects. They are primarily accessible by top-level administrators, ensuring comprehensive oversight and configurations at a broad level.
One step below are the Project Keys, which are tailored to individual projects or products. These keys facilitate granular control over specific projects, and their access is typically granted to project managers and the relevant team members.
At the most specific level, Environment Keys manage distinct project phases like Development, Testing, or Production. Developers and operations teams usually manage these, adapting configurations to suit each environment's unique needs.
Environment-level API keys are automatically generated for new environments.
Creating new keys
Rotating and deleting keys
Data Processing Addendum (DPA)
Permit offers a standard Data Processing Addendum that you can review and adopt immediately. Enterprise and Pro (for an additional fee) customers can request a tailored DPA by contacting support or their customer success manager.
You are never required to store personally identifiable information (PII) inside Permit’s control plane. You can rely entirely on opaque user identifiers, and if you must work with PII you can keep it solely on your self-hosted PDPs.