Use the Permit API and SDK
Learn how to leverage the Permit API and SDK to integrate robust access control into your application. This guide will walk you through the essential steps, from setting up your environment to managing user permissions seamlessly.
Our API & SDK Reference
Explore the complete API documentation to dive into all available endpoints and their usage.
Obtain your API key
To start using Permit.io, you'll need an API key to authenticate your application with the Permit platform. This key is essential for accessing Permit's authorization services and managing your app's permissions.
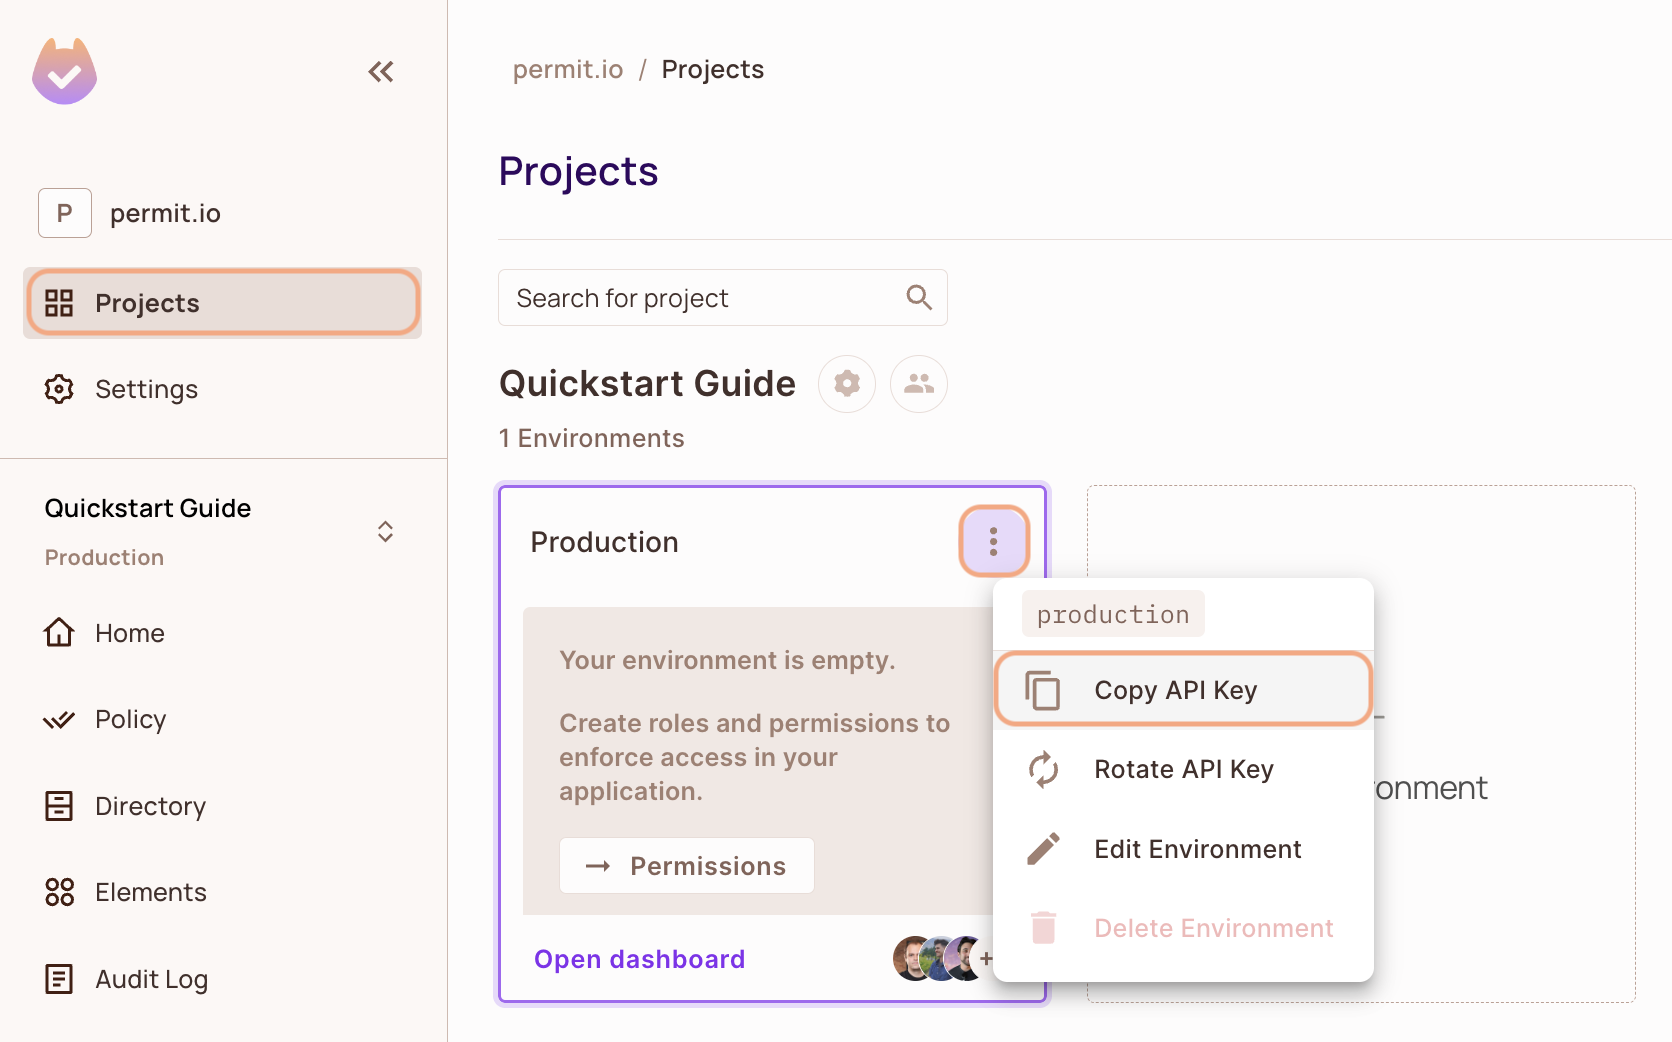
- Open the Permit Dashboard and go to the Projects screen.
- Select the desired Project and Environment.
- On the environment card, click the
in the top-right corner.
- Choose Copy API Key from the dropdown menu.

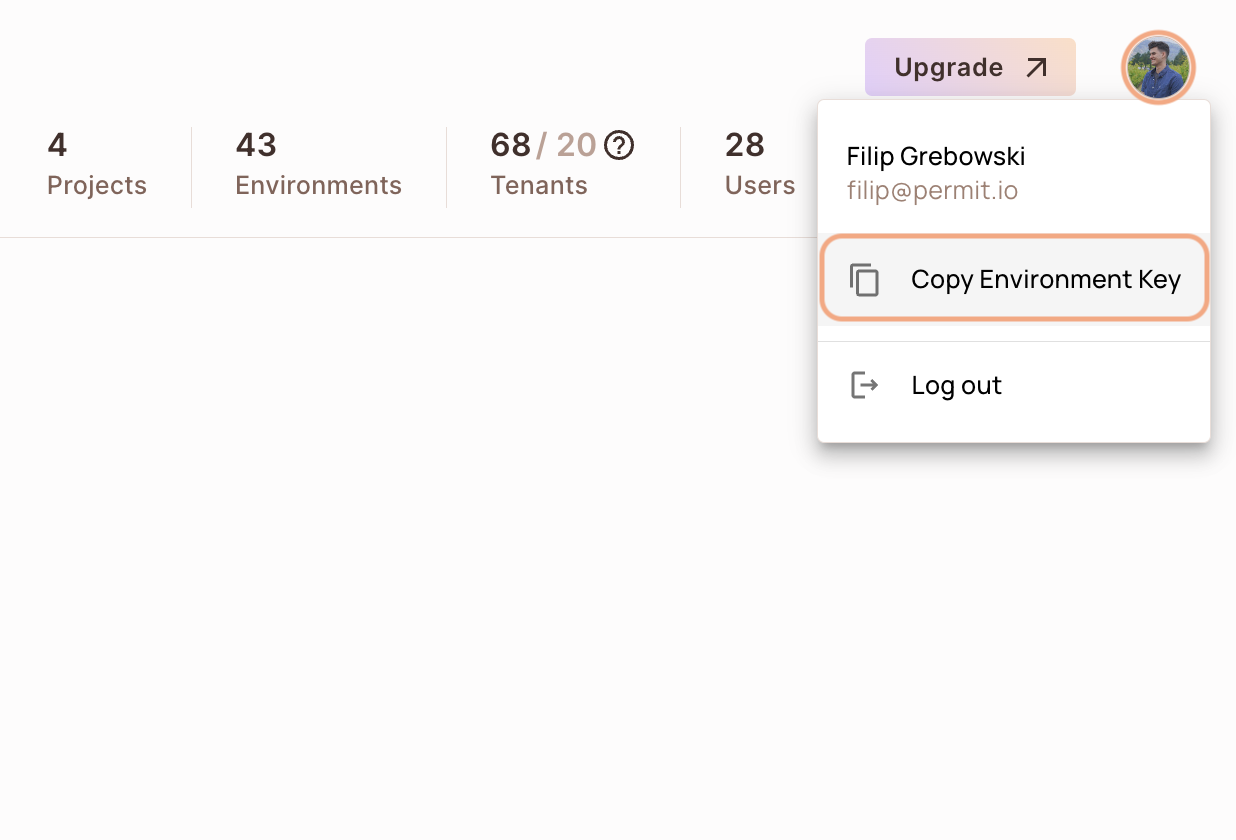
You can also copy the Environment API Key of the active environment by clicking on the User Menu Icon > Copy Environment Key

The API Key that you will copy from the user menu is linked to the active environment on the sidebar. Switching to another active environment and then clicking on the Copy Environment Key option will copy a different API Key - the API key of the newly activated environment.
Installing the SDK
To get started with Permit, you need to install the Permit SDK in your project. Open your terminal and run the following command.
Importing the Permit SDK
The next step is to import the Permit SDK into your project. The library provides all the tools you need to interact with Permit's APIs, including checking user permissions.
Initializing the Permit object
Once the library is imported, you'll need to initialize the Permit object. This object serves as the main interface for interacting with Permit.
You will need your API key, which you can obtain from the Permit dashboard. We have a whole guide for this. This API key allows you to securely authenticate and interact with Permit's API.
If you want the SDK to emit logs, add the below code to your Permit instance.
log: {
  level: "debug";
}
If you want the SDK to throw errors if you get a timeout or network error, add the below code to your Permit instance.
throwOnError: true;
Get the project and environment id
Understanding the scope of your work is essential for all API calls within Permit. This includes retrieving the project ID and
environment ID, which are required for your requests.
To get your ID's, run the below request to fetch the API Key Scope of your project:
You can expect a reply similar to the one below:
Perform your first call to Permit
It's time to use the API to call our first endpoint, and for this example, we will create a new role, and it's associated permissions.
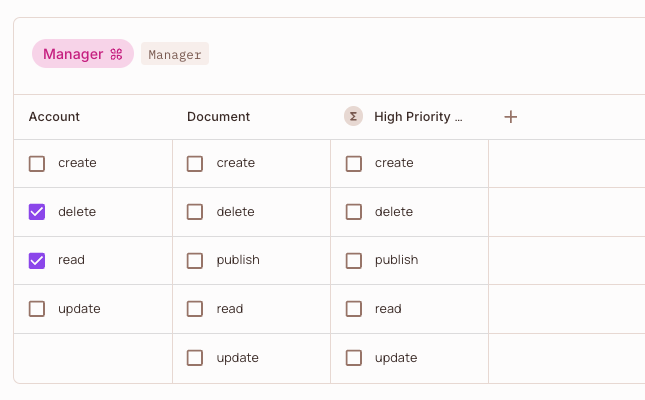
Here is code example of a Manager role, with the respective permissions on a account resource:
- Permission to
read - Permission to
delete
The result should be:

What did you learn?
In this guide, you've learned how to:
- Fetch your API key.
- Initialize a Permit Object using the
permitiolibrary. - Run your first API call and thus create a new role with permissions.
Ever heard of the Cat Facts API? Developers created it as a joke, but it became a hit for testing API integrations while sending random cat facts.
What's next? 🎉
- Sync yourn first user into Permit
- Create a new tenant
- Learn about multi tenant authorization
Nice work! Onto the next one.