Sync Data into your App
Policy decisions are often driven by data. While you can pass data in the check arguments, some of it would be synced to Permit in advance. This guide will walk you through the data entities and how to sync them to Permit.
Before we start: Understand Permit Data
These are the available data structures you might want to sync to Permit. These include:
- users (
RBAC,ABAC, &ReBAC)- user attributes (
ABAC)
- user attributes (
- tenants (
RBAC,ABAC&ReBAC)- tenant attributes (
ABAC)
- tenant attributes (
- role assignments (
RBAC&ReBAC) - resource instances (
ABAC&ReBAC)- resource instance attributes (
ABAC)
- resource instance attributes (
- resource relationship tuples (
ReBAC)
It's crucial to understand that most permissions rely heavily on additional data to function effectively.
Permit also supports event-driven sync of your data using OPAL scopes. You can read more about it here.
Permit Application Data can be added manually by using the Permit UI and via the SDK. We will be showing how to work with both methods, if possible.
Users & User Attributes (ABAC)
You can send user attributes programmatically using the Permit SDK. This is especially useful for bulk operations or integrating attribute management into your existing systems.
Imagine a SaaS platform where users have different subscription tiers like Free, Pro, and Enterprise. When a user upgrades their subscription, your system can automatically sync this new attribute (e.g., subscriptionLevel: Pro) with Permit's API. This ensures their updated access permissions—such as gaining access to premium features—are immediately enforced without manual intervention.
To add attributes to a user, use the SDK's users.sync function. This allows you to associate custom attributes with a specific user
identity.
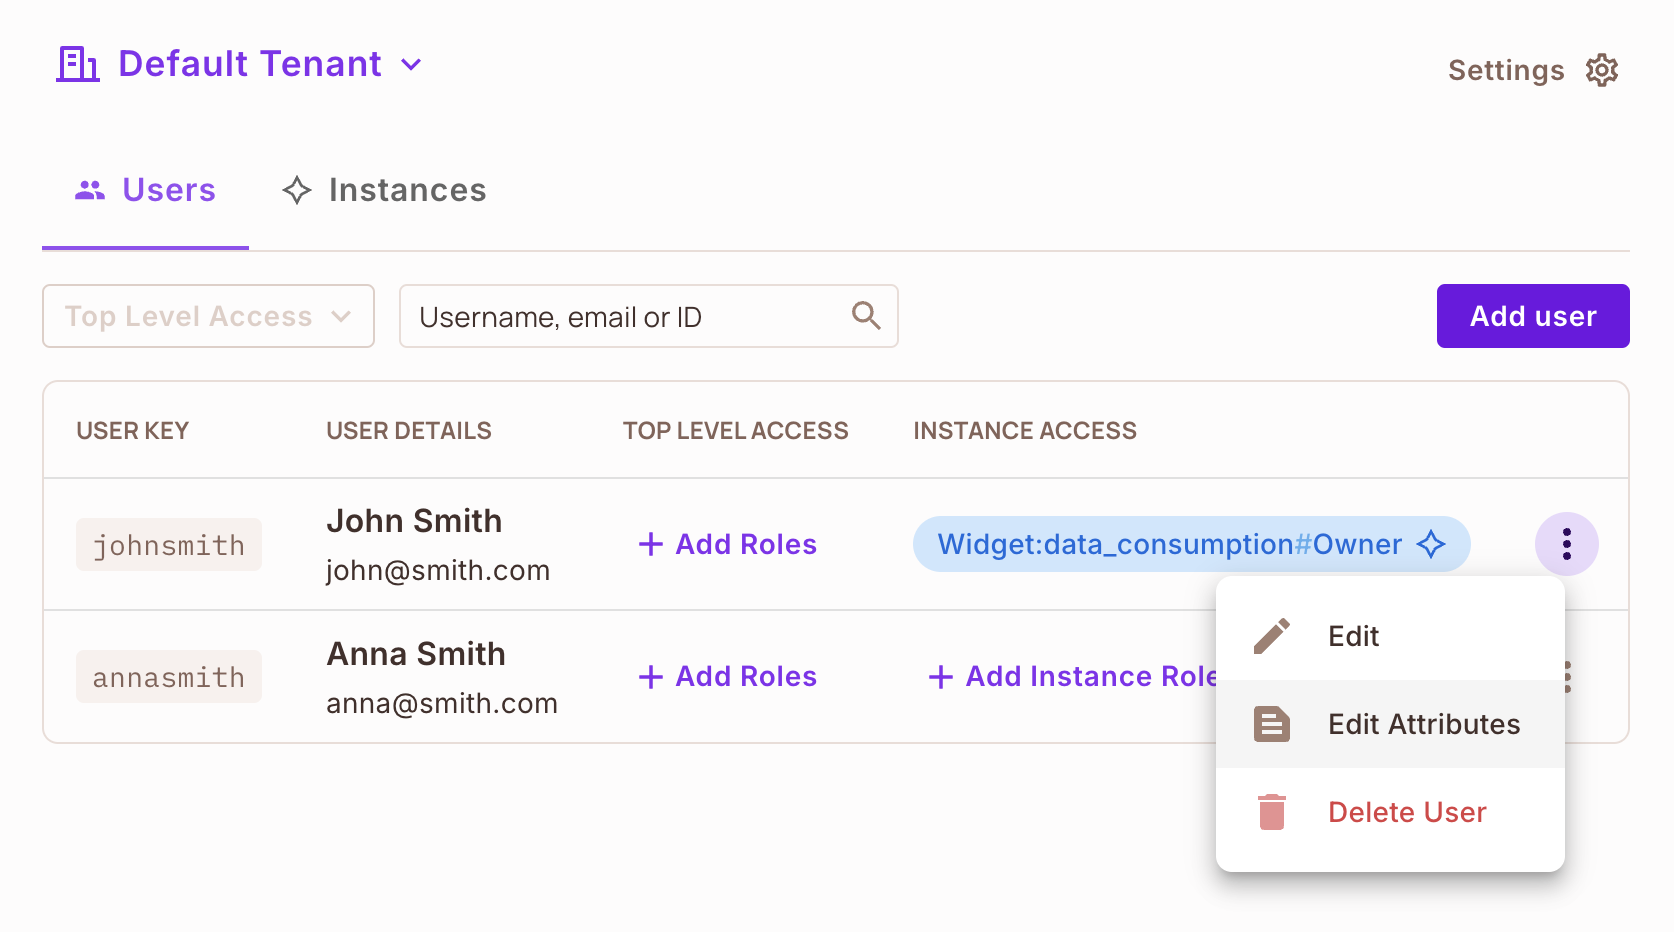
Attributes can be added using our no-code dashboard to each individual user identity by navigating to the Directory, selecting
the user you want to add attributes to, clicking the three dots and selecting Edit Attributes.
Tenants & Tenant Attributes (ABAC and ReBAC)
Tenant attributes describe properties or characteristics of a tenant, which typically represents a group, organization, or account within a multi-tenant system. These attributes help differentiate tenants and apply access control policies based on their specific requirements.
For example, in a multi-tenant e-commerce application, each tenant (merchant) may have unique configurations, such as their region or industry. When a new tenant is onboarded and selects their industry (e.g., Retail) and region (e.g., Europe), these attributes can be synced with Permit's API. This allows access control policies to dynamically adapt, ensuring the tenant's users see only content, features, or settings relevant to their region and industry.
For example:
- Region: Defines the geographical location of the tenant, such as North America, Europe, or Asia.
- Subscription Level: Specifies the service tier, such as Basic, Pro, or Enterprise.
- Industry: Indicates the tenant's sector, like Healthcare, Finance, or Retail.
Using tenant attributes, you can enforce policies like:
"Allow access to advanced analytics only for tenants with a Pro or Enterprise subscription."
To create a new tenant and assign attributes, use the SDK's tenant.create function. This allows you to enforce attribute-based
access control policies dynamically.
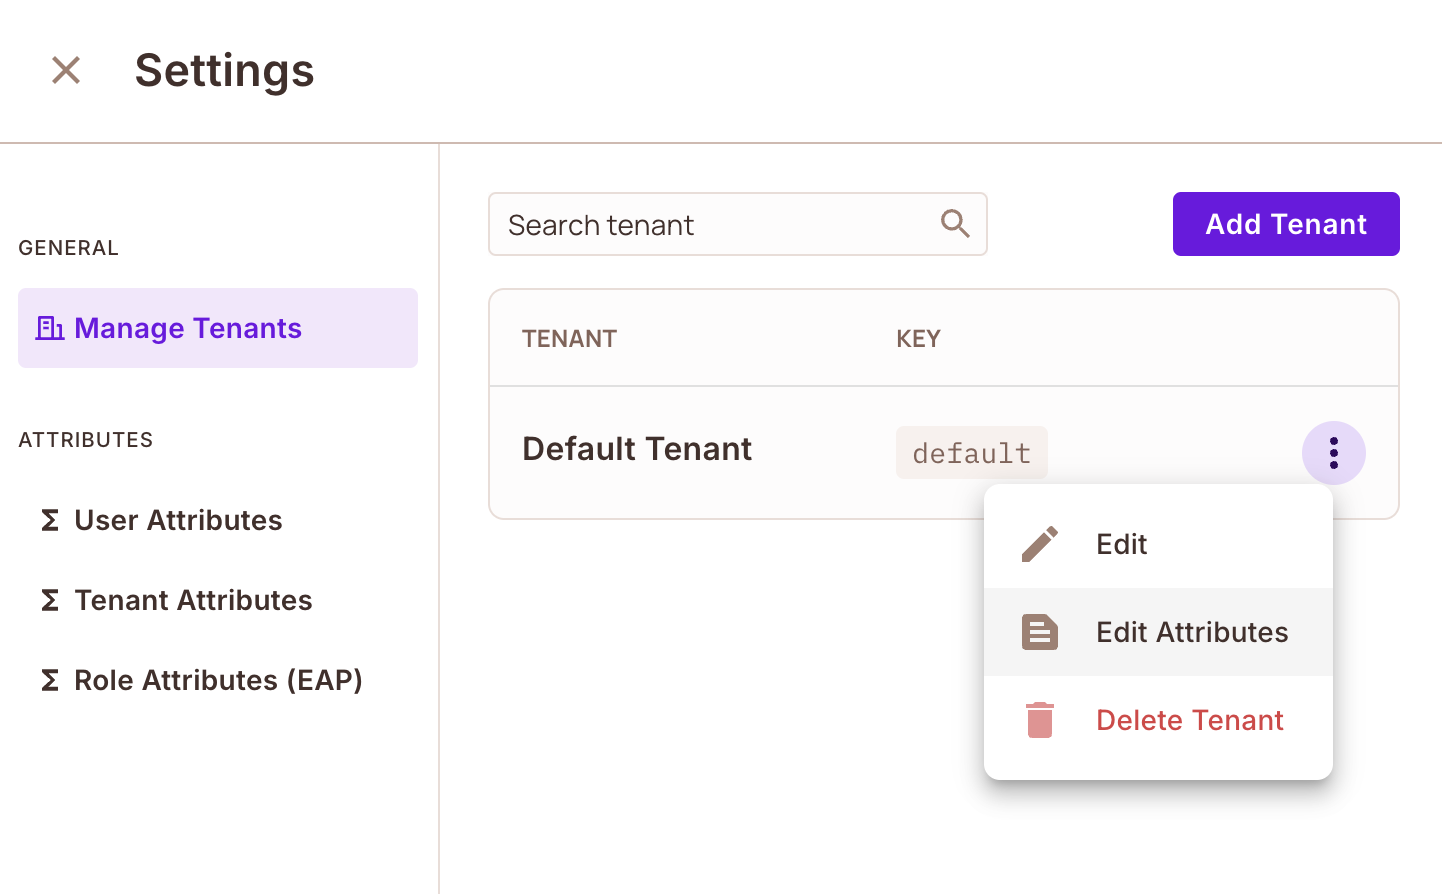
As with most data handling in Permit, you can also add tenant attributes to each individual tenant via the no-code UI.
All you have to do in navigate to Directory then go to Settings and select Manage Tenants. Find the tenant you want to
update, click the three dots next to it, and choose Edit Attributes.
Add or modify attributes as needed, specifying the name and value as a JSON object.
Role Assignments (RBAC & ReBAC)
When syncing data into Permit.io, configuring role assignments is a critical step. Role assignments define what actions a user can perform, either at a global level (RBAC) or in relation to specific resources (ReBAC). Permit supports both models to give you maximum flexibility.
In a project management tool, users may have roles like Admin, Manager, or Contributor. When a new user is added to a specific project and assigned the Manager role for that project, your system can sync this assignment with Permit's API. This ensures that the user has immediate access to manager-level actions—like assigning tasks or viewing reports—specific to that project, without impacting their role in other projects.
When creating a new user, you can assign top-level or instance-specific roles directly using the SDK's users.sync function.
You can define the top-level roles by specifying the role and the tenant that role belong in. It will always be an array
of roles, as a user can have more than one role in multiple tenants. Here is an example:
We can also define a resource instance role which is associated with each specific resource. This means that if we have a resource
called Dashboard and two instances of that resource called Dashboard A and Dashboard B - then the unique user can have a
resource instance role of Owner on Dashboard A and resource instance role of Viewer on Dashboard B.
Resource Instances and Resource Instance Attributes (ABAC & ReBAC)
Resource attributes define specific characteristics of a resource, enabling fine-grained and context-aware access control. These attributes are added when creating a new resource in Permit by specifying them during the setup process. With every attribute, you have the ability to create individual instances of it. For each individual instance, you can provide extra data as per the defined attributes.
Imagine a learning management system where resources like "Courses" have attributes such as difficultyLevel (e.g., Beginner, Intermediate, Advanced) and category (e.g., Math, Science). When a new course is created, these attributes can be defined and synced with Permit's API. For each course instance, specific data—such as the instructor or a unique course ID—can also be added. This ensures that access control policies are dynamically applied based on the course's characteristics, like granting access only to Advanced-level Math courses for certain users.
When creating a new resource instance, you can assign custom attributes directly using the SDK's resource_instances.create function.
This allows you to define instance-specific properties dynamically. Here is an example:
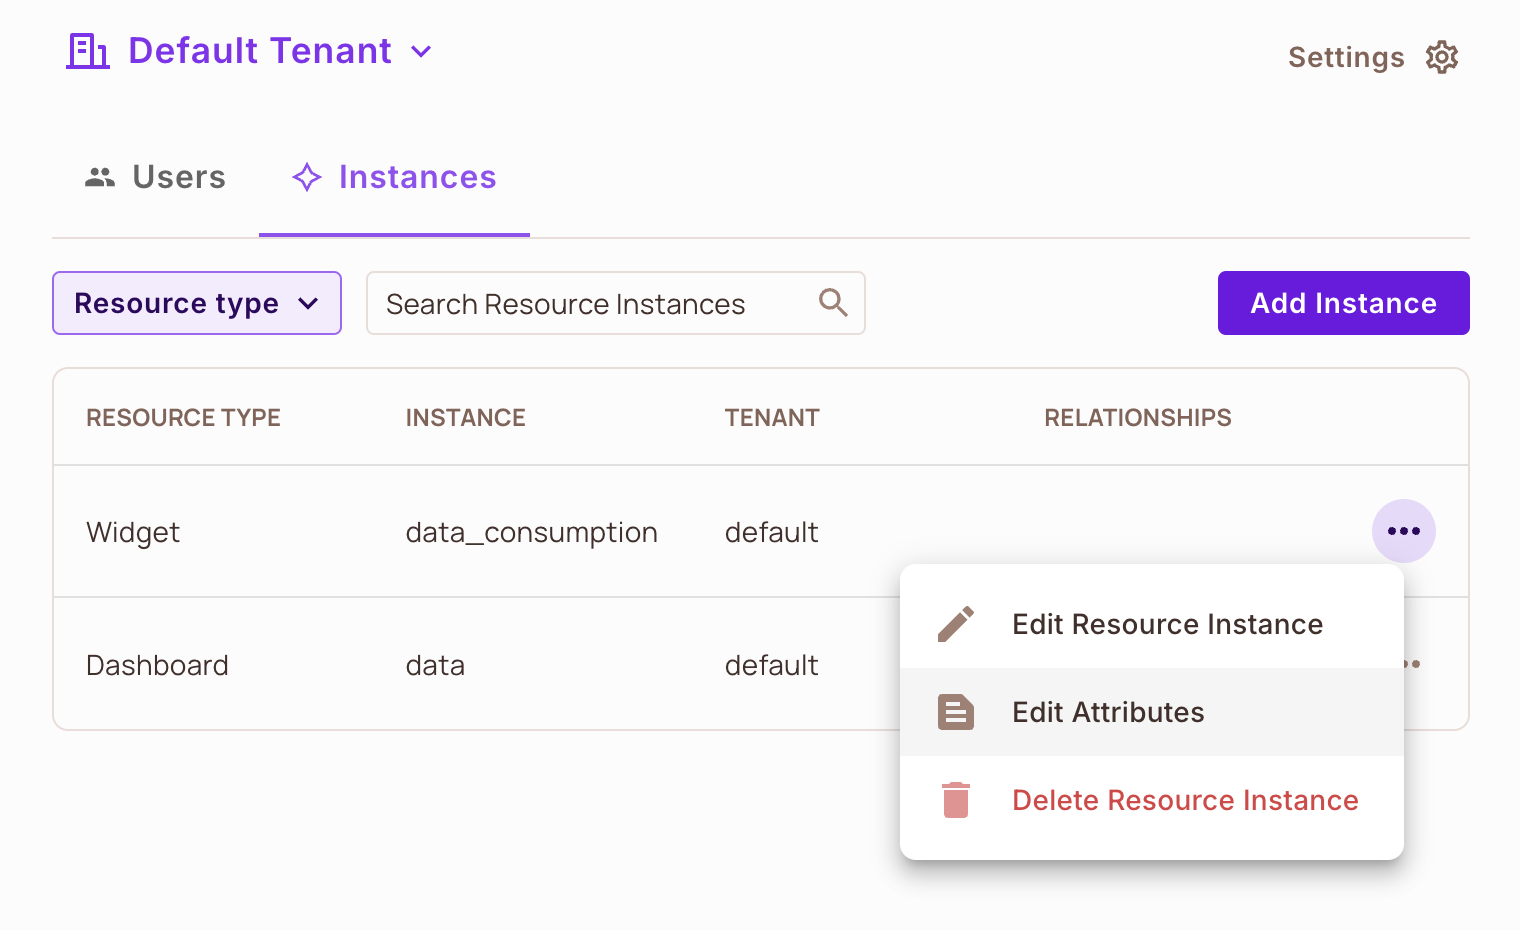
To add resource instance attributes directly from the UI:
You need to navigate to Directory and then Instances. Select the specific resource instance you want to add attributes for,
click the three dots and select Edit Attributes.
Relationship Tuples (ReBAC)
In Permit, relationship tuples primarily define how resources relate to each other, forming the backbone of ReBAC. Users and tenants are assigned via roles, while the relationships between resources make access control dynamic and contextual.
For example, in a collaboration platform, you might have resources like "Projects" and "Documents." A relationship tuple can define that a document belongs_to a specific project. When a user is assigned a role like Project Manager for a particular project, they automatically gain access to all related documents within that project. By syncing these relationships with Permit's API, you ensure access control dynamically reflects how resources are interconnected, without needing to manually define permissions for every individual resource.
The format for each relation tuple is as follows:
<Subject> : <Relation> : <Object>
To define a new relationship tuple, use the SDK's relationship_tuples.create function. As part of this request, you will need
to send the subject, relation, object and the tenant.
Lets define what these keys mean:
subject- The resource instance assigned the new relationrelation: The relation to assign between the subject and objectobject: The resource instance on which the new relation is assignedtenant- The tenant the subject and object belong to. If the resource instances don't exist yet, the tenant is required to create them, otherwise it is ignored.
Here is an example of such a request:
To configure relationship tuples in the Permit no-code UI:
Navigate to Directory and then Instances. Select the resource instance you would like to define a tuple for, click the
three dots and Edit Resource Instance. Define the Subject, Relation, and Object - and proceed to save.
Did you know that the concept of data synchronization dates back to the early days of telecommunication?
In the 19th century, synchronization was first used to align clocks for railway systems to prevent train collisions.
What's next? 🎉
- Implement bulk permission checks to optimize authorization workflows
- Use policy-based filtering to retrieve only relevant data
- Query and manage user permissions dynamically
You can now sync any data into Permit!