Git and Permit
Learn how to manage the policies configured in Permit in your GitHub repositories using GitOps
To configure your GitHub repository to work properly with Permit, this guide will walk you through two main steps:
- Adding an SSH deploy key with write access to your repository.
- Configuring Permit to use your repository with the SSH url and the deploy key.
If you prefer an automated bash script that prompts for all the input, view the example gist.
While this guide is focused on GitHub, the same steps can be applied to other Git providers that supports SSH deploy keys with minor modifications.
Add SSH Deploy Key
Adding an SSH deploy key is simple. Below are the steps to add a key with write access to your GitHub repository.
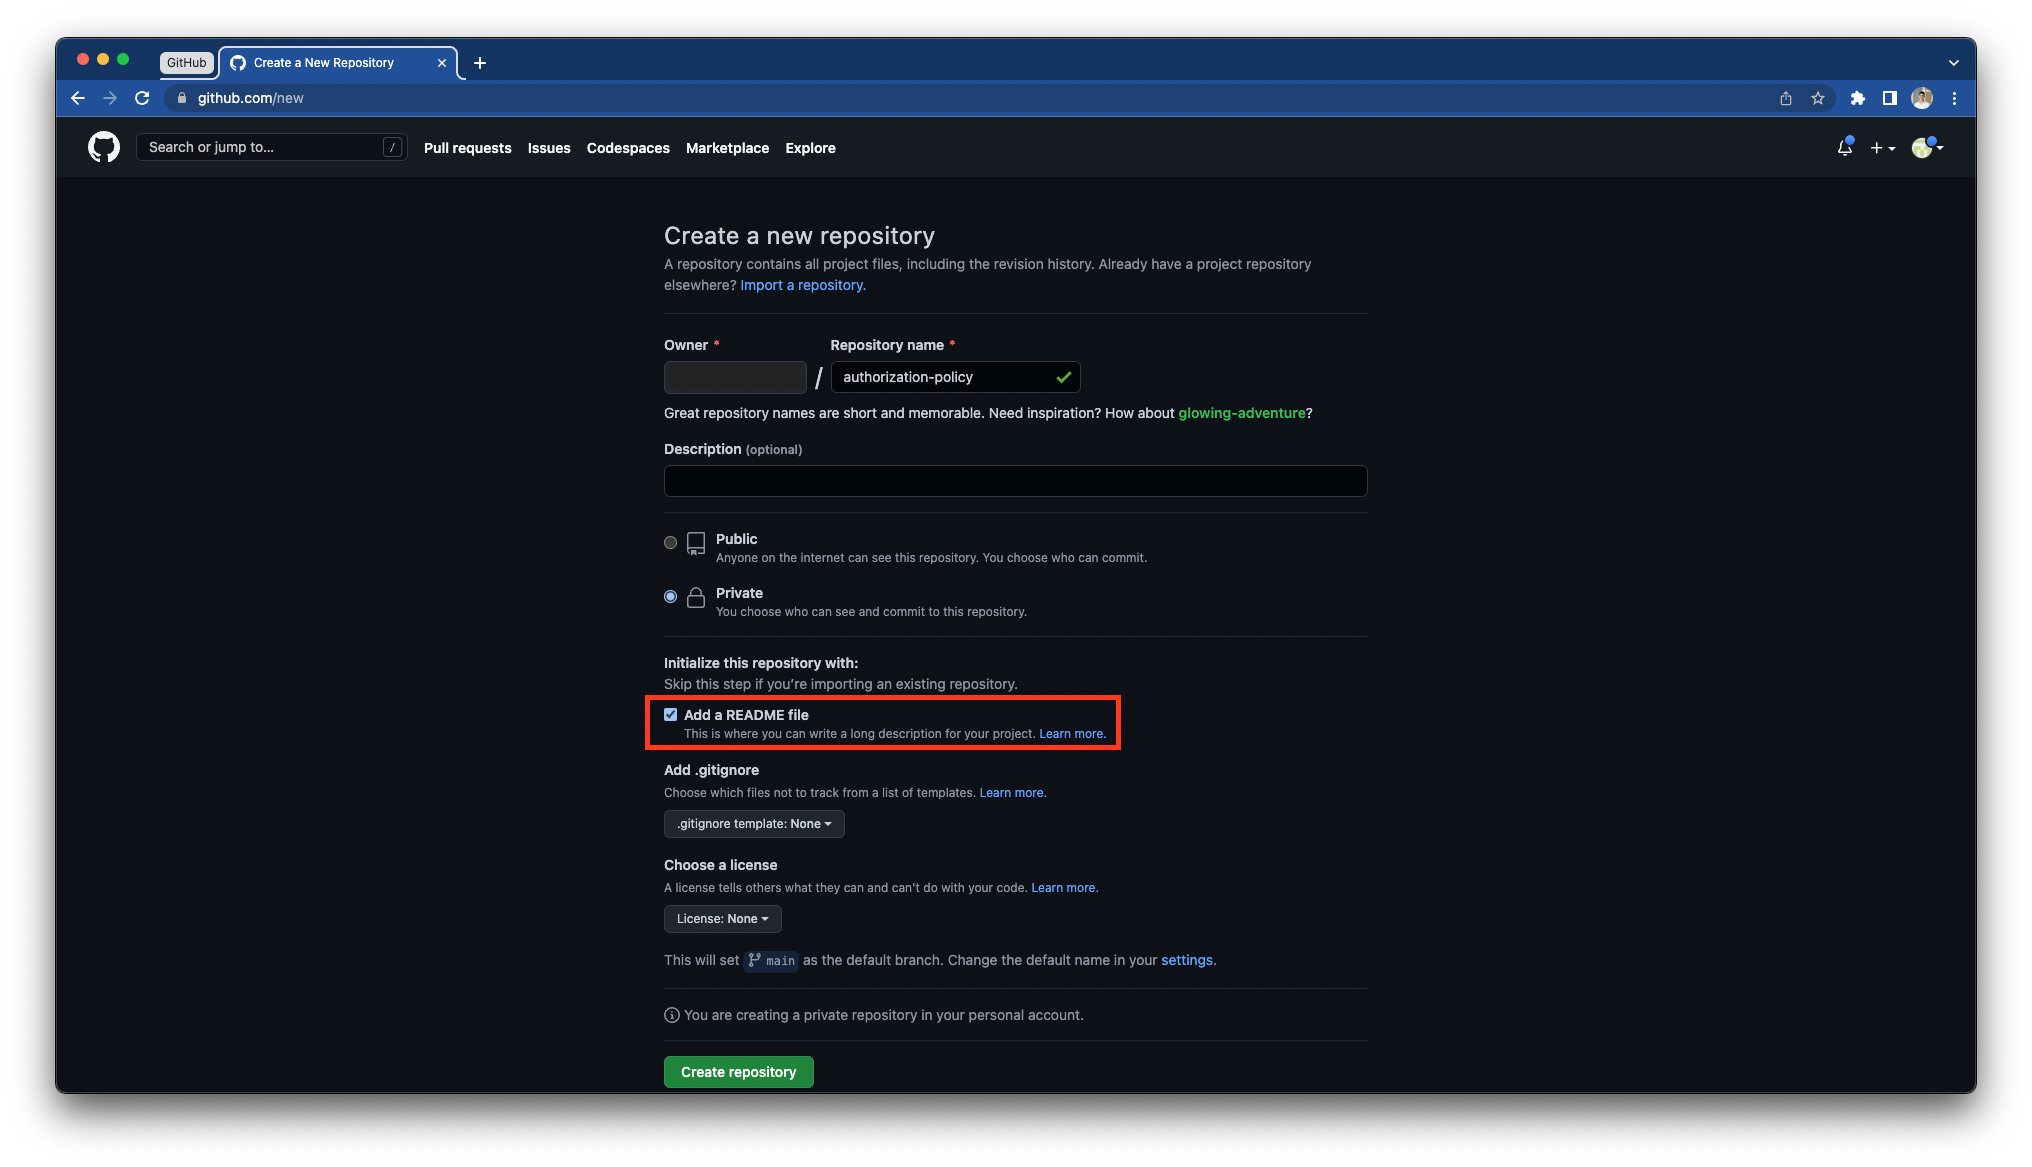
Create a repository
You need a repository with a default branch that exists on the remote (with an initial commit). If you already have a repository you can skip to the next step.
Create your repository in GitHub:
When utilizing Permit GitOps and the Copy Environment API with a brand-new Git repository that has no commits on the main branch, ensure that at least one file is added and committed. This step is essential for our system to successfully clone the branch.
By default the following mapping takes effect - each repository is mapped to a specific Permit project, and for each project, branches are created and mapped for each Permit environment.
Generating an SSH key
In order for you to be able to generate and push policies to your repository, you need to create an SSH key, and add it as a "Deploy Key" with write access to your repo.
You can use the below command to generate a secured SSH key:
ssh-keygen -t ecdsa -b 521 -C "help@permit.io"
You will be prompted to enter a location for the private and public keys. Don't worry, your private key will be securely stored on our end, and no passphrase will be required.
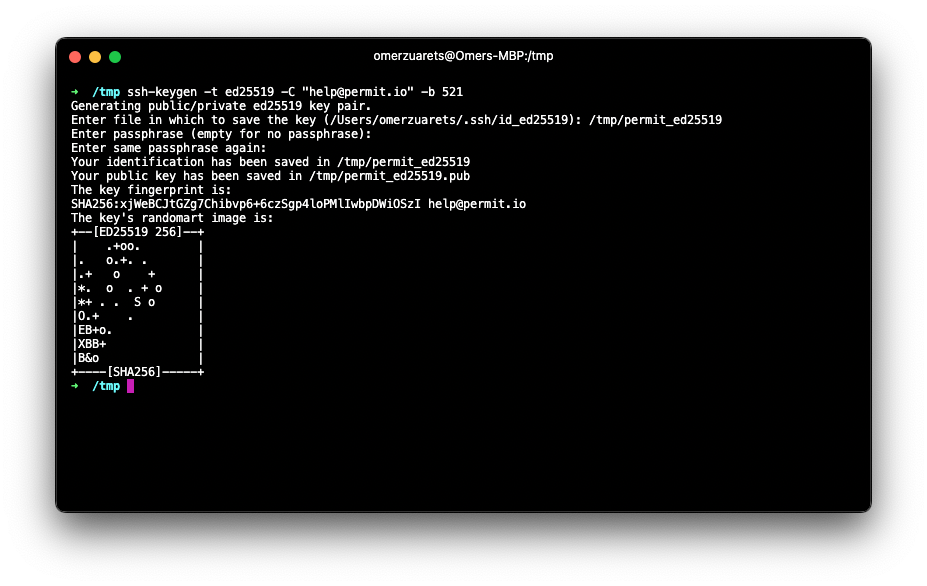
The private key is at the location you chose and the public key is at the same location with a ".pub" suffix.
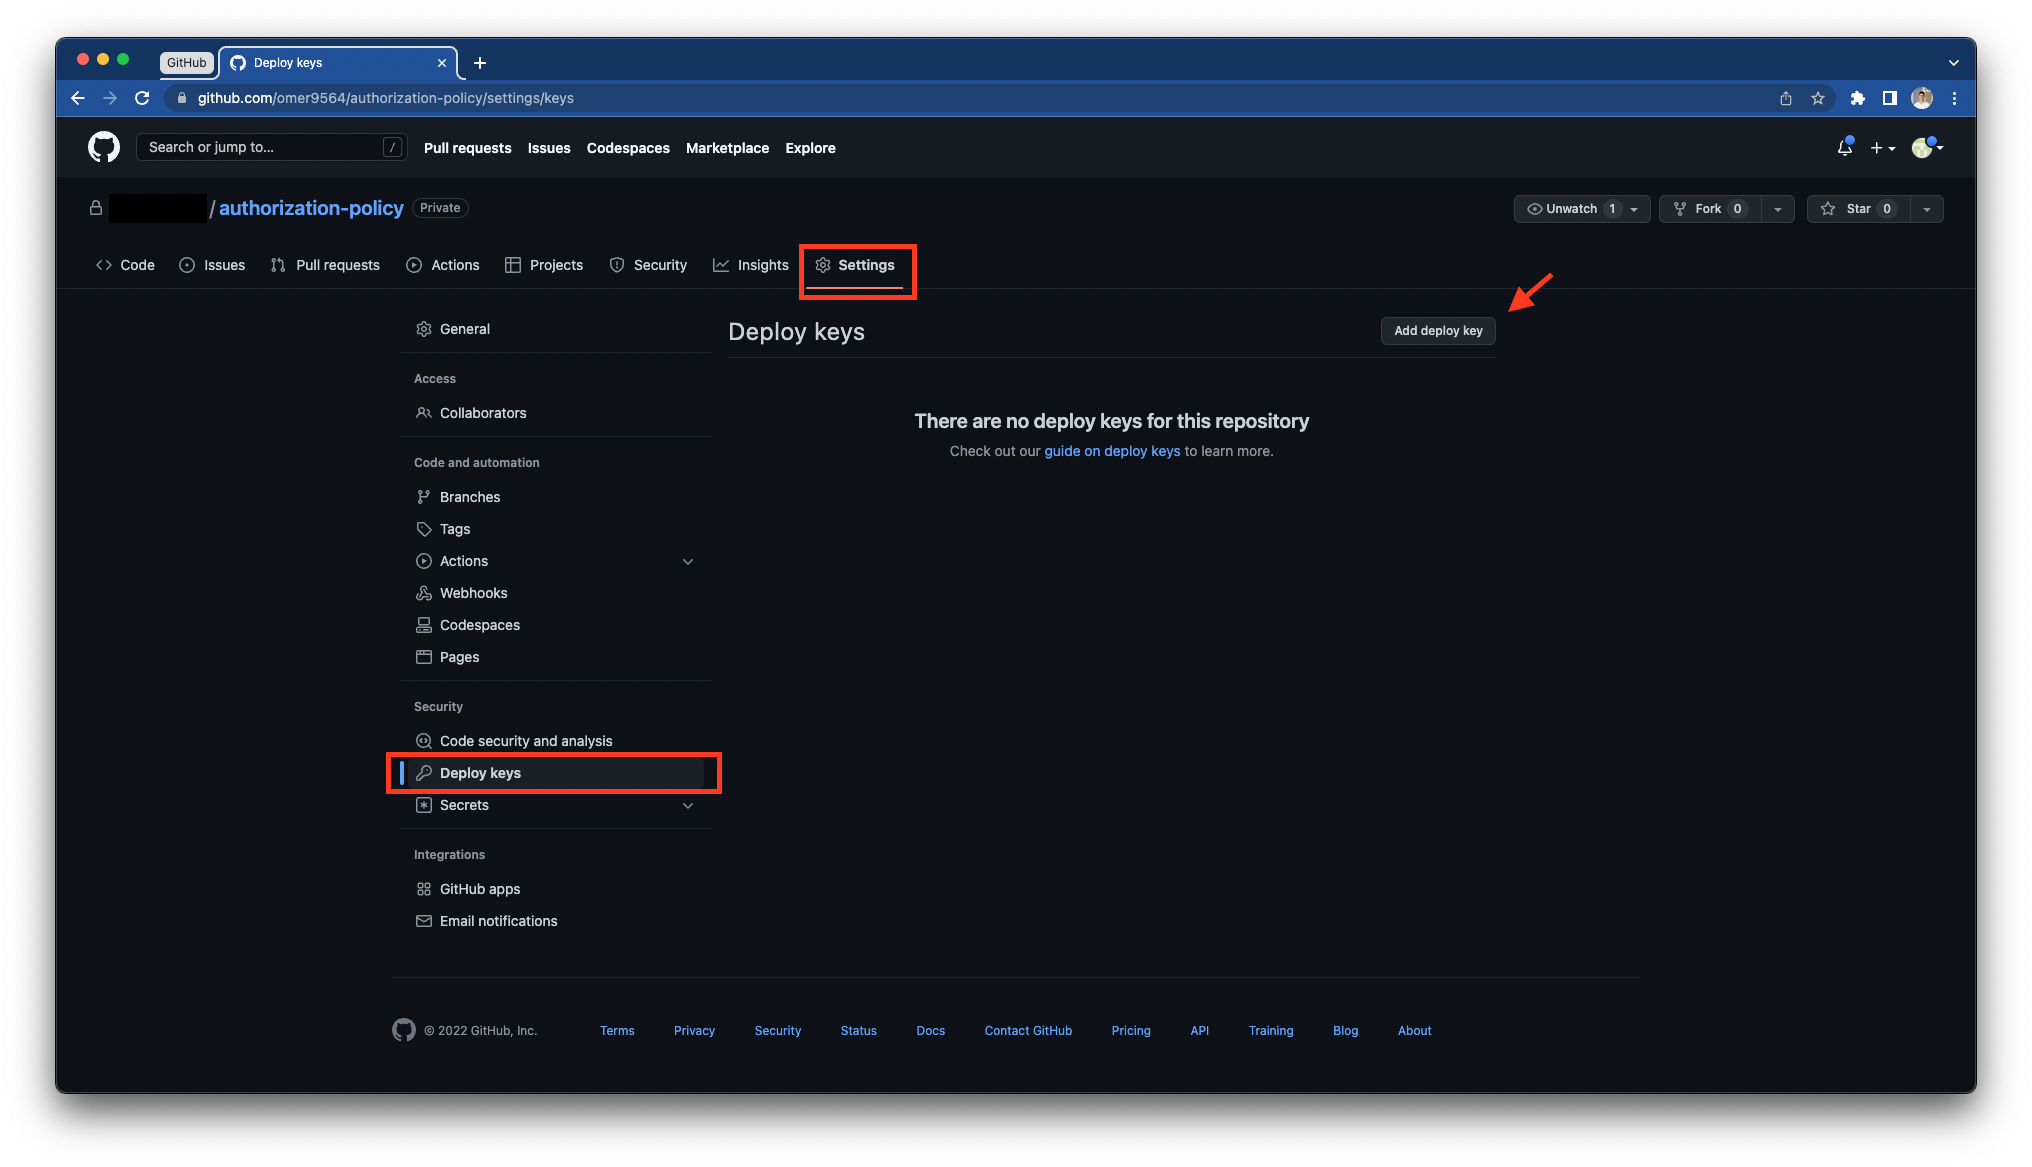
Adding the Deploy Key
Make sure the deploy key is set up without Two-Factor Authentication (2FA) to allow the Permit server unrestricted read and write access to your repository.
-
To add a "Deploy Key", go to your repository → Settings → Deploy Keys and press on the "Add deploy key" button.
-
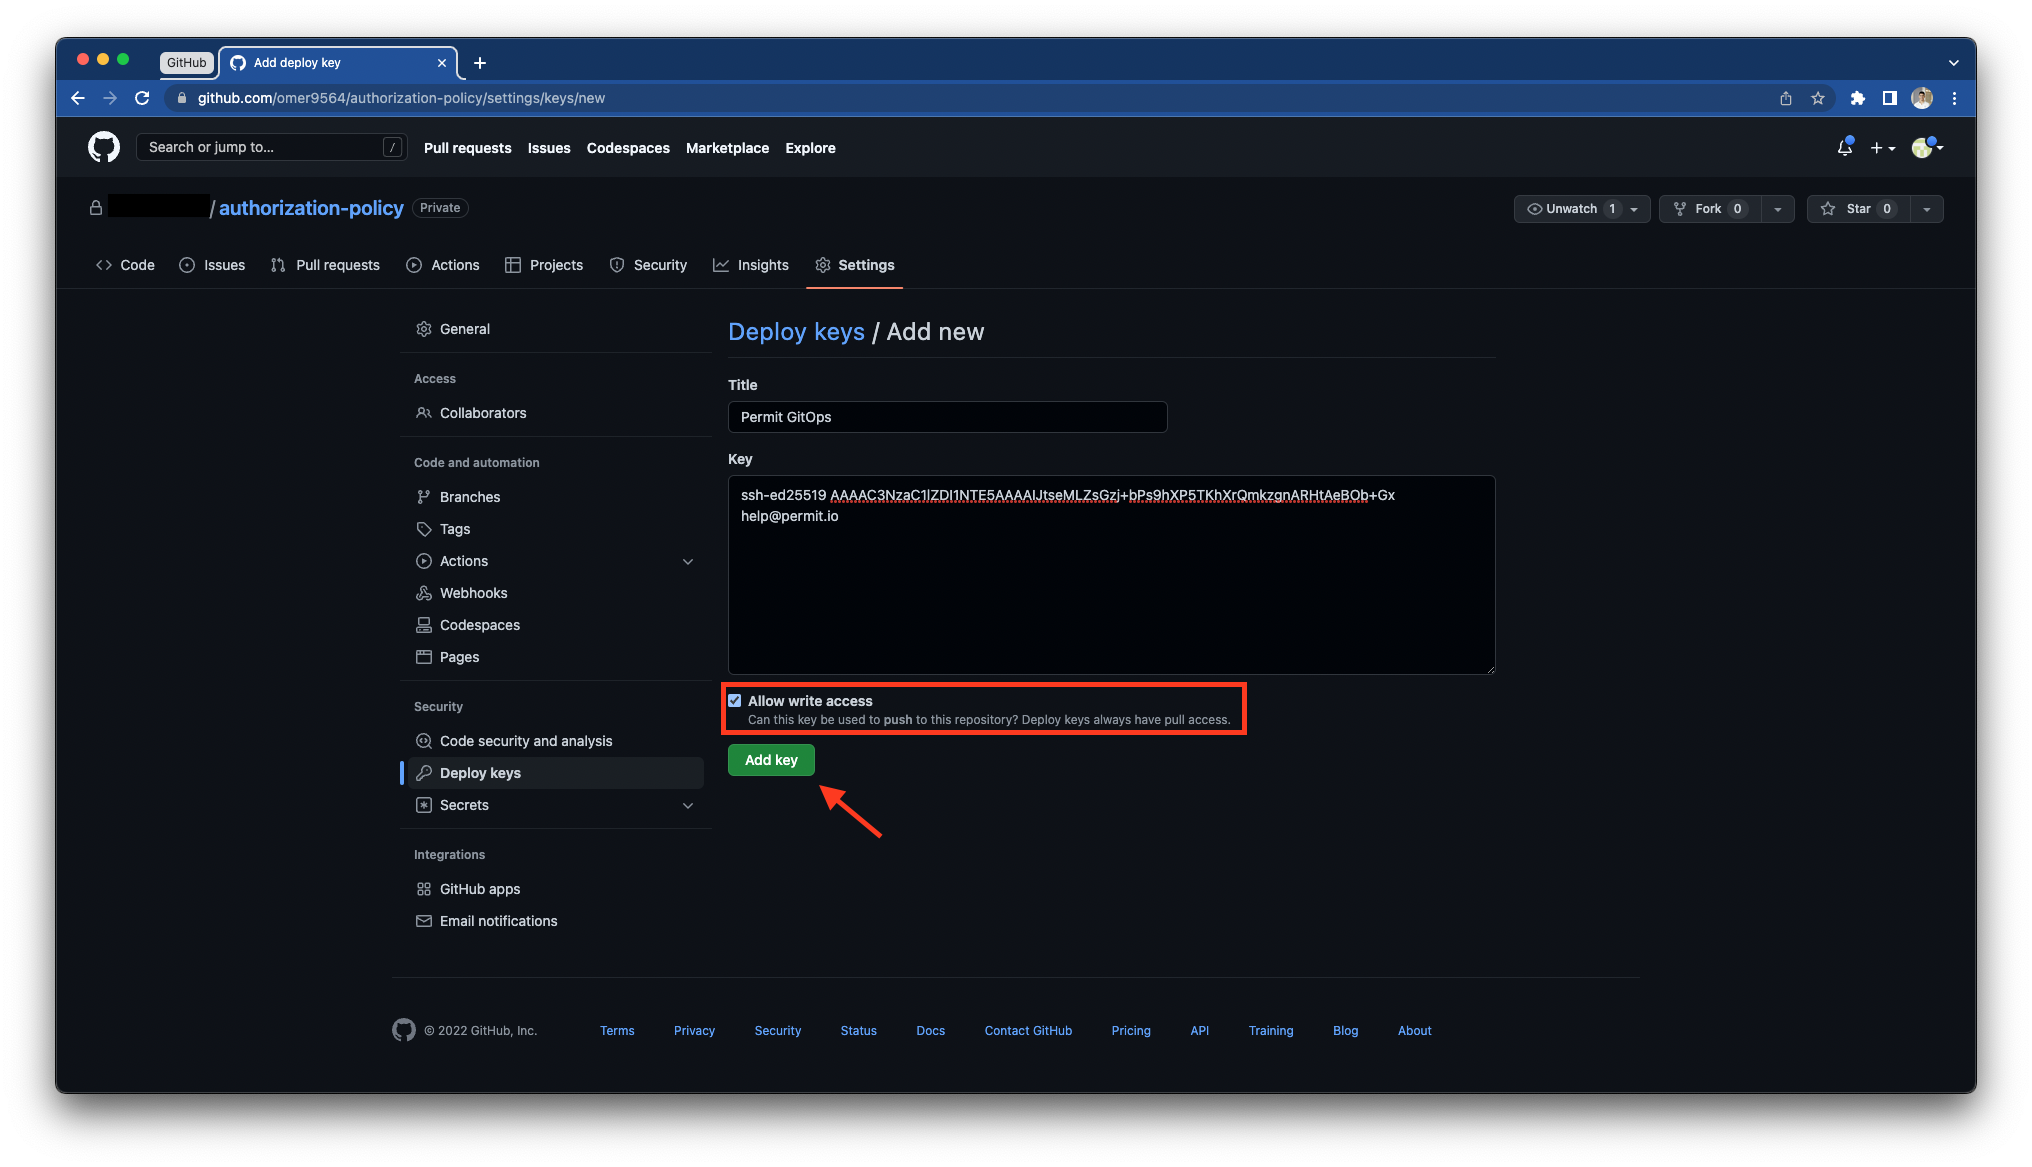
Copy the public SSH key you have generated previously to your clipboard and paste it in the GitHub prompt.
Make sure to toggle "Allow write access"
Permit GitOps Configuration
The following steps will guide you on how to configure Permit to use your GitHub repository with the SSH url and the deploy key.
Creating a JSON Configuration File
To perform the initial GitOps configuration API call to Permit, you need to create a JSON file with the following structure:
{
  "url": "<your-ssh-url>",
  "main_branch_name": "<your-default-branch>",
  "credentials": {
    "auth_type": "ssh",
    "username": "git",
    "private_key": "<your-private-key>"
  },
  "key": "<your-custom-id-string-without-spaces>"
}
With the JSON created, we can start filling it in with the required information.
Copy the SSH Details from GitHub
-
Copy the SSH url from GitHub, and replace the
<your-ssh-url>placeholder in the JSON file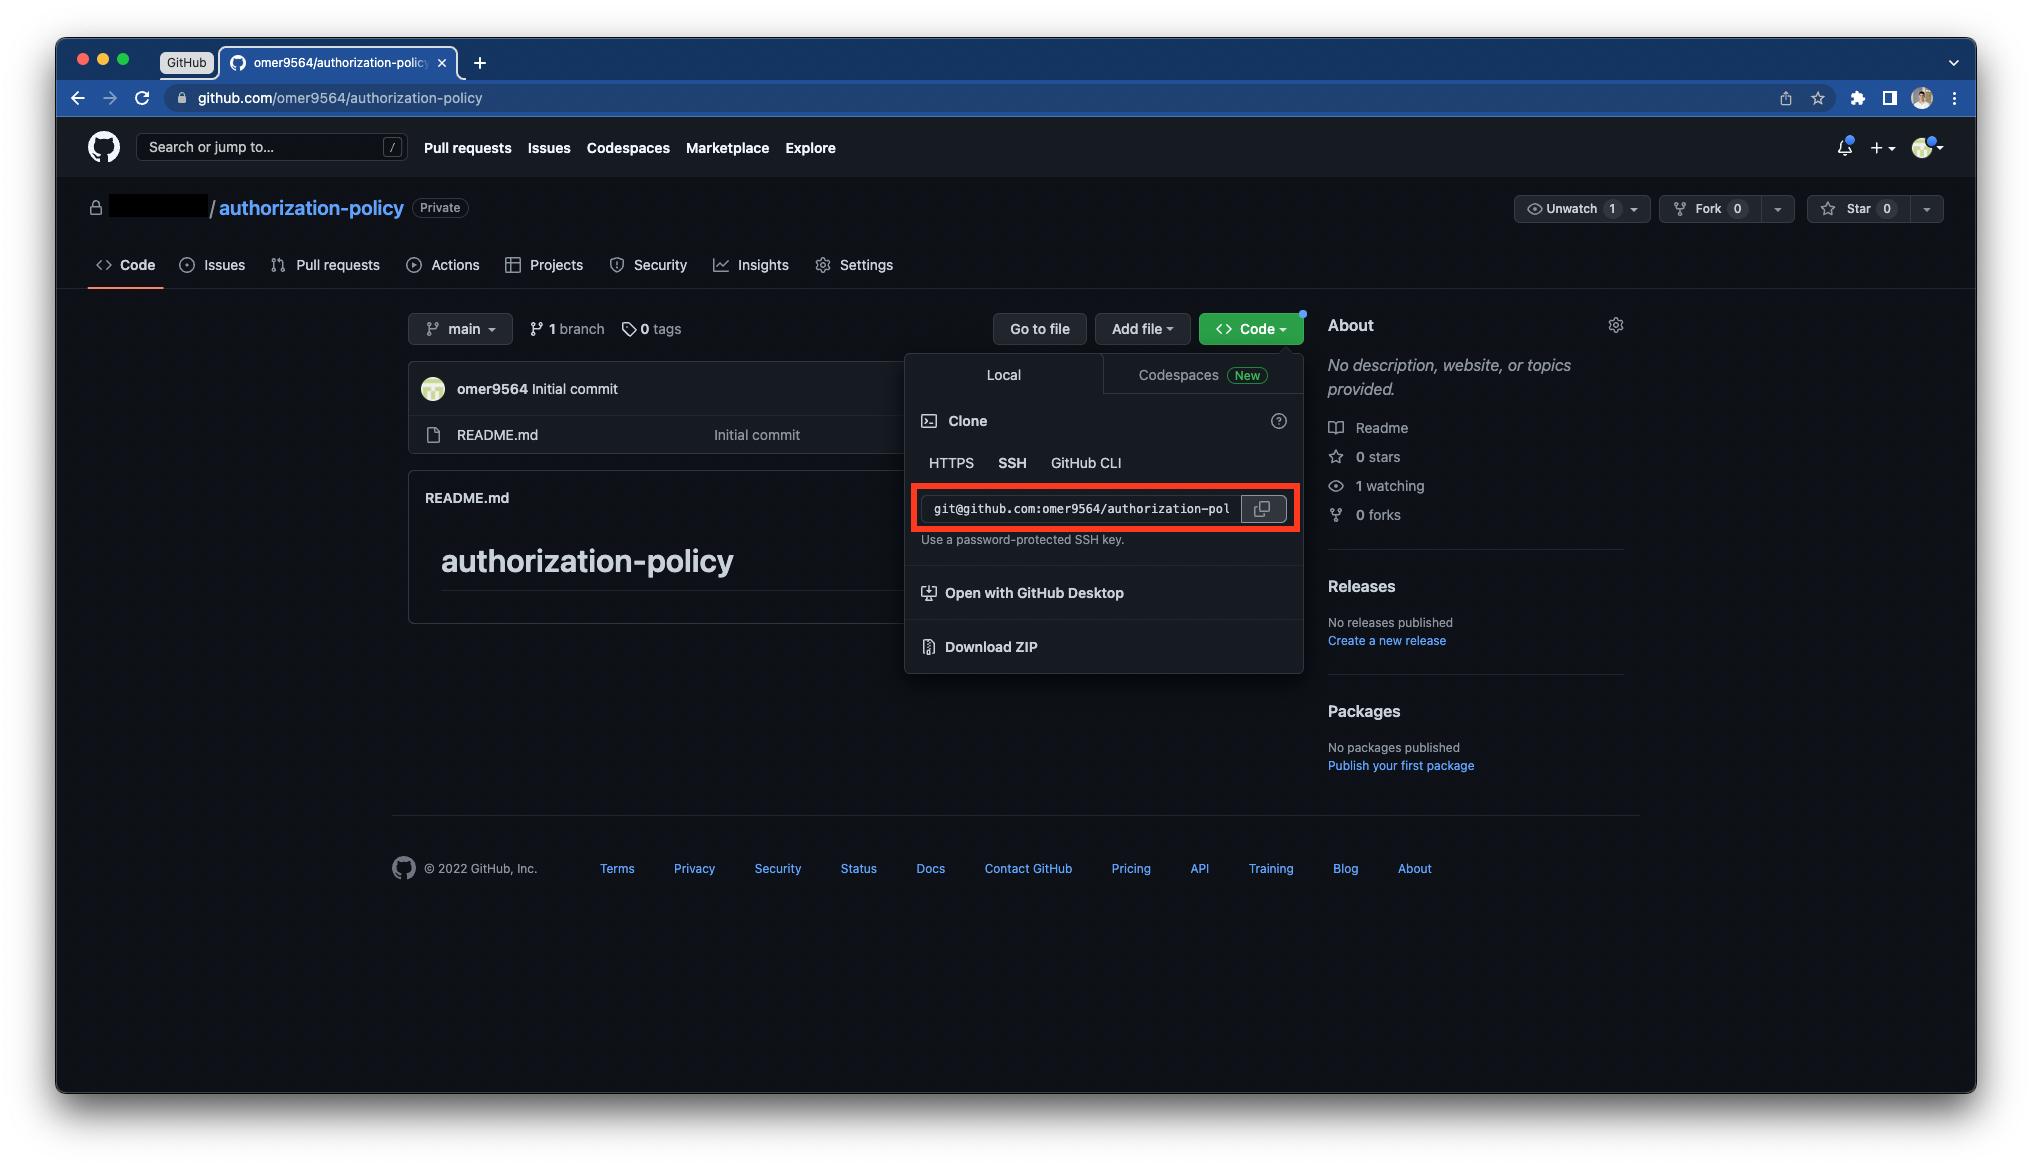
-
Copy the SSH private key you've generated previously and replace new lines with "\n". You can do the new line replacement using the following command:
awk -v ORS='\\n' '1' <private-key-file> -
Replace the
<your-default-branch>placeholder with the default branch name of your repository (usuallymain).
Get your Project Key / ID from Permit
-
Login to Permit.io.
-
Navigate to your project using the project selector found on the sidebar.
-
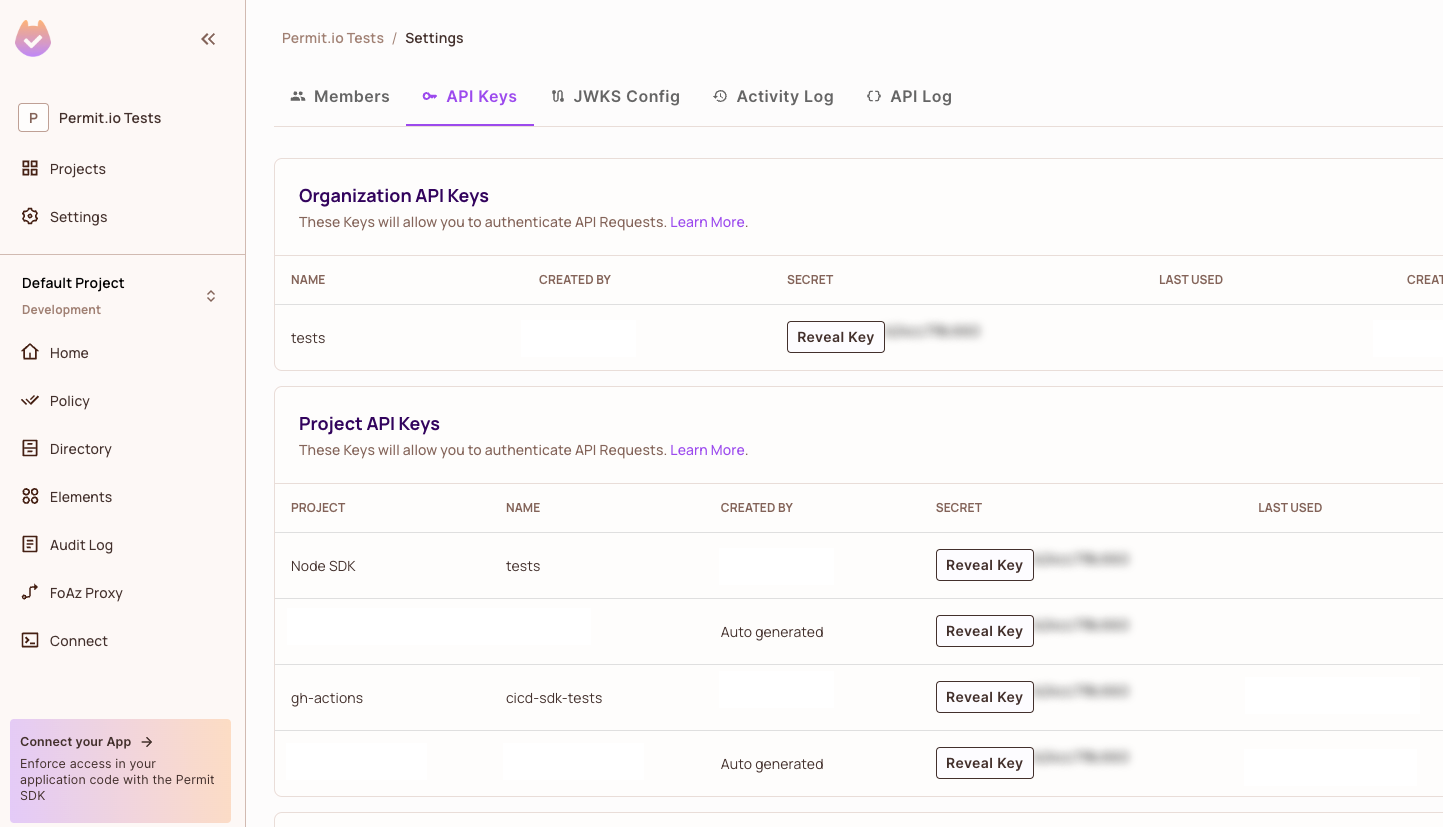
Navigate to the API Keys page and create a project or organization API key.
-
Get your project key / id using the below command.
curl -X GET "https://api.permit.io/v2/projects" -H "Content-Type: application/json" -H "Authorization: Bearer {API_KEY from step 3}" -
Replace the JSON placeholder with your project id or key
Configure Permit to Use Your Repository
-
Execute a POST request to Permit with your JSON:
curl -X POST "https://api.permit.io/v2/projects/<your-project-id-or-key>/repos" -H "Content-Type: application/json" -H "Authorization: Bearer {API_KEY from step 4}" --data-binary @"path/to/your/json" -
Now, if you return to your GitHub repository, you will observe new branches, each corresponding to a different environment in your project. These branches are named following the format
permit/generated/<env_id>, where<env_id>is the unique identifier for each environment.You can specify a custom branch name by setting the custom_branch_name of your environment. See an example.
-
After validating your new policy branches, you need to activate the new repository in Permit. To do this, replace the placeholders below with your project ID or key and execute a PUT request to Permit:
curl -X PUT "https://api.permit.io/v2/projects/<your-project-id-or-key>/repos/<your-repo-id-or-key>/activate" -H "Authorization: Bearer <your-permit-api-key>"
Test Your Configuration
Now that we activated our Git repository to work with Permit, let's test out a custom policy.
-
Checkout to the correct branch using
permit/generated/<env_id>. -
Insert your policy code exclusively within the
customfolder. This can be done by either editing thecustom/root.regofile with your custom Rego code or by creating a new file and importing it in thecustom/root.regofile. You can see an example of such a custom policy here.Important NotePlease avoid editing policy code outside of this folder, as it could potentially be overridden by our code or break the Rego code.
-
Once modifications are made within an environment branch, push it to the remote GitHub repository (the same environment branch and not the main branch). Permit cloud will then detect these changes and relay them to the PDP that is associated with that environment for an update.
Your git repository is now ready to be synced to your PDPs. Test it by checking permissions against your newly created custom policies 🚀