Approval Management Element
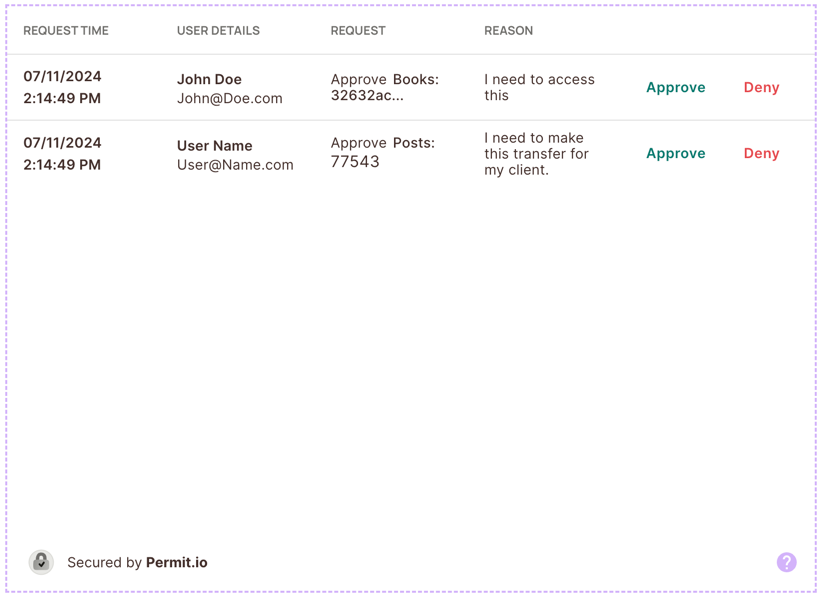
The Approval Management Element is a Frontend component that shows you Operation Approvals. Easily approve or deny Operation Approvals.
Overview
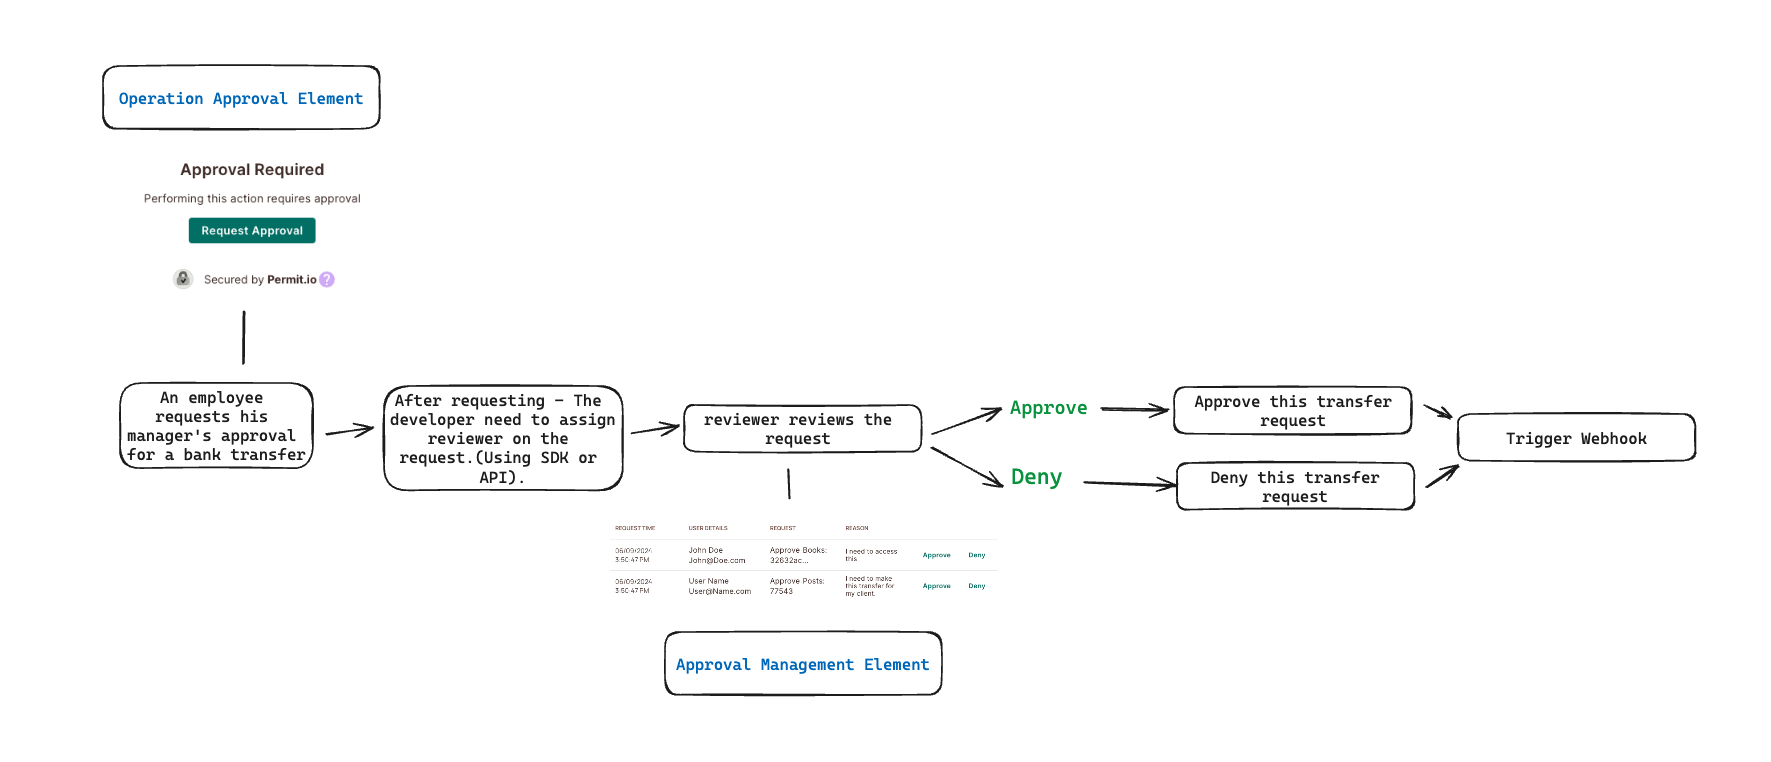
The Approval Management Element allows users with role "Operation Approval Reviewer" to manage pending requests efficiently. This element based on Operation Approval element,reviewer and approved roles both will be created on the operation approval element. For view the operation approvals that have been created you will need to assigned the relevant user to the reviewer role.
After the request will approve, the requesting user will be automatically assigned to the approved role (on the relvent resource instance for his request). The element displays a list of pending requests, and the reviewer can approve or deny them. The element is designed to be embedded in your application, and it is fully customizable to fit your application's look and feel.
Example
Take the example of a bank transfer in the marketing department. An employee in the marketing department wants to transfer money to an advertising supplier. An employee cannot make a transfer, he needs approval from a manager, the manager of the marketing department approves the transfer. A bank transfer is initiated by the employee, and the manager approves it via the Approval Management interface.
We manage a list of users from the Operation Approval element. You can learn about and implement the element on this page.
Creating and Connecting the Element
1. In the Elements Screen, under Approval Management, click on "Create Element".
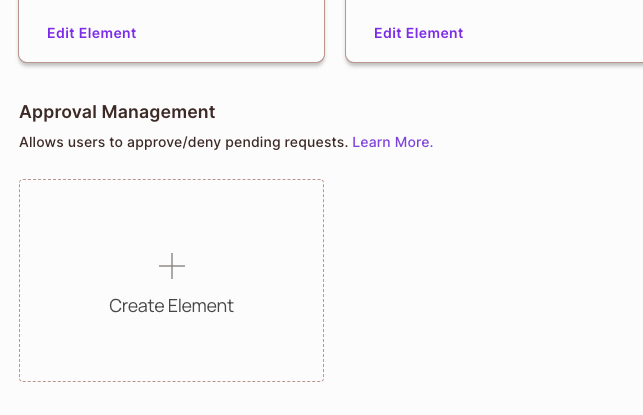
2. Give the element a name, and click on "Create".
Our element has now been created, is ready to be edited and customized to our needs!
Element Customization
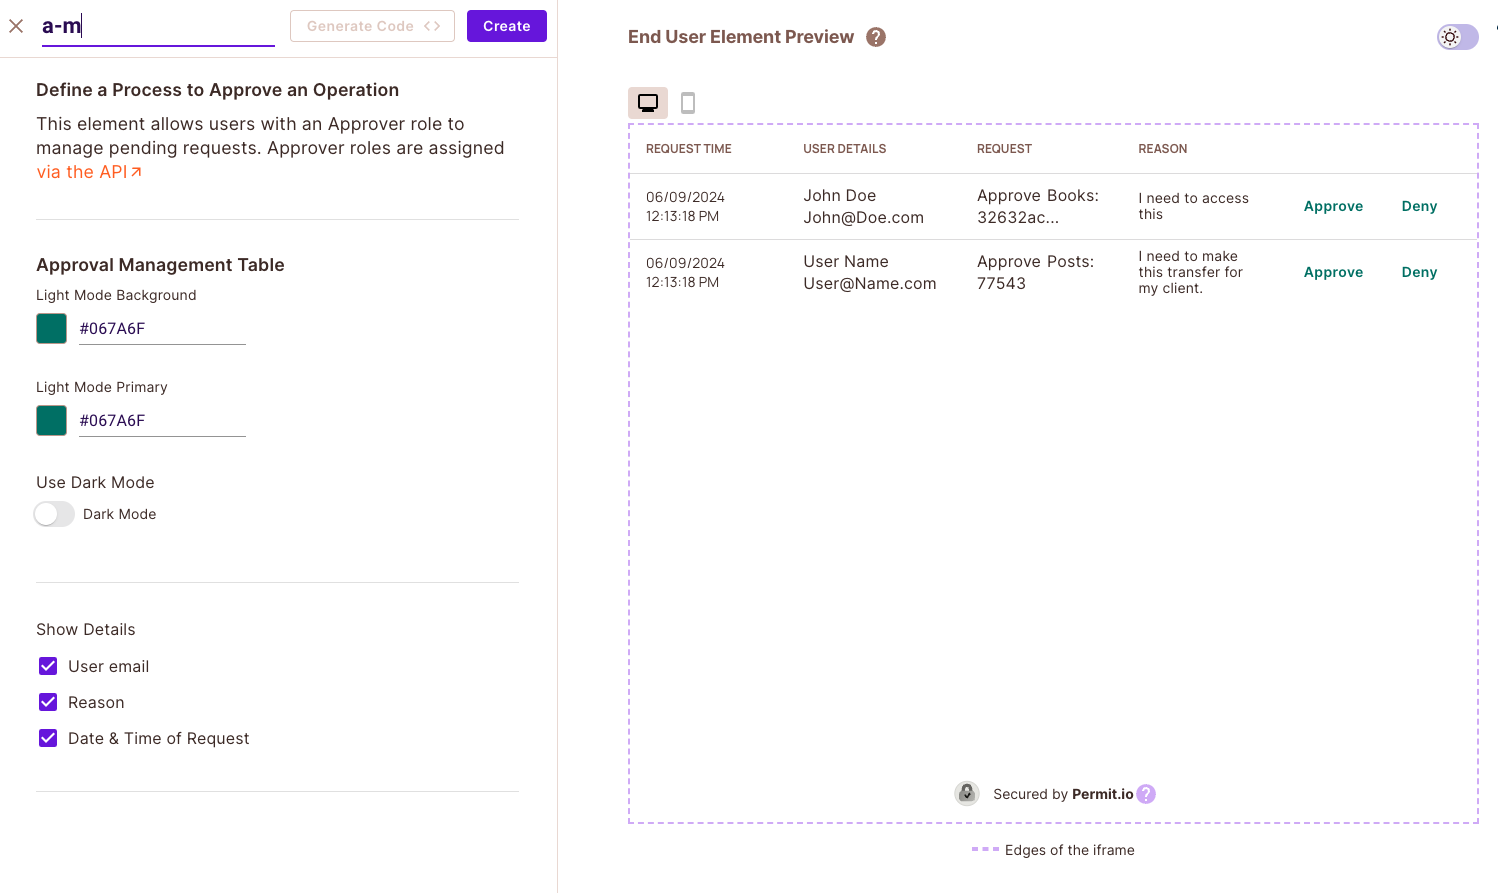
With every new element, you will be able to adjust it to ensure the look and feel of it fits your application.
You can change the background color and the color of the buttons
You can show the user email, reason and date & time
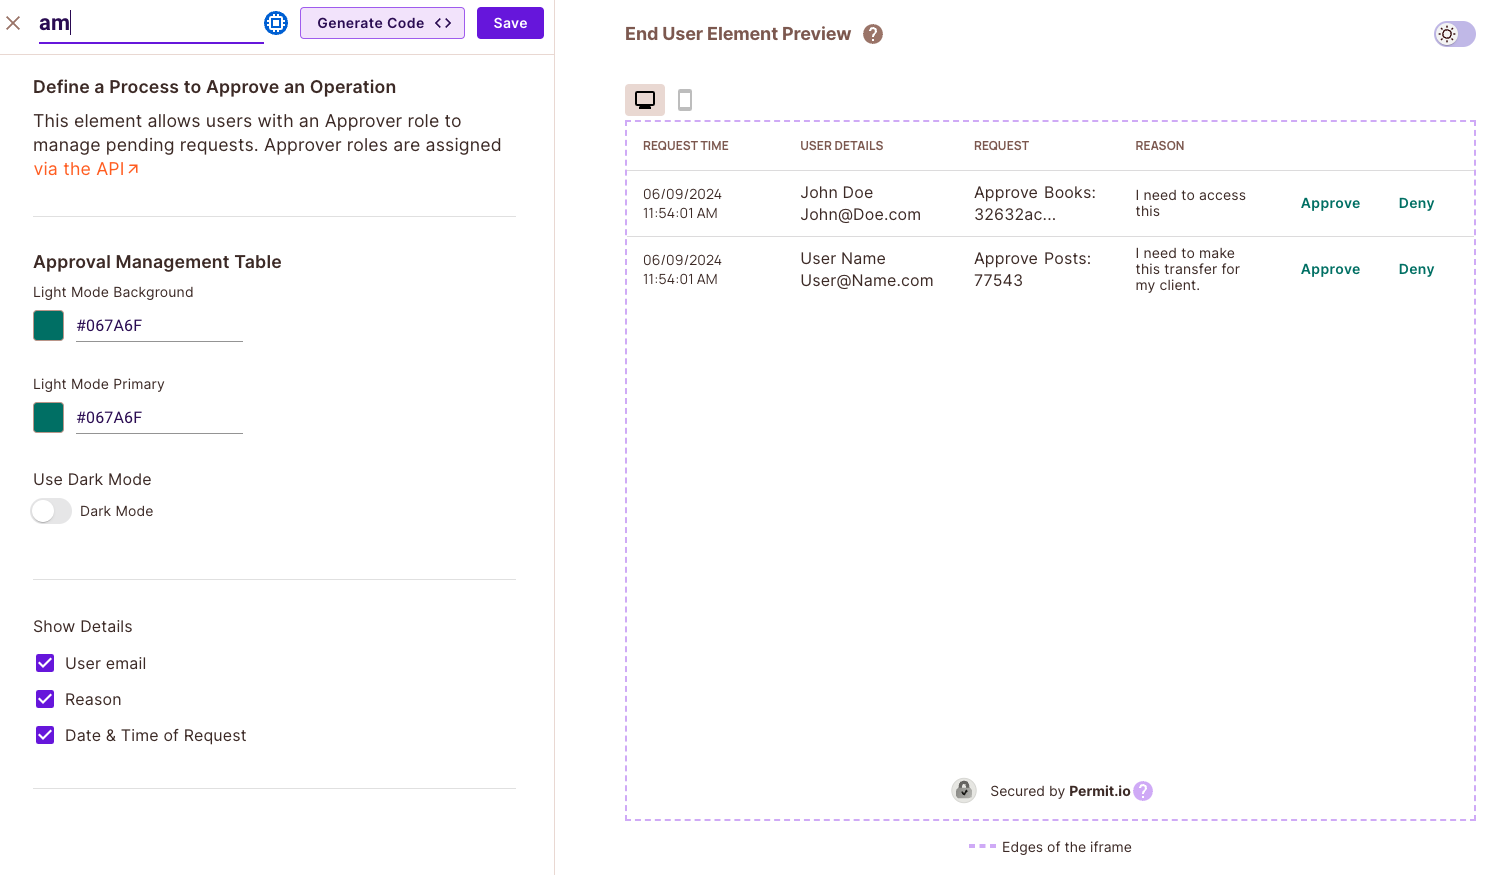
In the approval management element, you can also change the button color according to your theme, and toggle which details will be displayed.
Creating an iFrame
In your newly created element, click the "Generate Code" button on the top of the screen
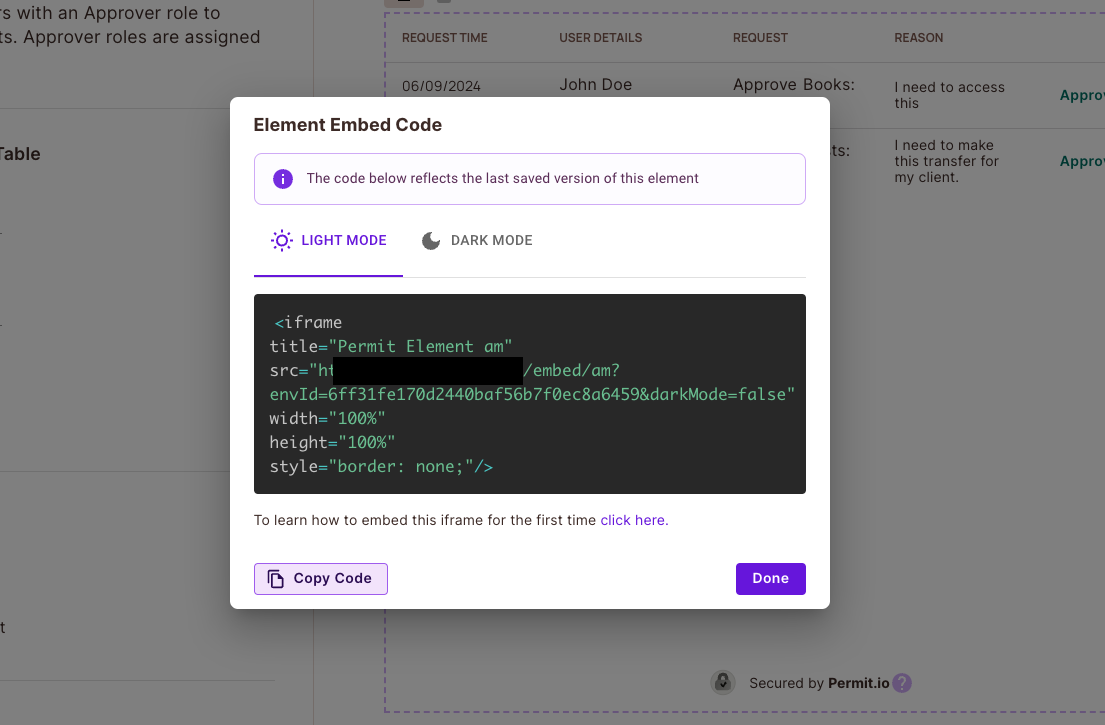
A code snippet for the element will be generated for you.
This will be an <iframe> that you can insert anywhere into your application. It will look like the code snippet below:
Note that it is crutial to select the Tenant relevant for this element for it to fuction properly.
The dynamic values in src are:
<ELEMENT_NAME>- The name of the element you have created.
Replace them with your values.
<iframe
	title="Permit Element Name"
	src="https://embed.permit.io/<ELEMENT_NAME>?envId=<SOME_UNIQUE_ID>&darkMode=false"
	width="100%"
	height="100%"
	style="border: none;"
/>
Once the iframe is ready, we need to embed it. To do that, you'll need to create a login. In the next section, we'll walk you through logging in. Choose a way to log in that's convenient for you:
Embedding the Element
Please check the Embedding Elements documentation for more information on how to embed the element into your application.