Ruby Quickstart
This tutorial is intended for users who have completed the basic setup of at least one policy in Permit. If you haven’t done that yet, check out this guide first.
1. Get your Permit Environment API Key
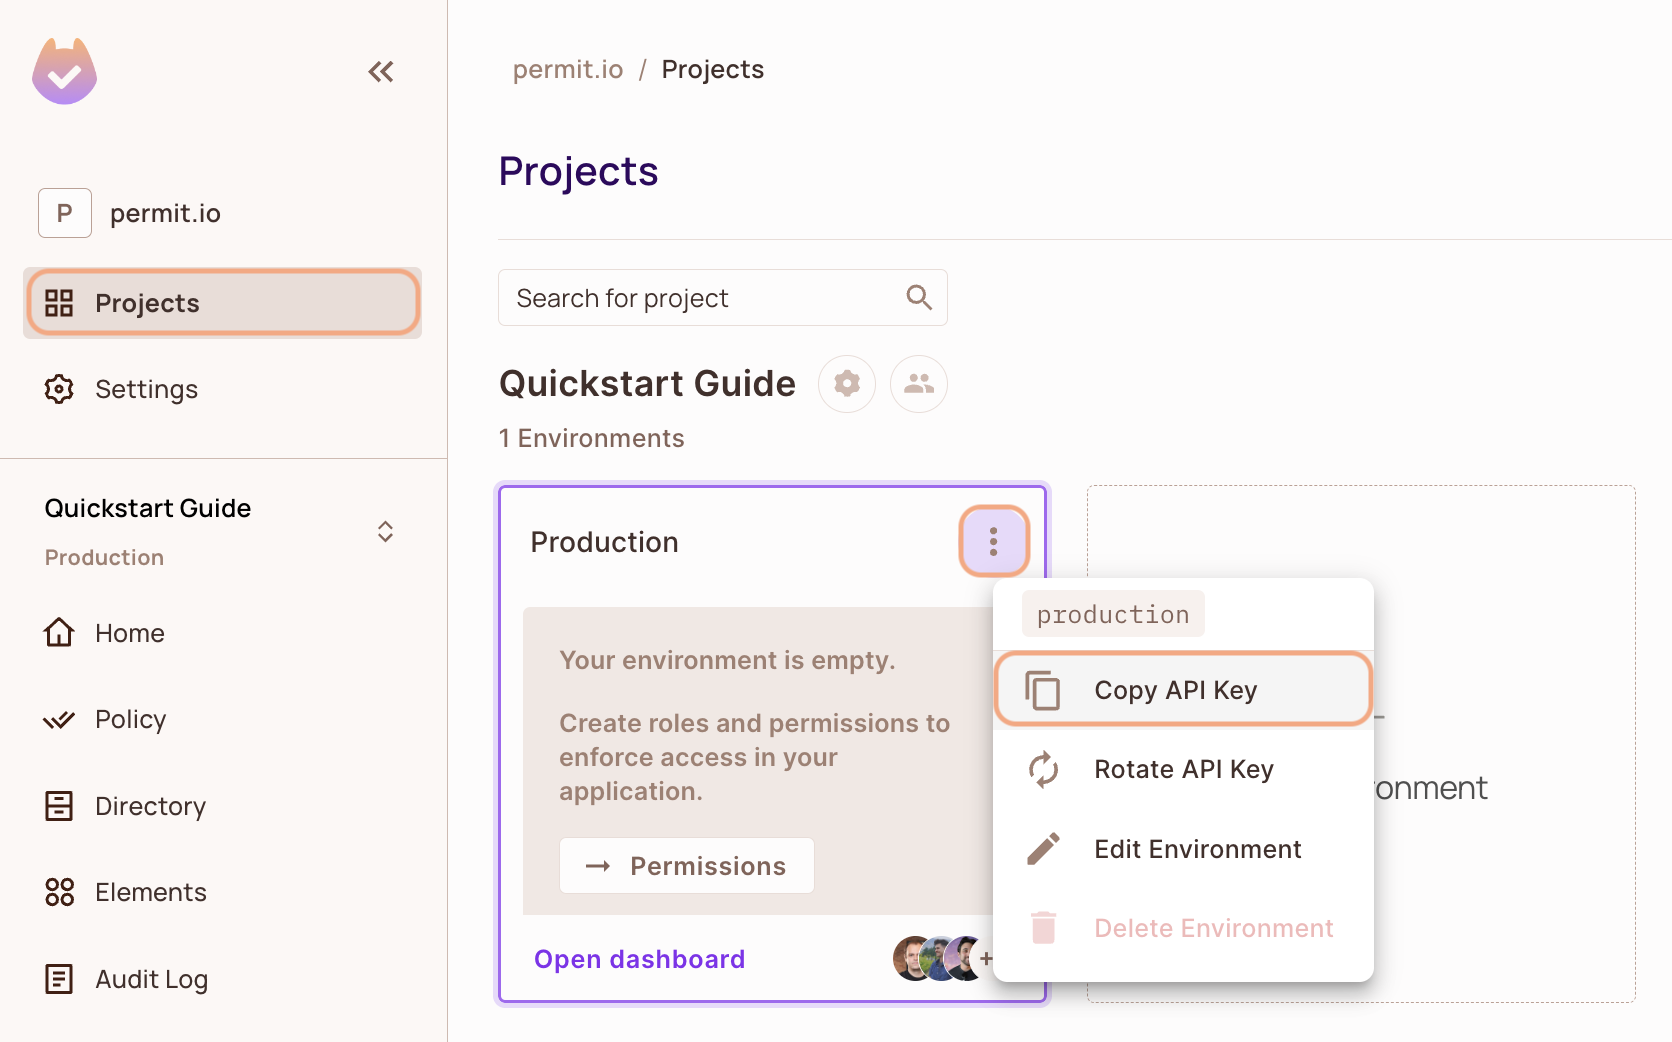
- In the Permit Dashboard, navigate to the Projects screen.
- Find the Project and Environment you wish to connect to.
- Click the
 icon on the top right of the environment card.
 - Click Copy API Key.
You can also copy the Environment API Key of the active environment by clicking on the User Menu > Copy Environment Key
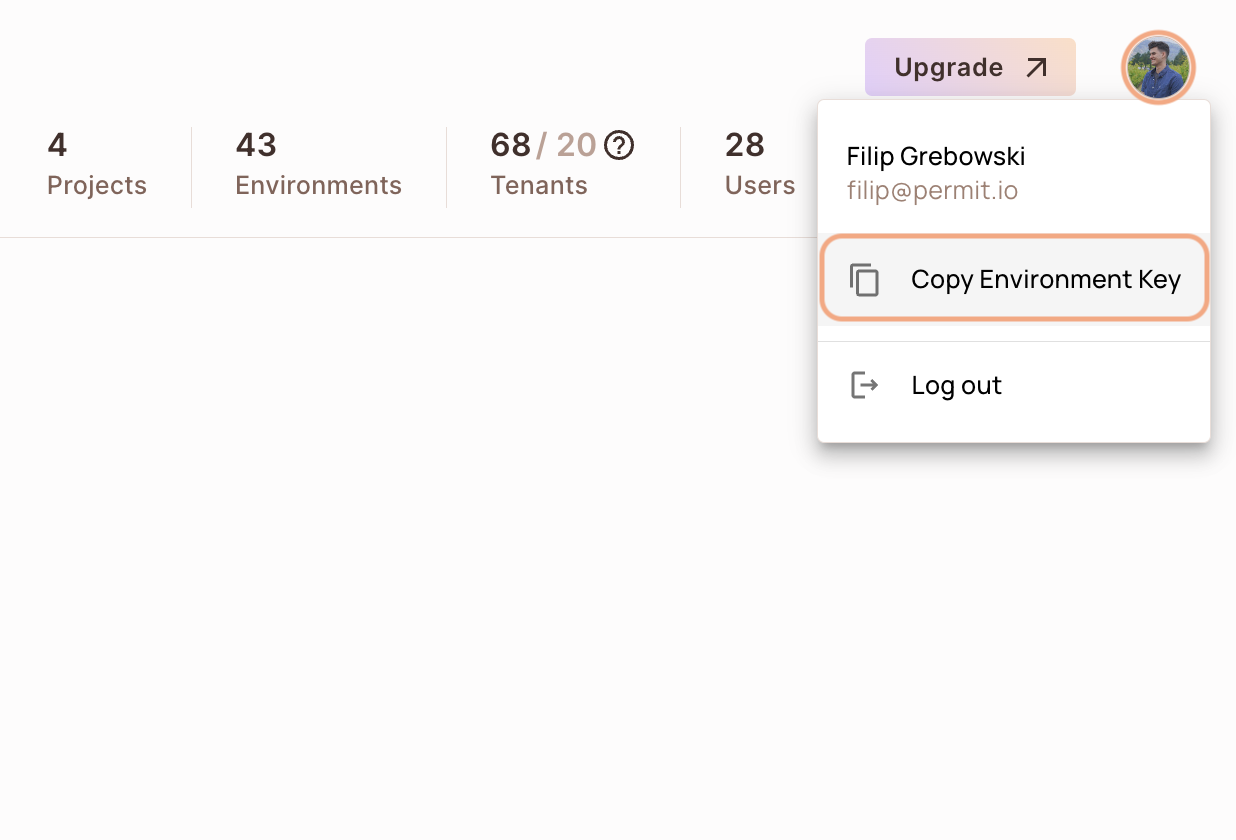
The API Key that you will copy from the user menu is linked to the active environment on the sidebar. Switching to another active environment and then clicking on the Copy Environment Key option will copy a different API Key - the API key of the newly activated environment.
2. Setup your PDP (Policy Decision Point) Container
Permit provides you with a Policy Decision Point, which functions as your microservice for authorization. The PDP is provided as a docker container ready for you to use, or as a managed Cloud PDP that Permit.io runs for you.
- Cloud PDP
- Container PDP
Cloud PDP is easy to use. As part of the initialization of the Permit instance, you just need to pass the Cloud PDP URL.
Cloud PDP is a managed, production-ready service that Permit.io runs for you. It supports RBAC and ReBAC authorization models, but does not support ABAC.
For more details on capabilities, limits, and when to use Cloud PDP vs. a container PDP, see Cloud PDP Capabilities.
// This line initializes the SDK and connects your app
// to the Permit.io Cloud PDP.

const permit = new Permit({
  pdp: "https://cloudpdp.api.permit.io",
  // your API Key
  token: "[YOUR_API_KEY]",
});
Please follow the steps below to install and run the container on your local machine.
1. Pull our PDP container from Docker Hub
If you do not have Docker installed as of yet, click here to install Docker.
docker pull permitio/pdp-v2:latest
2. Run the container
Remember to replace <YOUR_API_KEY> with the Secret Key you obtained in the previous step.
docker run -it -p 7766:7000 --env PDP_DEBUG=True --env PDP_API_KEY=<YOUR_API_KEY> permitio/pdp-v2:latest
Congratulations! You should now have a PDP container running. You can always check the status of the container
by typing docker ps in your terminal.
Let's add the Permit SDK to your app or use the demo example below.
Add the SDK to your Ruby code
Initialise the Ruby SDK and check for permissions.
- Install the Permit.io SDK for Ruby
gem install permit-sdk
- Import the SDK into your code
require 'permit-sdk'
- Create a new instance of the SDK.
You can find instructions on getting a secret API key in the previous section.
require 'permit-sdk'
permit = Permit.new("TOKEN", "localhost:7766") # the PDP url is optional
Check for permissions using the SDK
You can run a permission check with permit.check(). You need to pass 3 arguments to the function:
user: a unique user that identifies the user doing the action - this can be created using hash or a string.action: the action performed, as string.resource: the resource the action is performed on - this can be created using a hash or a string.
In the following examples we are checking that a user with the unique key john@permit.io can create a document resource.
Here is an example using strings:
require 'permit-sdk'
permit = Permit.new("TOKEN", "localhost:7766") # the PDP url is optional

permitted = permit.check("john@permit.io", "create" , "document")
if permitted
  puts "john@permit.io is permitted to create a document"
else
  puts "john@permit.io is not permitted to create a document"
end
And here is an example using Hash objects:
require 'permit-sdk'
permit = Permit.new("TOKEN", "localhost:7766") # the PDP url is optional

user_hash = {"key": "john@permit.io", "first_name": "john", "last_name": "doe", "email": "john@permit.io"}
resource_hash = {"type": "document", "tenant": "default"}
permitted = permit.check(user_hash, "create" , resource_hash)
if permitted
  puts "john@permit.io is permitted to create a document"
else
  puts "john@permit.io is not permitted to create a document"
end
Usually instead of an email you'd use the unique identifier provided by your chosen authentication solution. You can also pass the entire decoded JWT, to include attributes about the user.
In cases where you are dealing with more than one tenant in your application, Permit.check() can pass the tenant as part of the resource like we showed before in the Hash objects example.
The tenant passed in needs to be either the tenant id or the tenant key.
You can use the list_tenants API to get the ids and keys set for your tenants.
tenant: a unique tenant id or tenant key that you have defined within Permit.
if permit.check("user", "action", { "key": "resource", "tenant": "tenant" })
  # Allow to close document
end
Check permissions against ABAC policies
Above we have checked for permissions against an RBAC policy - but what if we have an ABAC policy we want to run a permission check for? An ABAC policy is made up of User Sets and Resource Sets, which you can read more about here.
With ABAC we define conditions based on pre-configured attributes.
If we are running a permit.check() for an ABAC policy, we replace the userId and the resource with objects, containing attributes.
if permit.check(user, 'close', { "key": "resource", "attributes": {"hasApproval": "true"} })
  # Allow to close document
end
Permission checks are being run against the PDP container that's running locally on your machine - offering minimal latency and without leaving your network.
This means that your user data never goes outside your system, keeping security high.
Full app example
Assuming a Ruby app made up of a single file, with the permit-sdk and webrick gem packages installed with the following command :
gem install permit-sdk webrick
Here is a full example of a Ruby app that uses the Permit.io SDK to check for permissions:
require 'webrick'
require 'permit-sdk'

permit = Permit.new("<YOUR_API_KEY>")

server = WEBrick::HTTPServer.new(Port: 4000)

server.mount_proc '/' do |_, res|
  res['Content-Type'] = 'application/json'

  permitted = permit.check("user@mail.com", "read", "document")
  if permitted
    res.status = 200
    res.body = { result: "user@mail.com is PERMITTED to read document!" }.to_json
    next
  end
  res.status = 403
  res.body = { result: "user@mail.com is NOT PERMITTED to read document" }.to_json
end

trap 'INT' do server.shutdown end

server.start