Implementing Fine-grained Authorization in Flask Application
Integrate fine-grained authorization into your Flask application to build lightweight, secure APIs where users can perform operations based on their specific roles and permissions.
This guide shows you how to add fine-grained authorization to a Flask application using Permit.io. You will set up a policy for creating posts and comments, register users, assign them roles (like Author, Moderator, or Reader), and enforce permissions directly in your app's endpoints.
By the end, you will have a working example where only authorized users can access protected endpoints, and you will understand how to integrate Permit.io into your own Flask applications.
Prerequisites
- Flask application
- Docker (for running the PDP server)
- Node.js (for installing and running the Permit CLI)
- Permit.io account (Follow this guide to create an account)
Policy Configuration
Before integrating Permit.io with your Flask application, you need to configure a policy. If you already have a policy configured, you can skip this section and proceed directly to the integration guide.
Configure Policy in Permit
Installing the Permit CLI
First, install the Permit CLI. The Permit CLI is a command-line tool that allows you to create policies, run the PDP server, and perform other tasks. To install the CLI, run the following command in your terminal:
npm install -g @permitio/cli
Once the installation is complete, run permit to confirm the installation.
Authenticating the CLI
To use the CLI, authenticate it with your Permit account. Run:
permit login
This command opens a browser window and prompts you to log in with your Permit account. After logging in, the CLI is authenticated and ready to use. This also logs you into the default environment (a project can have multiple environments).
You can change the environment by running permit env select and then selecting the environment you want to use.
Creating a policy with a template
The Permit CLI offers various templates to create a policy with predefined roles and resources using best practices. This simplifies policy creation compared to starting from scratch.
To check the available templates, run permit template list. You can also visit the Permit CLI repo to see the templates and the actual terraform code for each template.
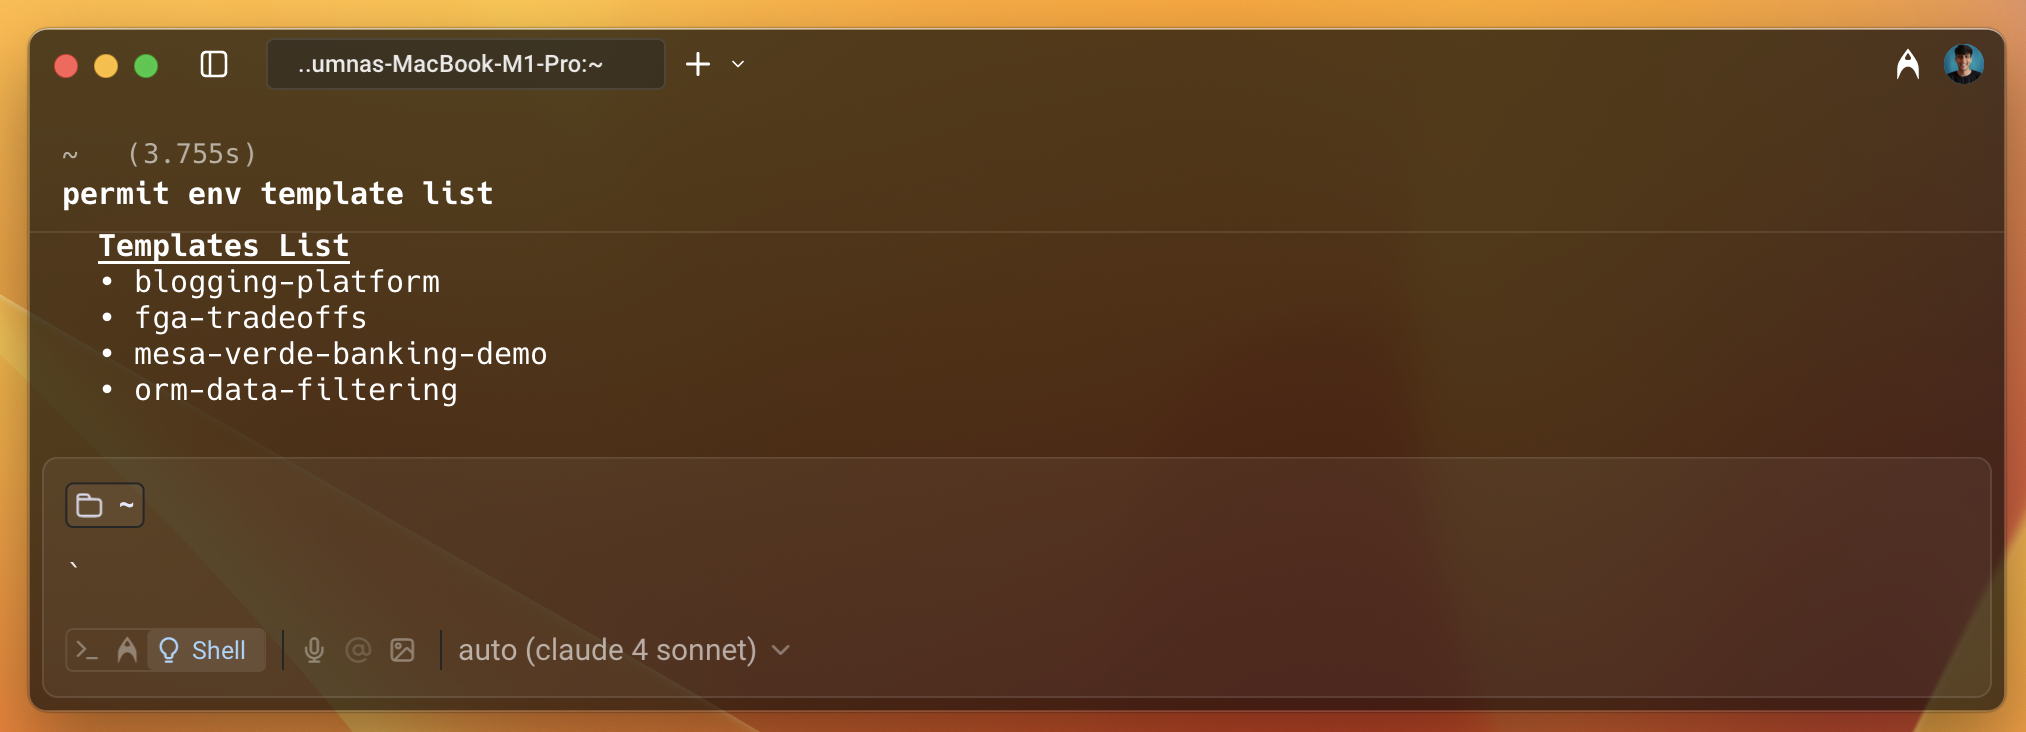
Use the blogging-platform template to create the policy. This template helps you set up a policy for a blogging platform with roles and resources. The policy is explained in detail in the next step.
To apply the template, run the following command:
permit template apply --template blogging-platform
You will see a success message in the terminal.
Understanding and accessing the policy from the dashboard
Next, go to the Permit dashboard, select your project, and click on the Policy tab in the left sidebar. You will see the policy you just created.
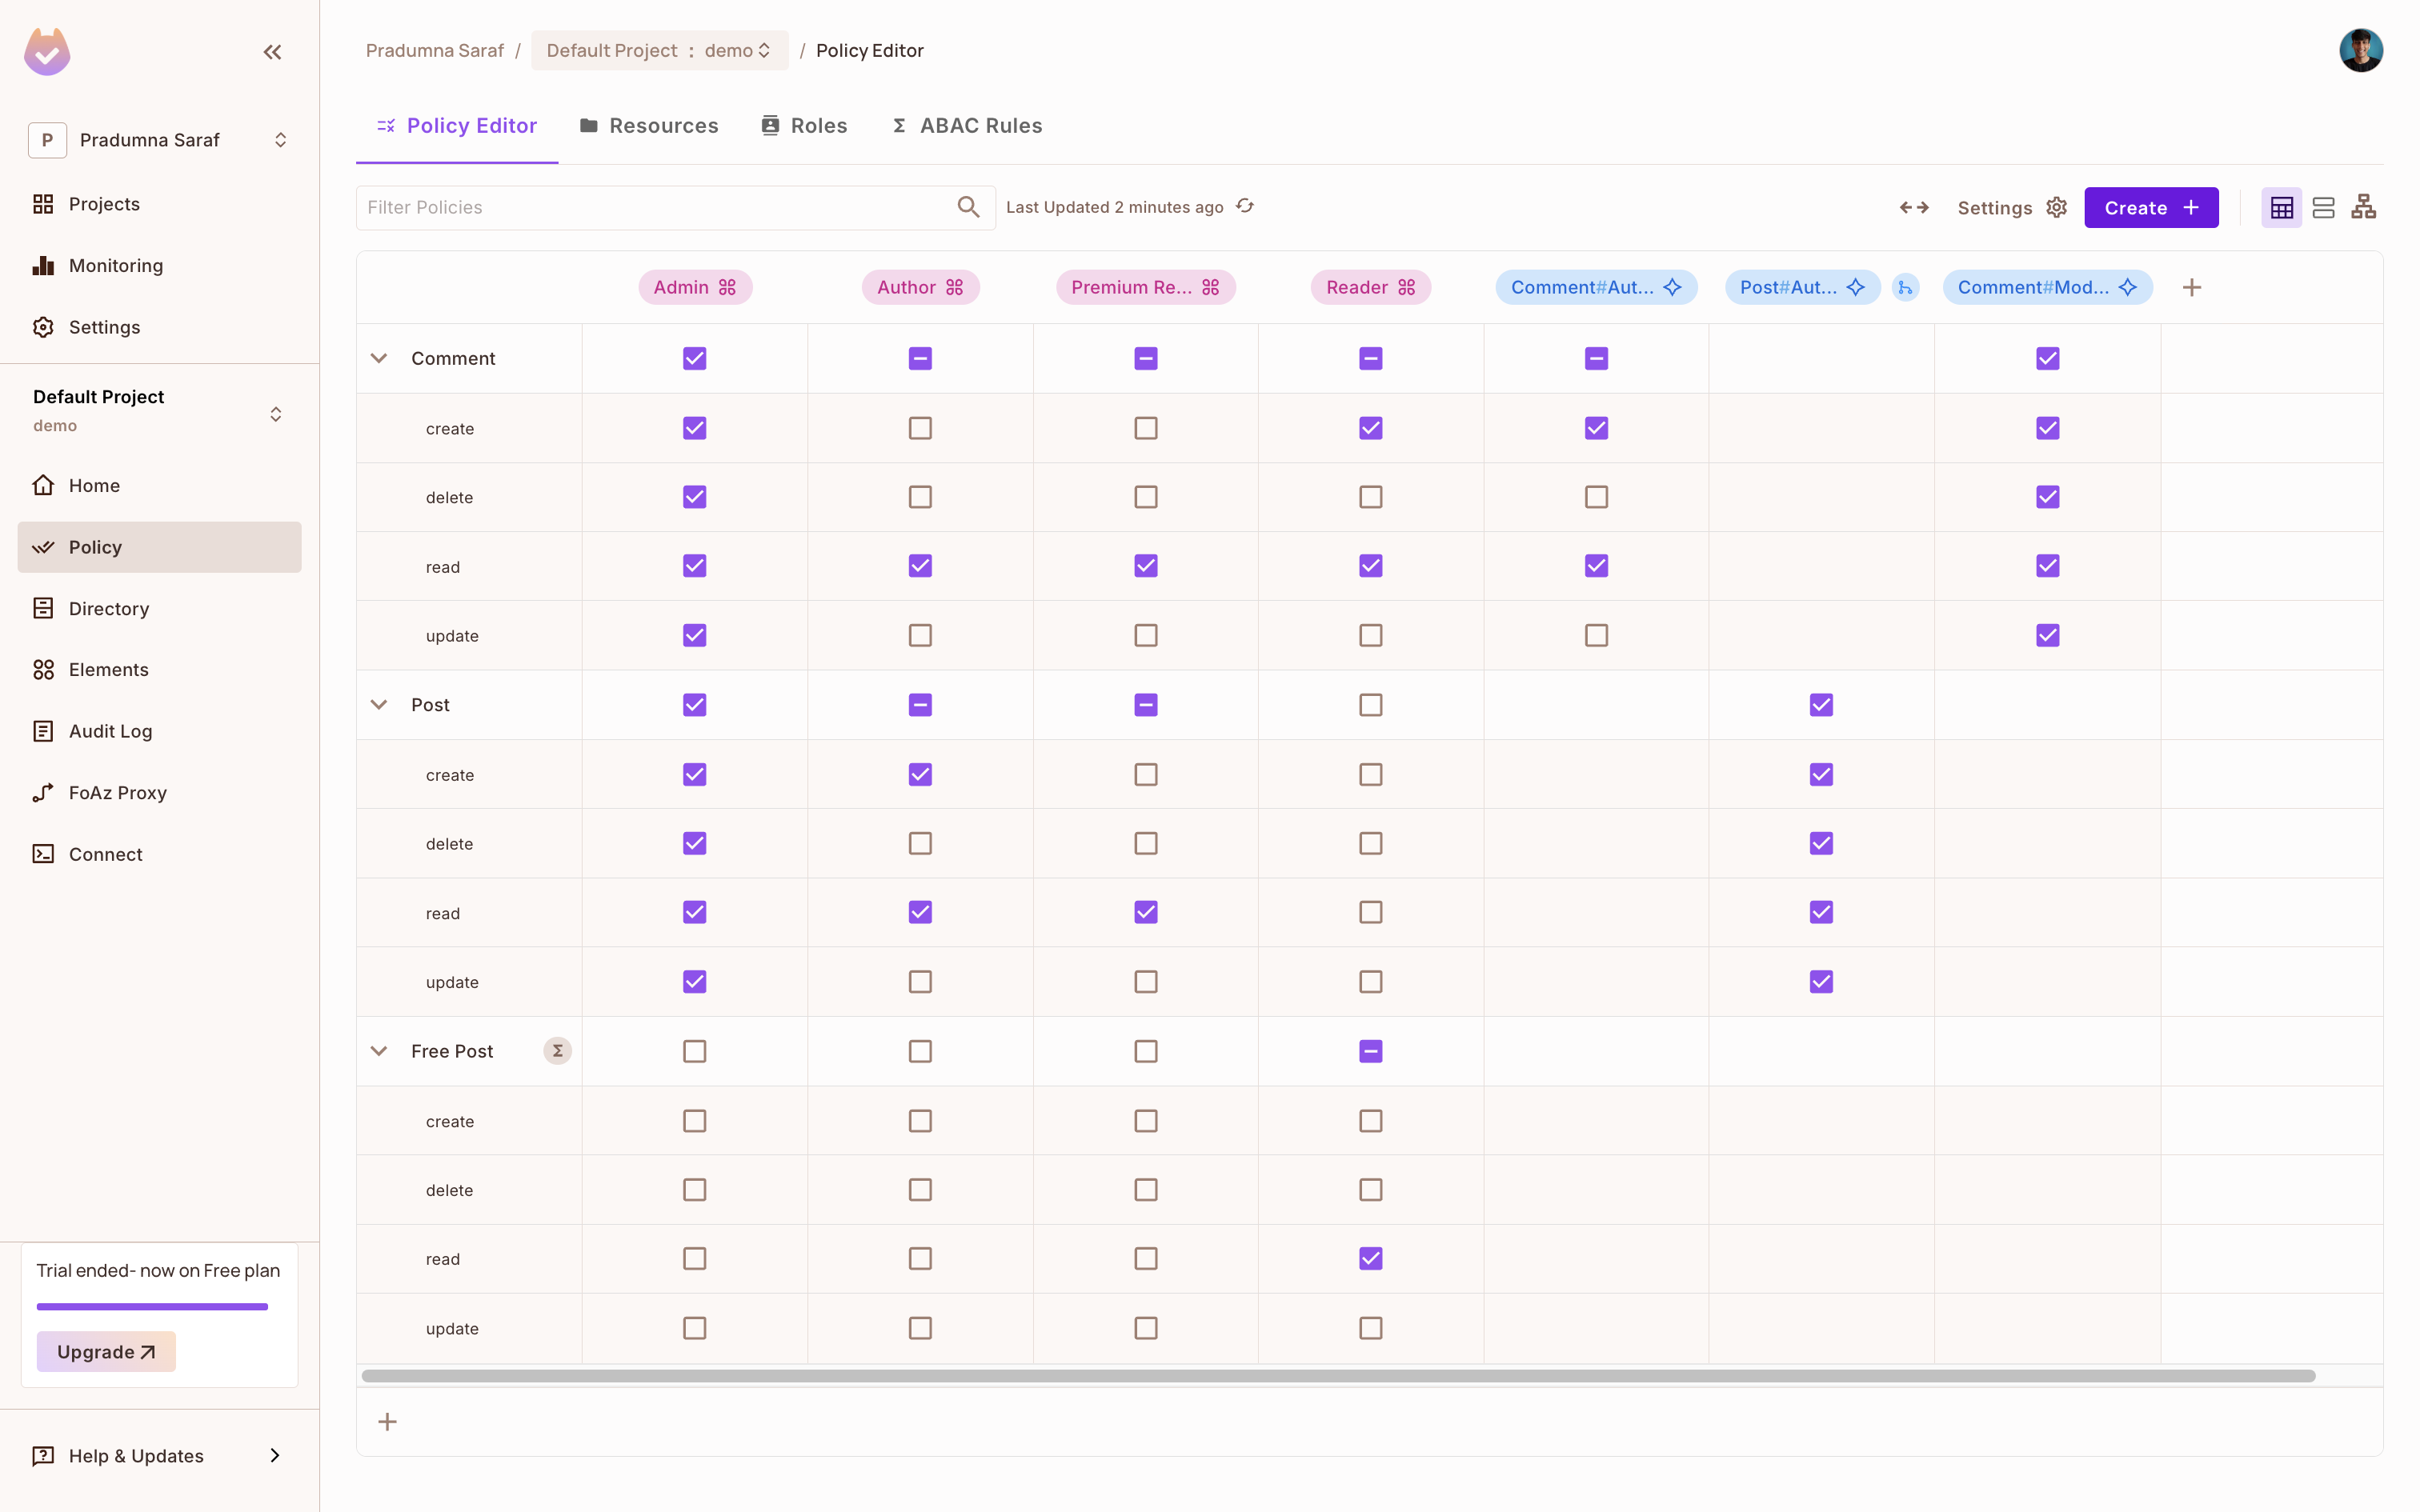
- For the blog application, there are two resources: Posts and Comments. Depending on the role and action, the user will have access to the resource. New users accessing the blog are assigned the Reader role and have permission to read posts.
- As users become Authors, they gain access to create and update blog posts and manage comments.
- There is also a relationship between Post and Comment resources: the person who creates a post automatically becomes a Comment Moderator.
- A Free Post resource set filters non-premium posts, allowing Readers to access only free content. This is a ReBAC setup.
This setup combines ABAC and ReBAC to enforce flexible and secure permissions. You can easily add or remove permissions by checking or unchecking them in the policy editor.
Integration Guide
Now that you have a policy configured, you can integrate Permit.io with your Flask application. The following steps will guide you through the integration process.
Getting the API key
To get the API key:
- Click on Projects in the left sidebar.
- Click on the three dots for the environment you want to use.
- Click on Copy API Key and store it in a safe place. You will use this API key to authenticate your application with Permit.io. If you have any difficulty getting the API key, follow this guide.
Once you have the API key, proceed to integrate Permit.io with your Flask application.
Setting up the Flask application with Permit.io
Start by setting up the Flask application. In your app.py file, add the following code:
# app.py
from flask import Flask, request, jsonify
from permit import Permit
import os
import asyncio
from pydantic import BaseModel, EmailStr, ValidationError

app = Flask(__name__)

permit = Permit(
    token=os.getenv("PERMIT_API_KEY"),
    pdp=os.getenv("PDP_URL", ""),
)

class UserIn(BaseModel):
    email: EmailStr
    first_name: str
    last_name: str
The UserIn model validates the request body using Pydantic. The Permit SDK is initialized with the PERMIT_API_KEY (the API key you copied from the Permit dashboard) and the PDP_URL (the URL of the PDP server). You will set these up later.
Defining endpoints
To register a user, create an endpoint that registers a user inside the app.py file.
# app.py
@app.route("/", methods=["GET"])
def root():
    return jsonify({"message": "Hello, Flask with Permit!"})

@app.route("/register", methods=["POST"])
def register():
    try:
        user_in = UserIn(**request.get_json())
    except ValidationError as e:
        return jsonify(e.errors()), 422

    # Sync user with Permit
    user = asyncio.run(permit.api.users.sync({
        "key": user_in.email,
        "email": user_in.email,
        "first_name": user_in.first_name,
        "last_name": user_in.last_name,
    }))

    # Assign Reader role to the user in the 'default' tenant
    role_assignment = asyncio.run(permit.api.users.assign_role({
        "user": user_in.email,
        "role": "Reader",
        "tenant": "default",
    }))

    # Continue with your app's registration logic..

    return jsonify({
        "message": "User registered and role assigned",
        "user": user.dict() if hasattr(user, "dict") else user.__dict__,
        "role_assignment": role_assignment.dict() if hasattr(role_assignment, "dict") else role_assignment,
    }), 201

if __name__ == "__main__":
    app.run(debug=True, port=8000)
- The
/endpoint returns a simple message. - The
registerhandler allows new users to register for the blog application and assigns them the Reader role, giving them access to read posts.
Testing the registration process
To demonstrate the registration process, use the curl command to make a request to the /register endpoint. Register two users John and Emma. Both of these users will be automatically assigned the Reader role.
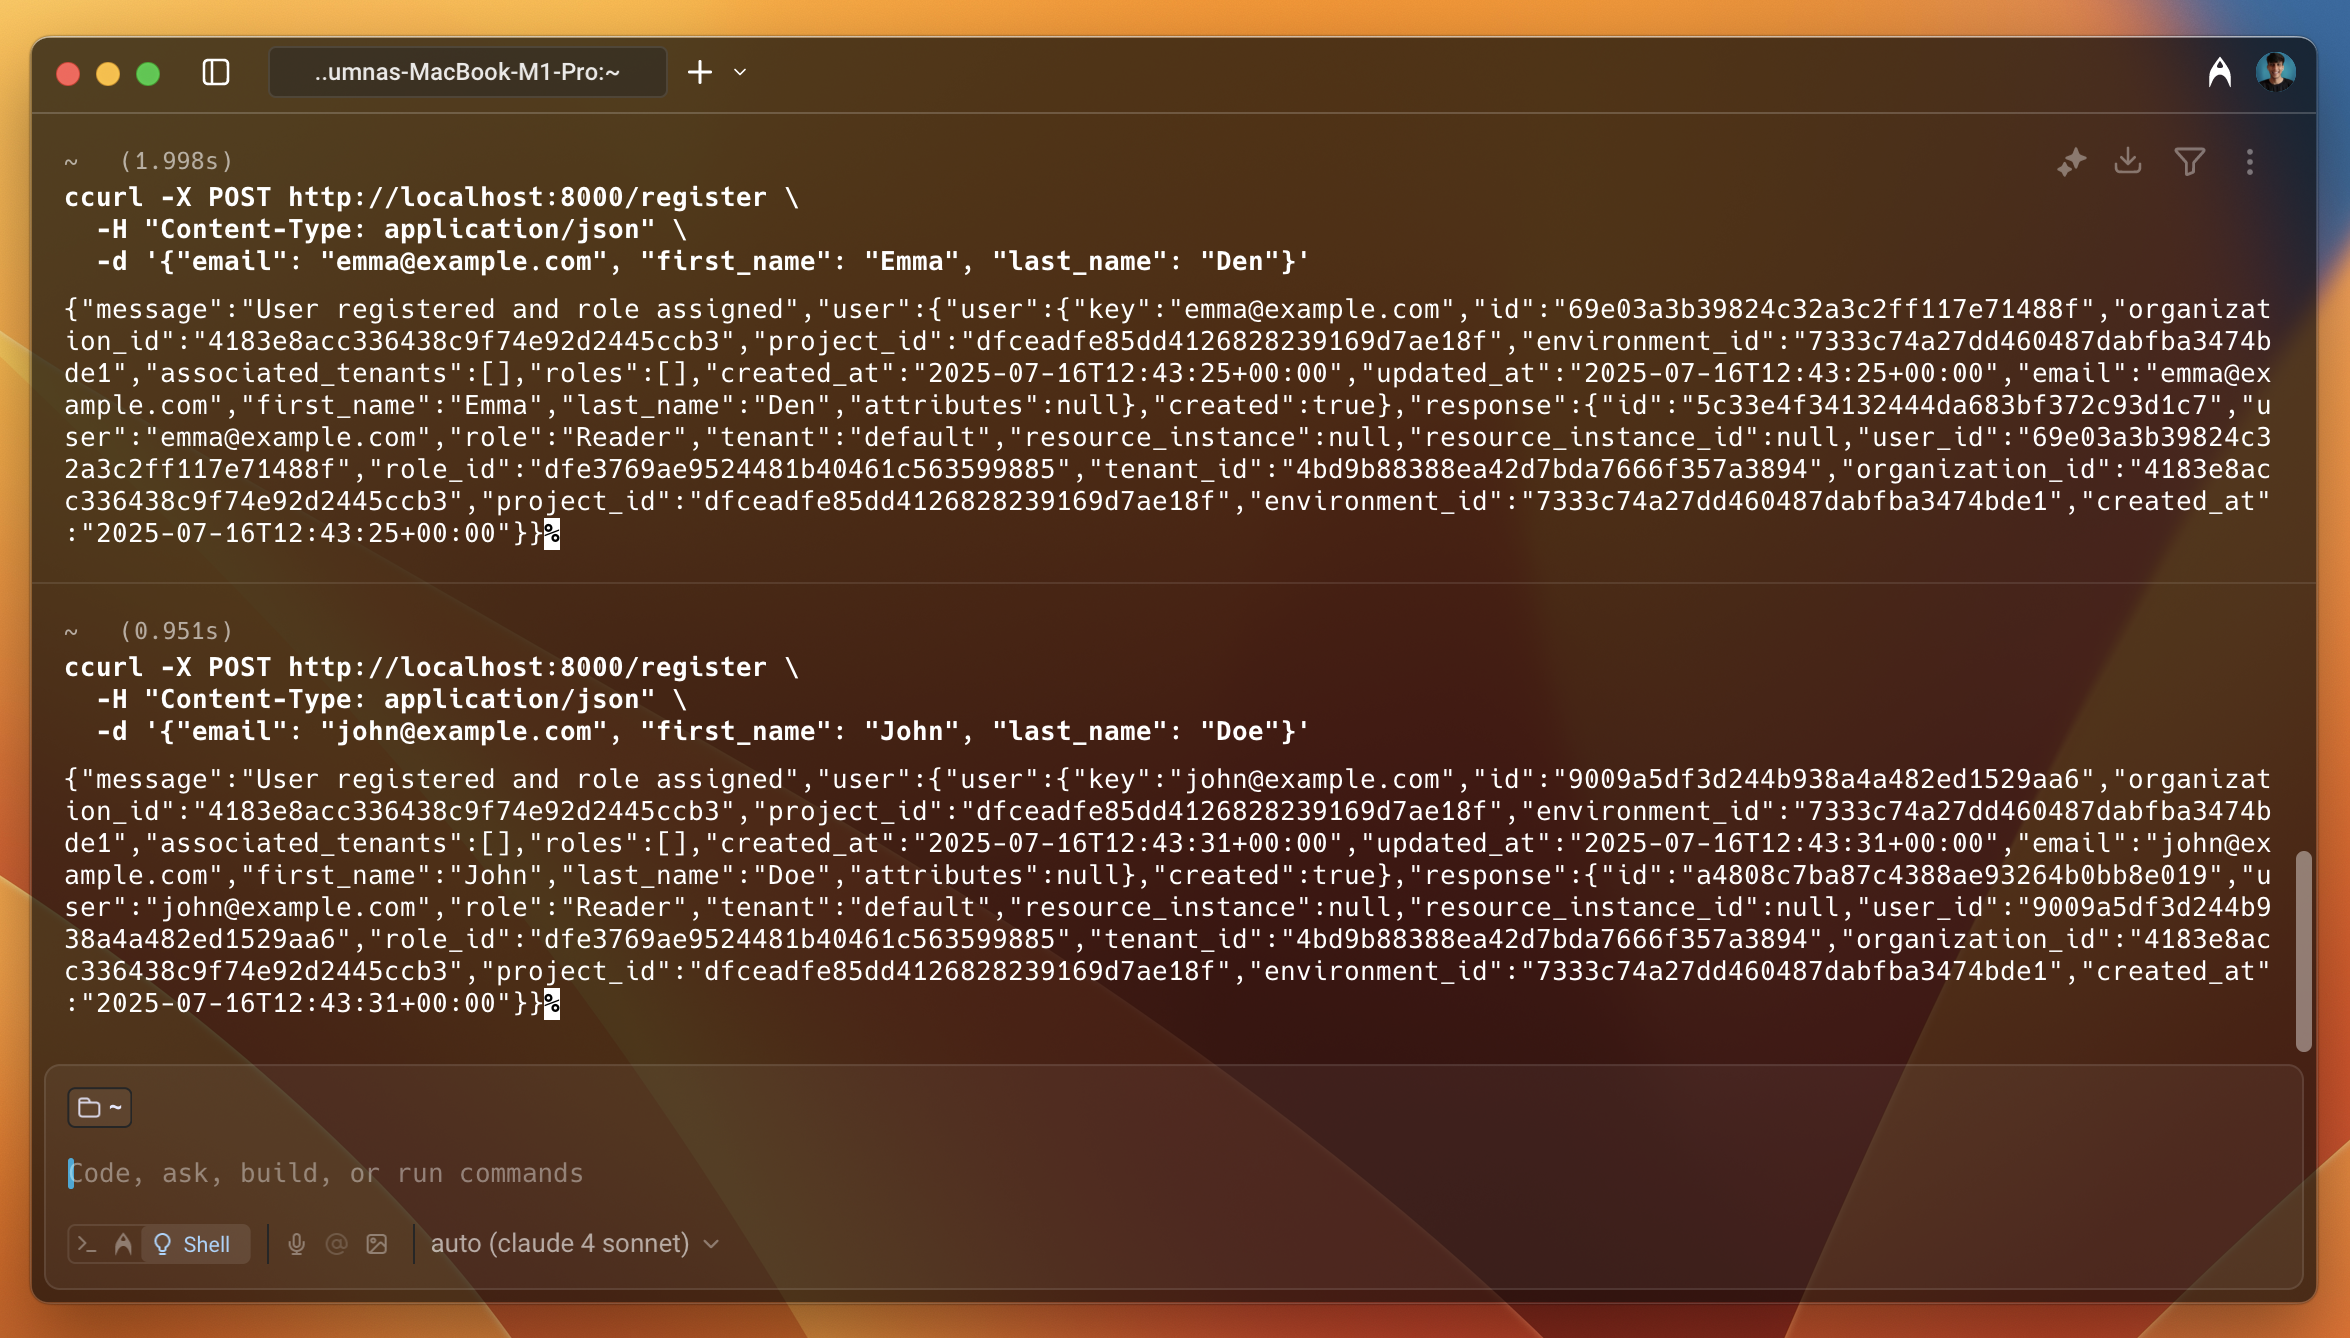
As shown in the image above, the users are created successfully and you receive information about the users in the response, such as id, project_id, key, etc.
In the next step, we will assign John with the Author role to allow them to create a post.
Giving the user access to the resource
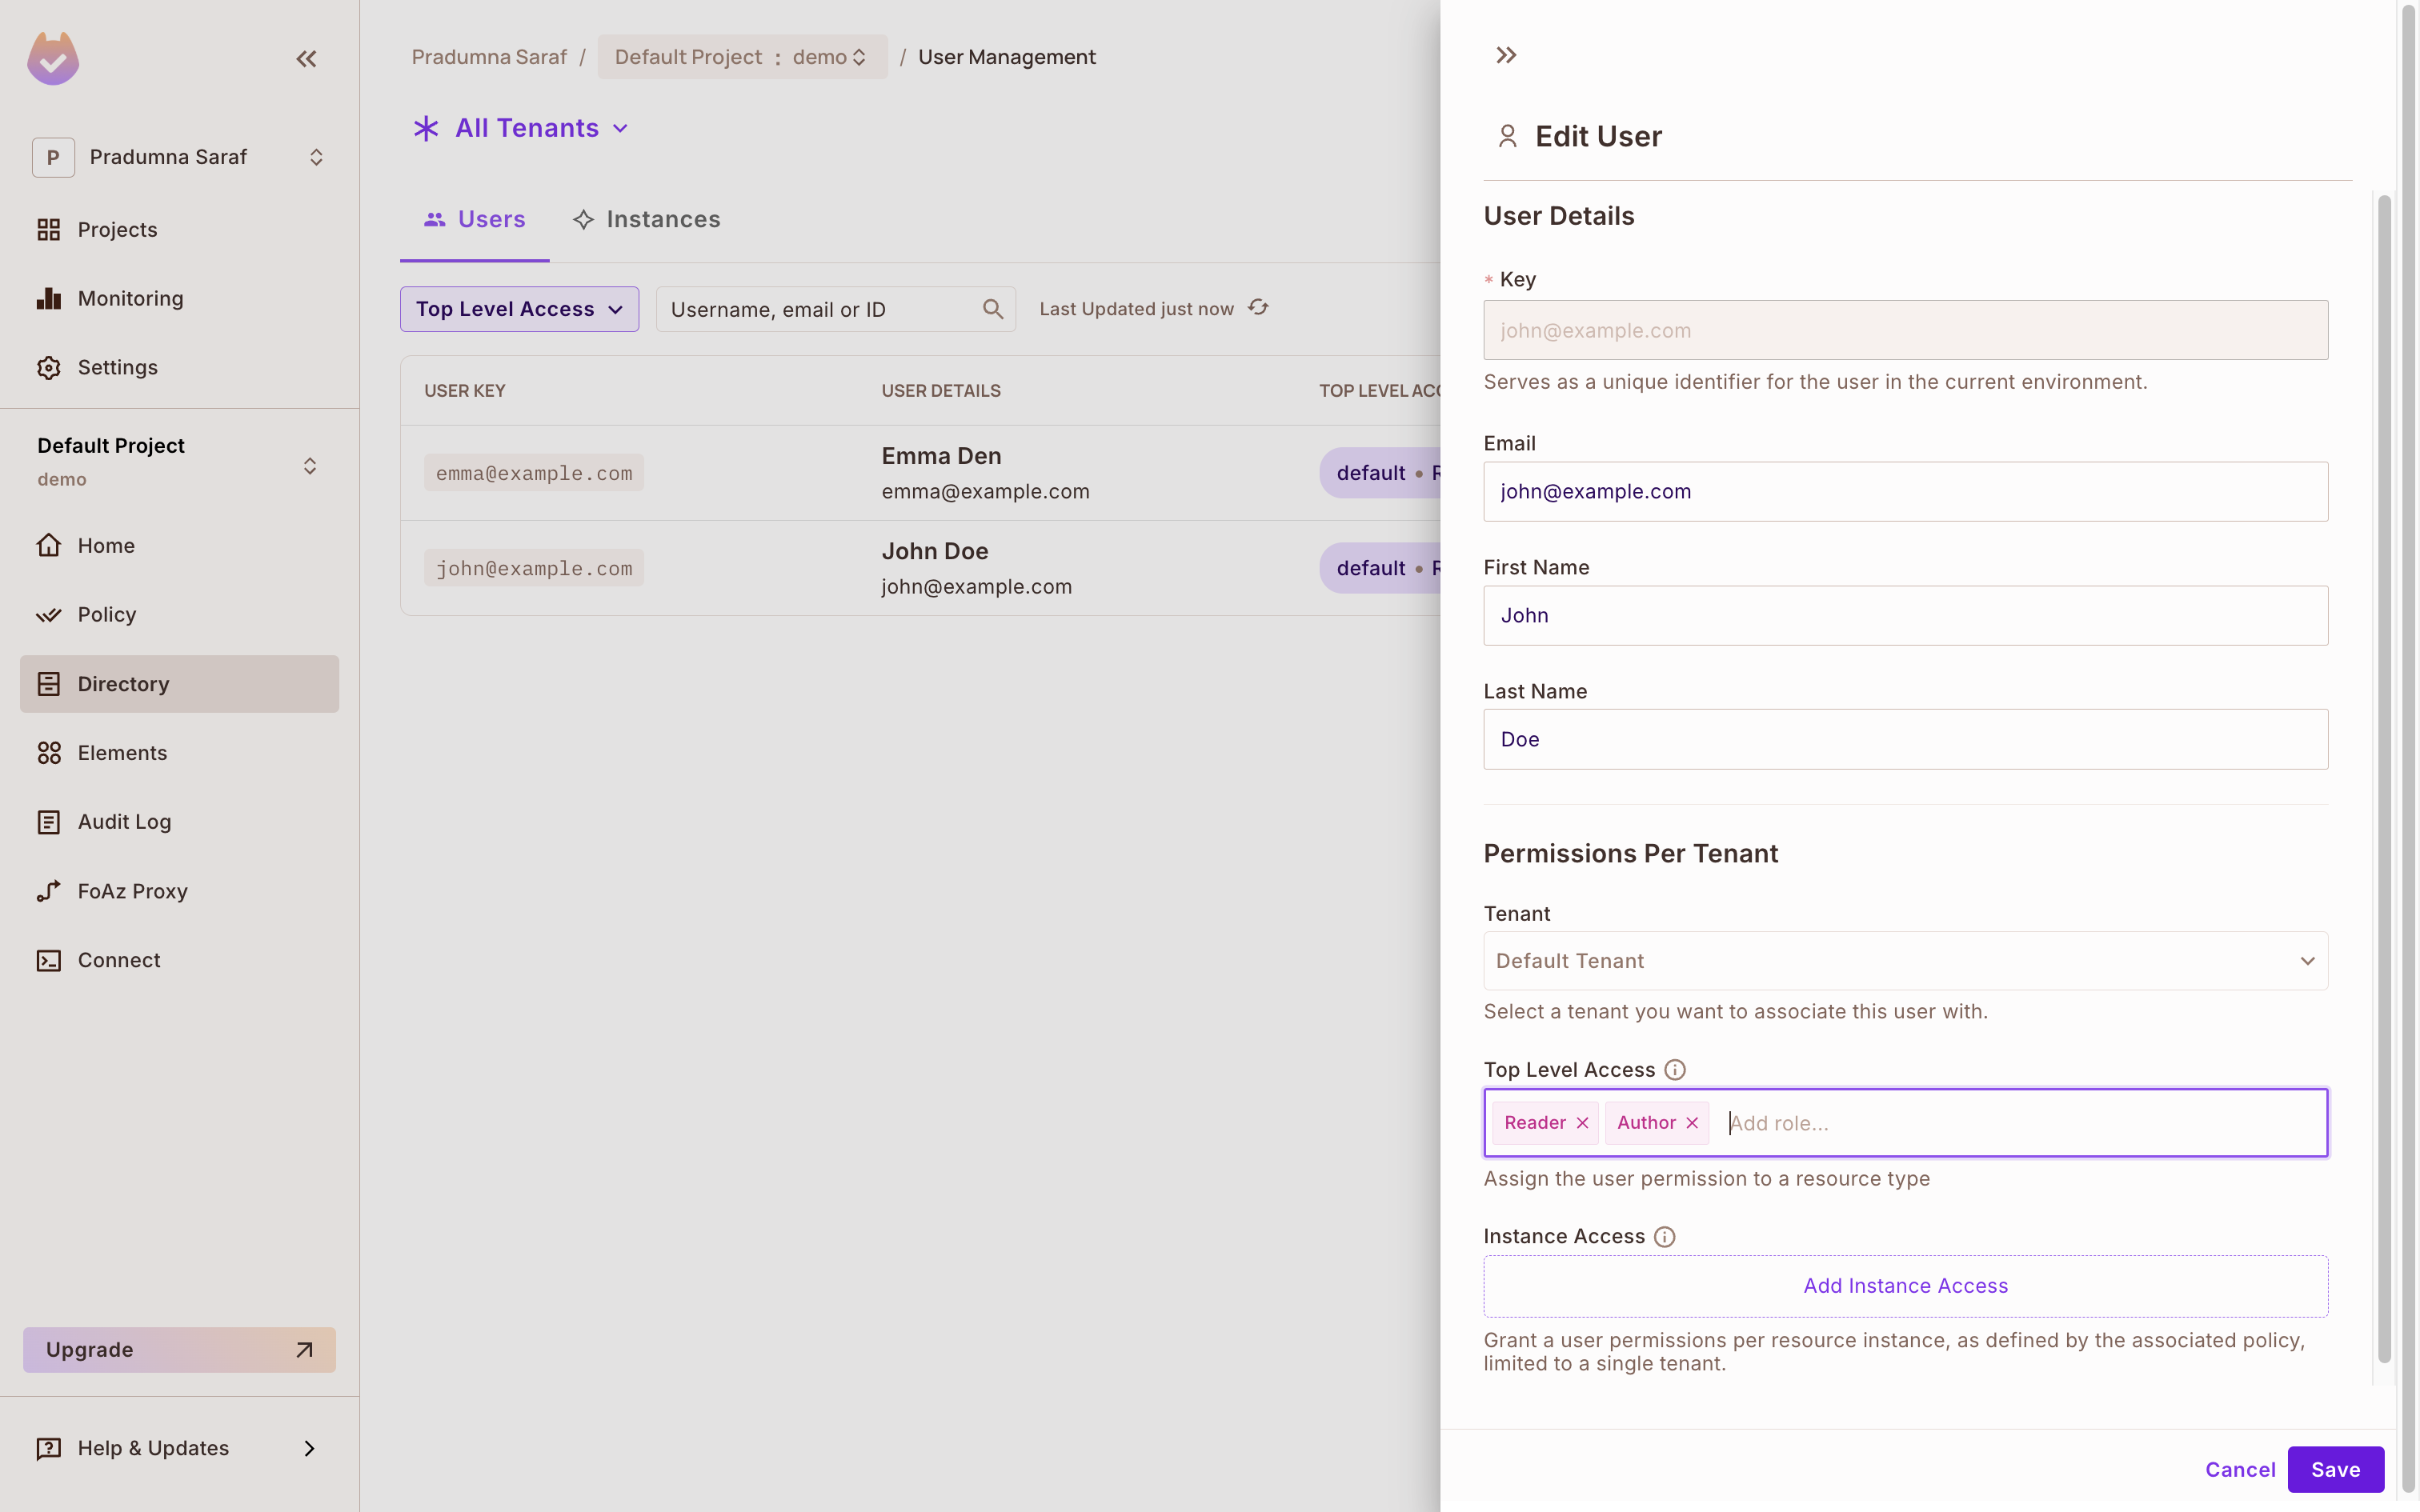
By default, users are assigned the Reader role. To allow John to create posts, assign him the Author role:
- Select Directory from the left sidebar in the Permit dashboard.
- Beside the user, click on the Add Instance Role button.
- Select tenant (default) from the dropdown.
- Select the Author role and Save button.
You will verify this later when you check the access.
Setting up the PDP server
At this point, your application is ready with the user synced and the policy created. To enforce the policy, use Permit's PDP (Policy Decision Point) to check if the user has access to the resource. First, set up the PDP.
Run the following command to spin up your environment PDP in a Docker container:
permit pdp run
After you run the above command, you will see output with information such as container ID, name, etc.
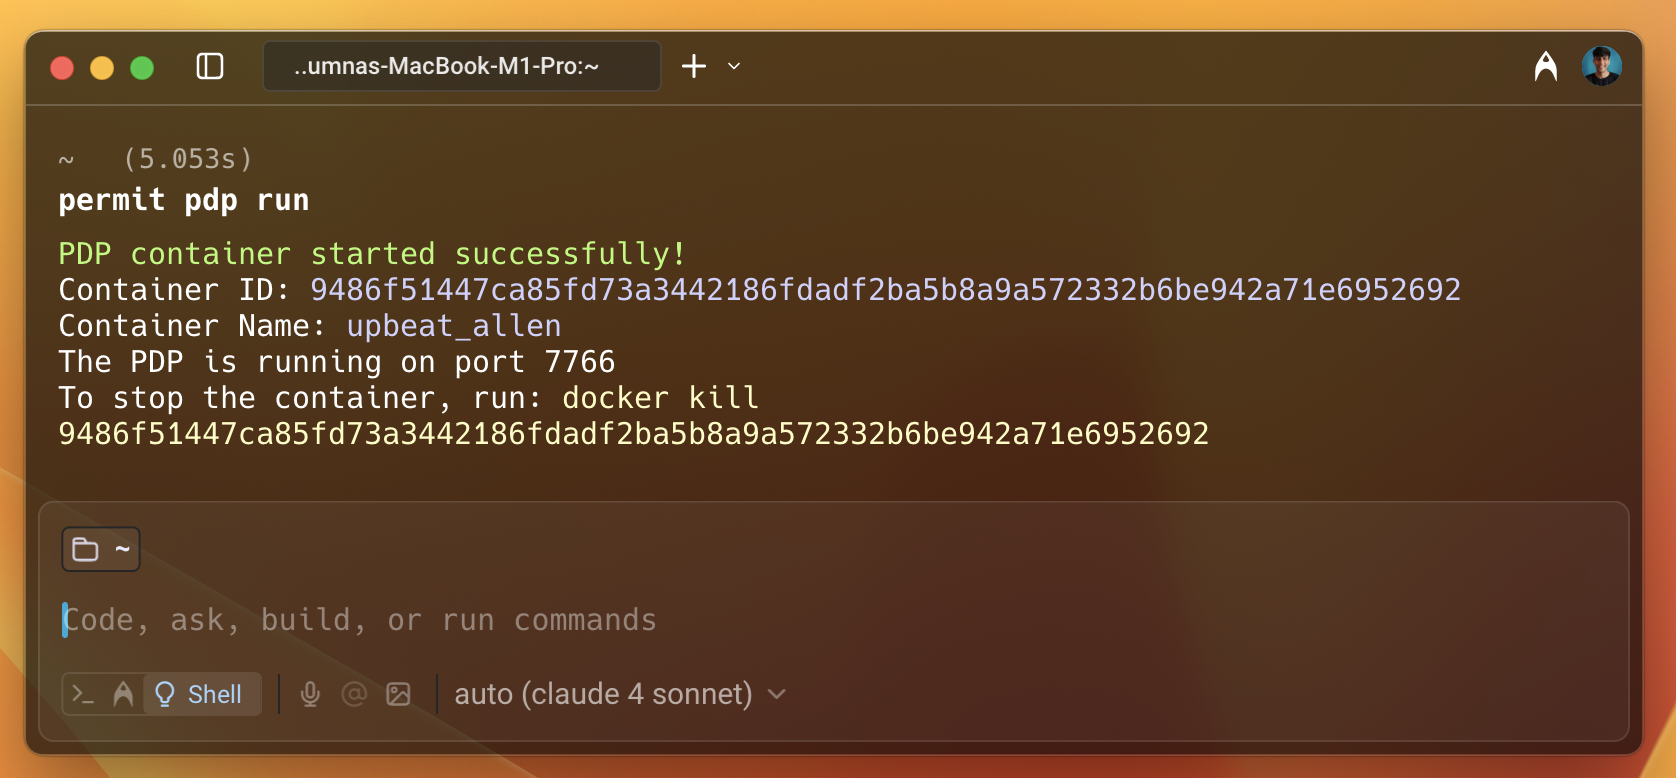
The PDP server runs on port 7766 by default. You can change the port if needed. Finally, update the PDP_URL environment variable in your application.
Creating the endpoint to check access
Since the blog application can have various elements like creating a post, commenting, editing, etc., create a new endpoint /posts to demonstrate access control. Only users with the Author role can create a post.
# app.py
# Posts model
class Posts(BaseModel):
    user: str

# post creation endpoint
@app.route("/posts", methods=["POST"])
def posts():
    action = 'create'
    resource = 'Post'
    try:
        check = Posts(**request.get_json())
    except ValidationError as e:
        return jsonify(e.errors()), 422

    permitted = asyncio.run(permit.check(check.user, action, resource))
    if permitted:
        return jsonify({"message": "User is permitted"})
    else:
        return jsonify({"message": "User is not permitted"}), 403
You can use the same pattern to protect other endpoints, such as commenting, editing, or accessing premium content, by adjusting the action and resource values accordingly.
Checking the access
Now, check the policy enforcement. Since you have added the John user as an Author, you can check if the user has create access to the Post resource. To do this, use the curl command to make a request to the /posts endpoint.
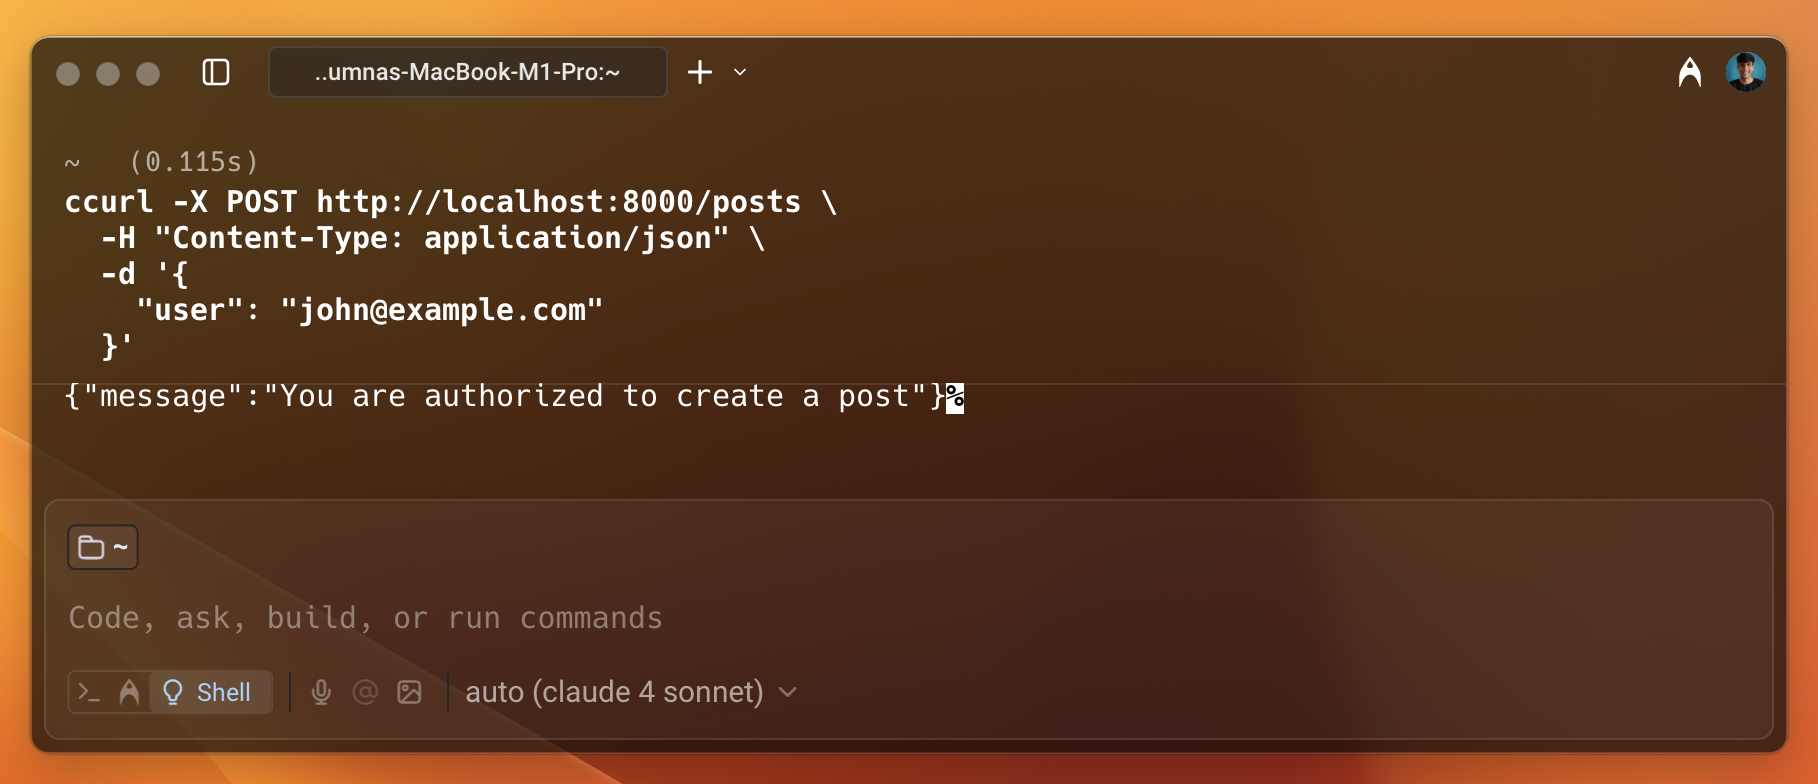
As shown in the image above, the user is permitted to access the resource.
Now, check the access for Emma. Since she is not assigned the Author role, she should not be able to create a post and access the resource.
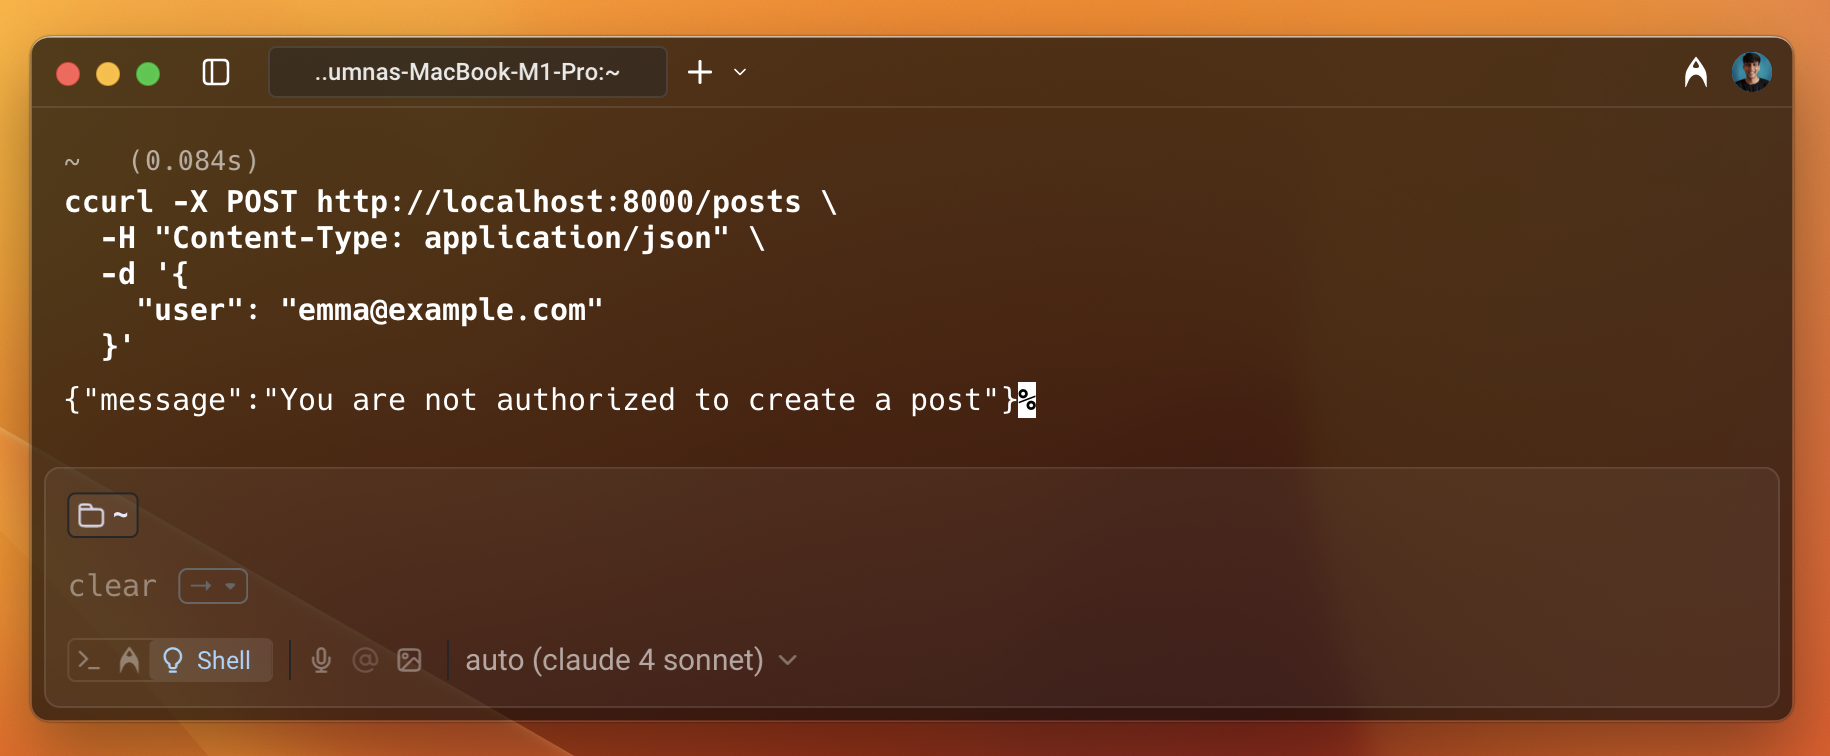
As shown in the image above, the user is not permitted to access the resource. This is how you can enforce policies using Permit.io with Flask.
Conclusion
In this guide, you learned how to integrate Permit.io with Flask. You created a simple Flask application that syncs users and tenants with Permit.io. You also created endpoints to check if users are authorized to access resources. You used the Permit SDK to enforce policies and check authorization. You also set up the PDP server locally using Docker.
Further Reading
- Python SDK Documentation - Explore advanced features and API methods
- Building RBAC Policies - Create and manage role-based authorization policies
- Embeddable User Management - Add user management UI components to your application