Hanko and Permit
Introduction
Hanko is an open-source tool and a cloud service that allows us to implement passkey authentication, and Permit is the leading authorization platform for developers. By integrating Hanko with Permit you can easily add secure, feature-rich, and scalable passkey authentication and fine-grained authorization systems to your application.
You can see more information about adding Passkeys and Fine-Grained Authorization to your application in this great blog by Gabriel L. Manor.
What you'll build
In this tutorial, you'll learn how to integrate Hanko with Permit. We will create a web app that uses Hanko for passkey authentication and Permit.io for easily manageable authorization, allowing us to change our application's permissions on the fly.
Although this application code is built with Next.js, Permit provides SDKs for any common language, so this example can give you a good figure for how it should look in your language.
The code for this application is available on GitHub.
Prerequisites
-
An application that uses Hanko for authentication; in this example, we will use a demo NextJS app.
Getting Started
If you are already using Hanko in your application and just want to learn about the Permit authorization part, skip to the Setup Basic Role Based Authorization section.
Cloning the demo application
We highly recommend cloning our demo application so you can follow the steps more easily.
If you prefer to read the article without cloning the application, you can skip this section and continue to the next one.
To clone the demo application, run the following commands:
1. Clone the application:
git clone <git@github.com>:permitio/permit-hanko.git
2. Install the dependencies:
npm install
3. Run the application:
npm run dev
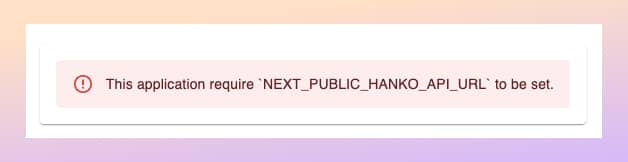
At this point, the application will fail to run as we need to set up the Hanko and Permit services.
Let's set up the Hanko account so we can log in to the application.
Setting up Hanko Passkey Authentication
To use Hanko for passkey authentication, you can either run it locally in your environment or use the cloud service. Here we will utilize the cloud service as it is easier to set up and use.
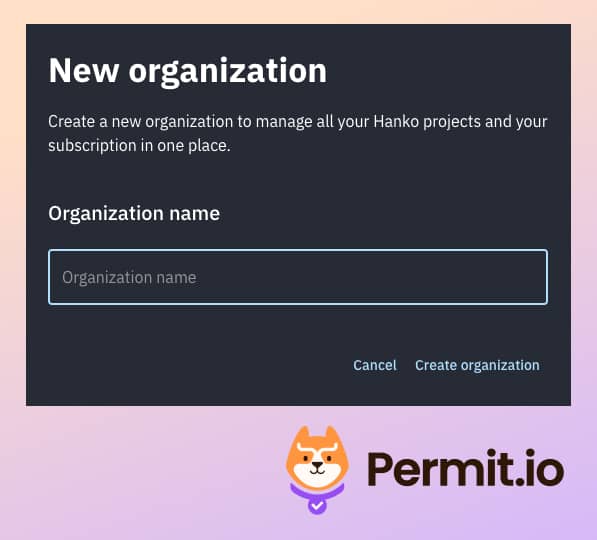
- Visit the Hanko webapp, create a new organization, and give it the name you want.
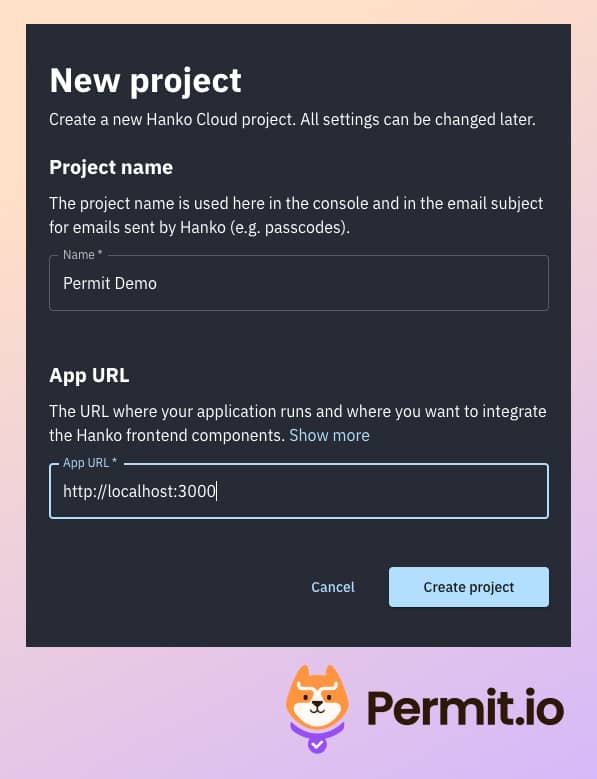
- In the main dashboard, create a new project - assign
http://localhost:3000as the App URL.
- From the Settings > General section of the project, copy the API URL.
- Paste it to a new file called
.env.local, in the root directory of the application.
NEXT_PUBLIC_HANKO_API_URL=https://a0ae8d5d-9505-415f-ad70-51839c285726.hanko.io
- Now, when we run the application again, we can see that the error is gone, and we can see the login page.
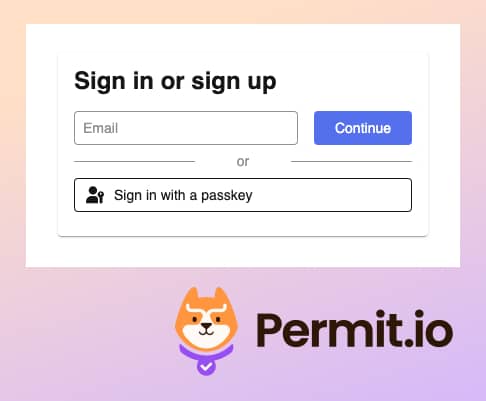
- To add this authentication window, we just use the Hanko SDK for JavaScript.
You can see the element that implemented the login flow in the
app/auth/login/page.tsxfile.
<Paper sx={{ p: 2 }}>
  <HankoAuth />
</Paper>
- We added the following middleware logic to the
middleware.tsfile that redirects the user to the login page if they are not authenticated:
const authenticateUser = async (req: NextRequest): Promise<string> => {
if (!hankoApiUrl) {
return "";
}

// Get Hanko token from cookie
const hanko = req.cookies.get("hanko")?.value;

...

// Authenticate user using Hanko
const user = await authenticateUser(req);

// Redirect to login page if user is not authenticated
if (!user) {
urlToRedirect.pathname = LOGIN_URL;
return NextResponse.rewrite(urlToRedirect);
}
With the authentication configuration and flow configured, we are ready to continue with the implementation of Permit.io for authorization in our application.
Setup Basic Role Based Authorization
With authentication done, it is time to set up our authorization layer. We'll start with setting up basic role-based access control (RBAC) to determine the actions our users can perform.
In the /app/api/notes/route.ts,
you'll find four functions, GET, POST, PUT, and DELETE - responsible for the logic of getting, creating, updating, and deleting notes,
respectively.
If you look at the route.ts file, you will see that we are going to use a generic
permit.check middleware.ts
file.
const response = await fetch(`${pdpUrl}/allowed`, {
    method: "POST",
    headers: {
        Authorization: `Bearer ${permitApiKey}`,
        "Content-Type": "application/json",
        Accept: "application/json",
},
body: JSON.stringify({
    user: user,
    action,
    resource: resource,
    context: {},
    }),
});
This code is a generic permit.check function that checks the permissions configured for the application using three factors:
User - the entity that attempts to perform the operation (in our case, a user authenticated with Hanko).
Action - the operation that the user will attempt to perform (in our case, GET).
Resource - the entity that the user will attempt to perform the operation on (in our case, the note).
At this point, we haven't configured the Permit SDK key in the app, so any user can perform any operation. Setting up Permit will fix this.
Now, we must configure these permissions in Permit. Not that we can adapt them to our needs without having to change any of the application code!
Let's begin by setting everything up within the Permit Dashboard:
-
Create a Permit account, set up a new organization, and give it whichever name you want.
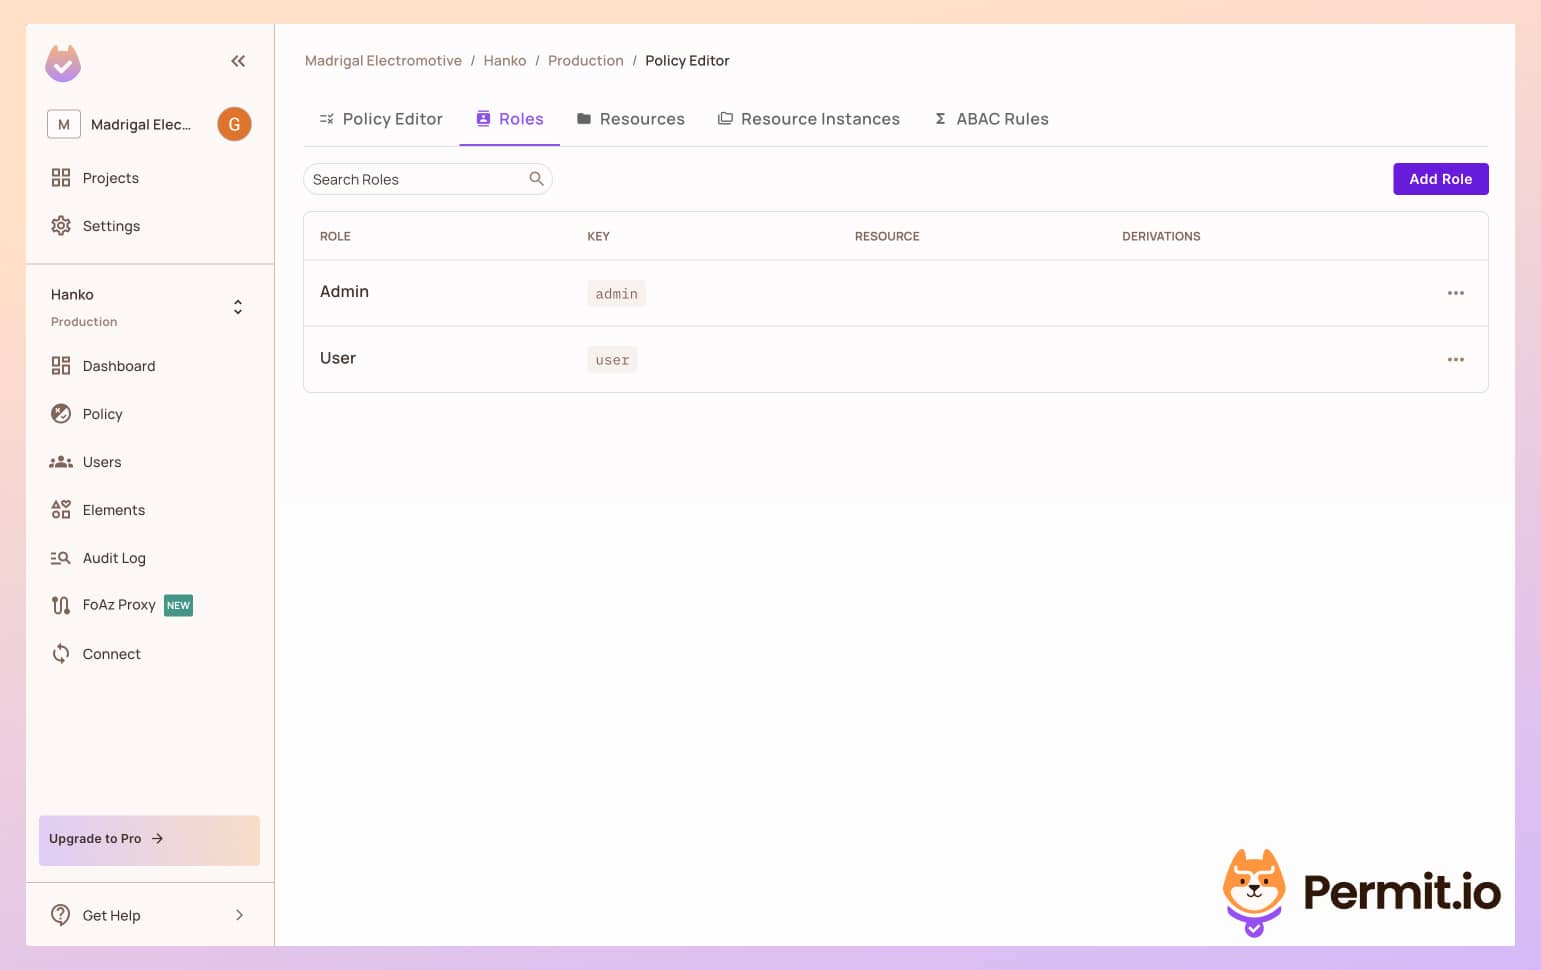
-
In the left sidebar, click on Policy, then go to the Roles tab, and create the following roles: Admin and User.
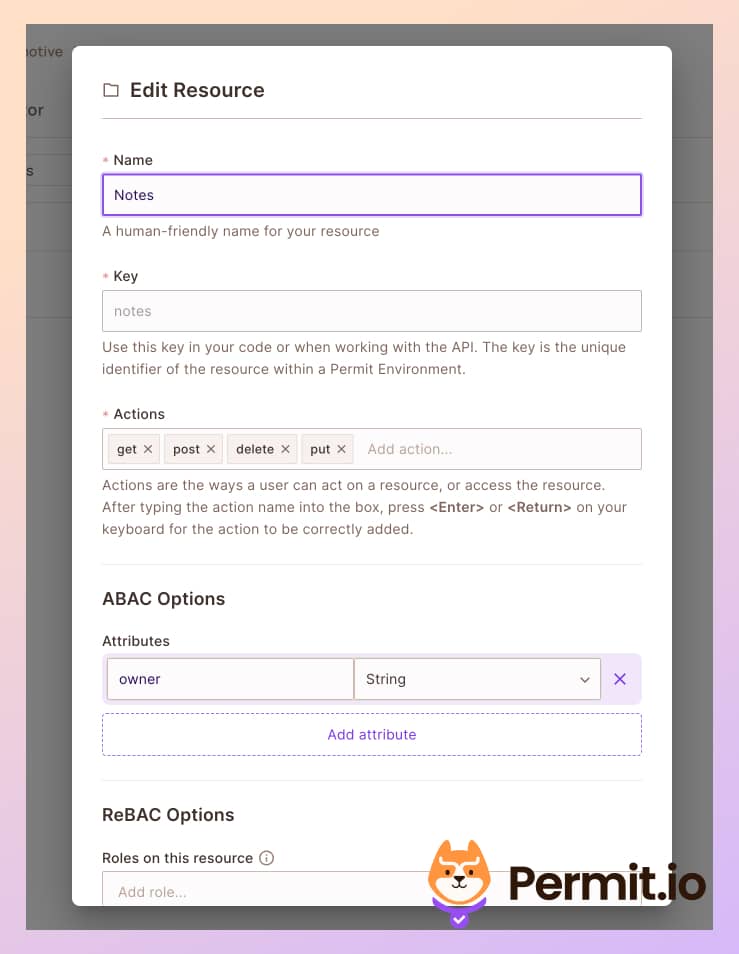
- In the Resources tab, create a new resource called notes, with the following four actions and an owner attribute:
get,post,delete, andput.
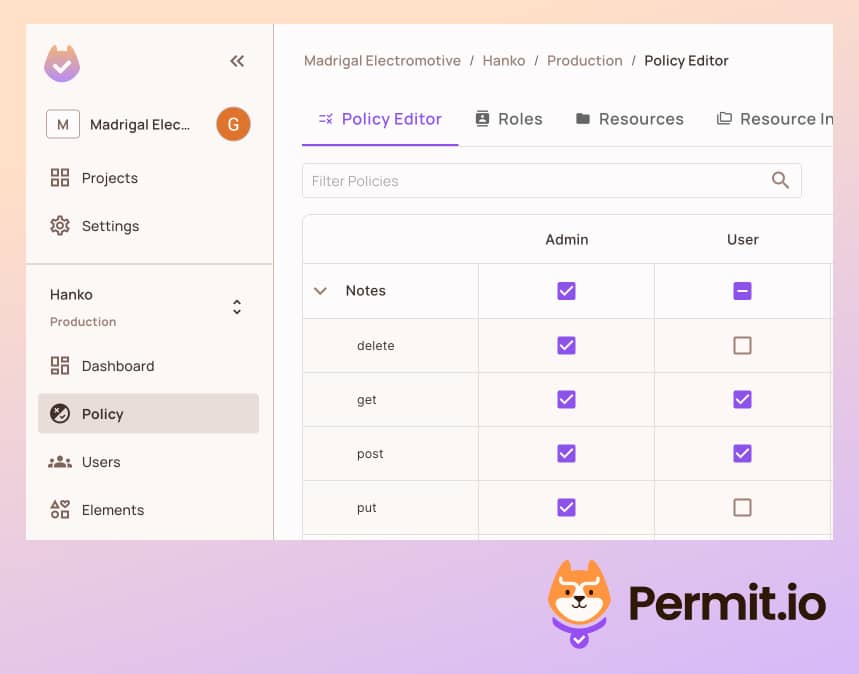
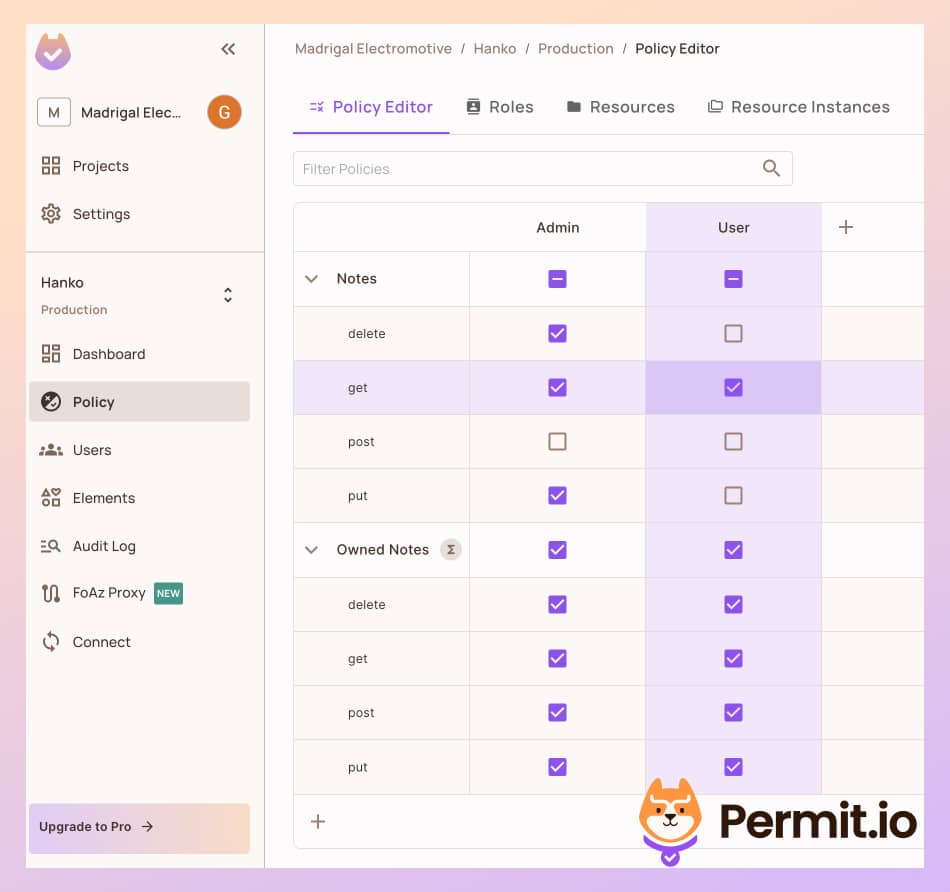
- Back in the Policy tab, let's allow all users to get and
postnotes, and only admins toput, anddeletenotes.
Next, we need to place the Permit.io API credentials in our application config.
-
To use Permit in your application, you get the API key from Permit dashboard.
-
Add the key in your in the
env.localfile:
PERMIT_API_KEY=<YOUR_COPIED_API_KEY>
- We will also want to configure the API endpoint of Permit to check the permissions. For this purpose, we will use the Permit cloud service.
PERMIT_PDP_URL=[https://cloudpdp.api.permit.io](https://cloudpdp.api.permit.io)
To make sure all environment variables are in place, restart the application.
Now that we have everything set up within Permit, it is time to sign up with a user and test if it works.
Sync Hanko Users to Permit.io
To check the permissions we configured, we need to sync the users from Hanko to Permit, so our users will be known to the Permit policy engine.
We will want to automatically assign a user role to every new user, so they will also be part of our newly configured policy. This role helps us to keep the principle of least privilege and give new users only very basic permissions in the application.
In the demo application, you can find the following code in the src/app/api/permit/route.ts file:
const response = await permit.api.syncUser({

key,
  email,
  attributes: {
    roles: ["user"],
  },
});

await permit.api.roleAssignments.assign({

role: "user",
  tenant: "default",
  user: key,

});
This code, as you can see, syncs the user to Permit if they do not exist yet.
Check the Permissions
-
In the
localhost:3000page, log in with a user of your choice, and make sure you have the right passkey configured. -
On the first screen of the application, try to create a new note. It should appear on the list.
-
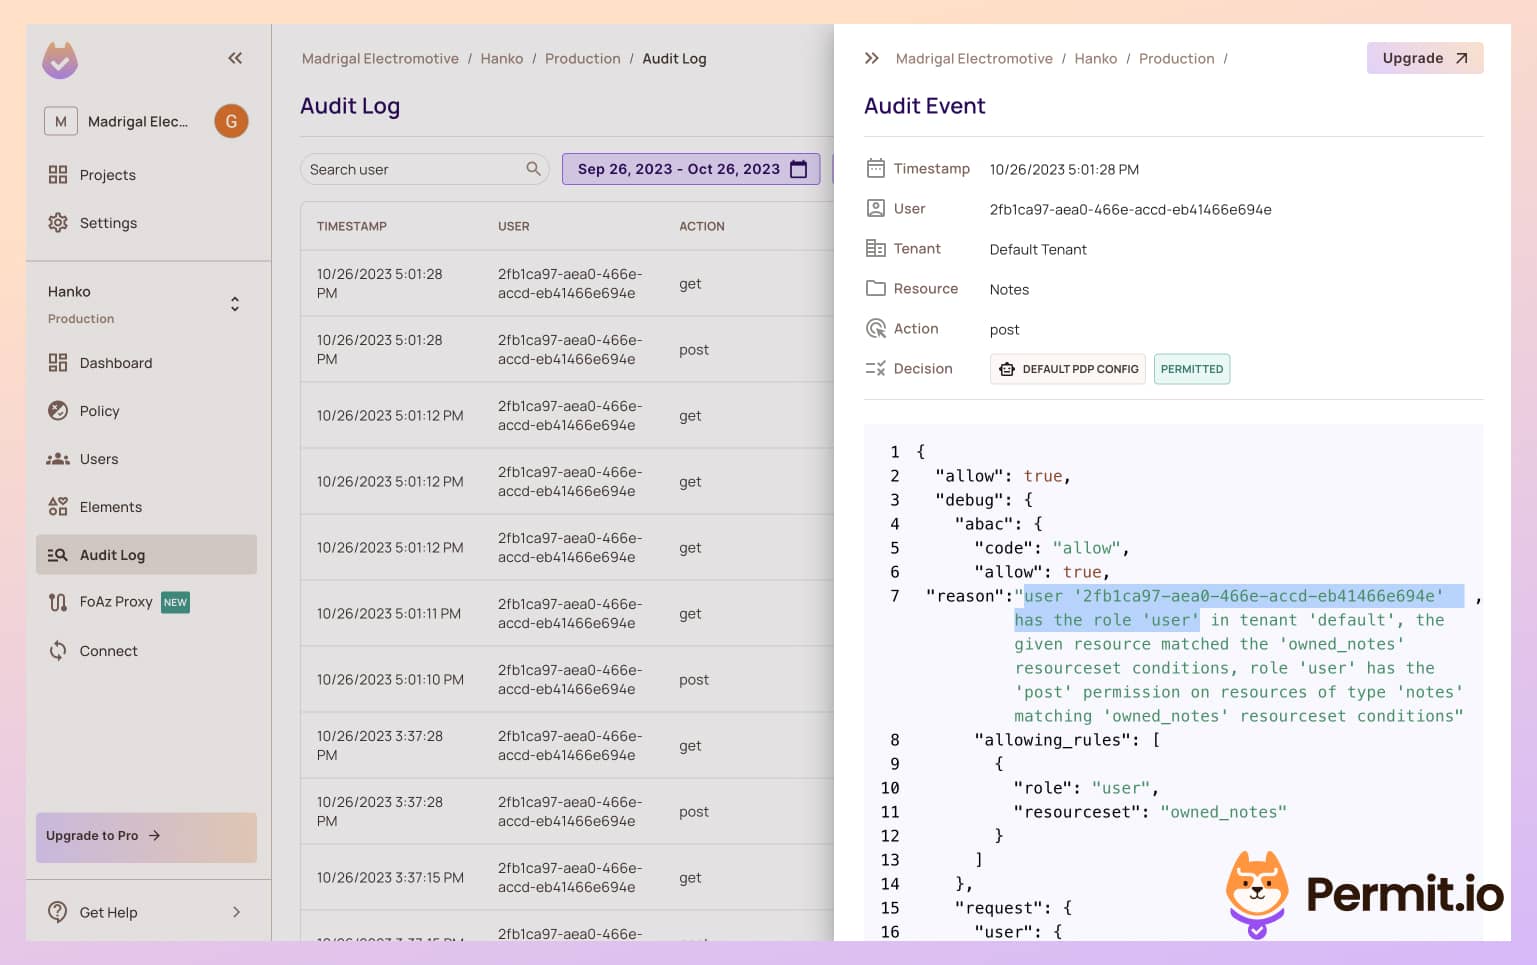
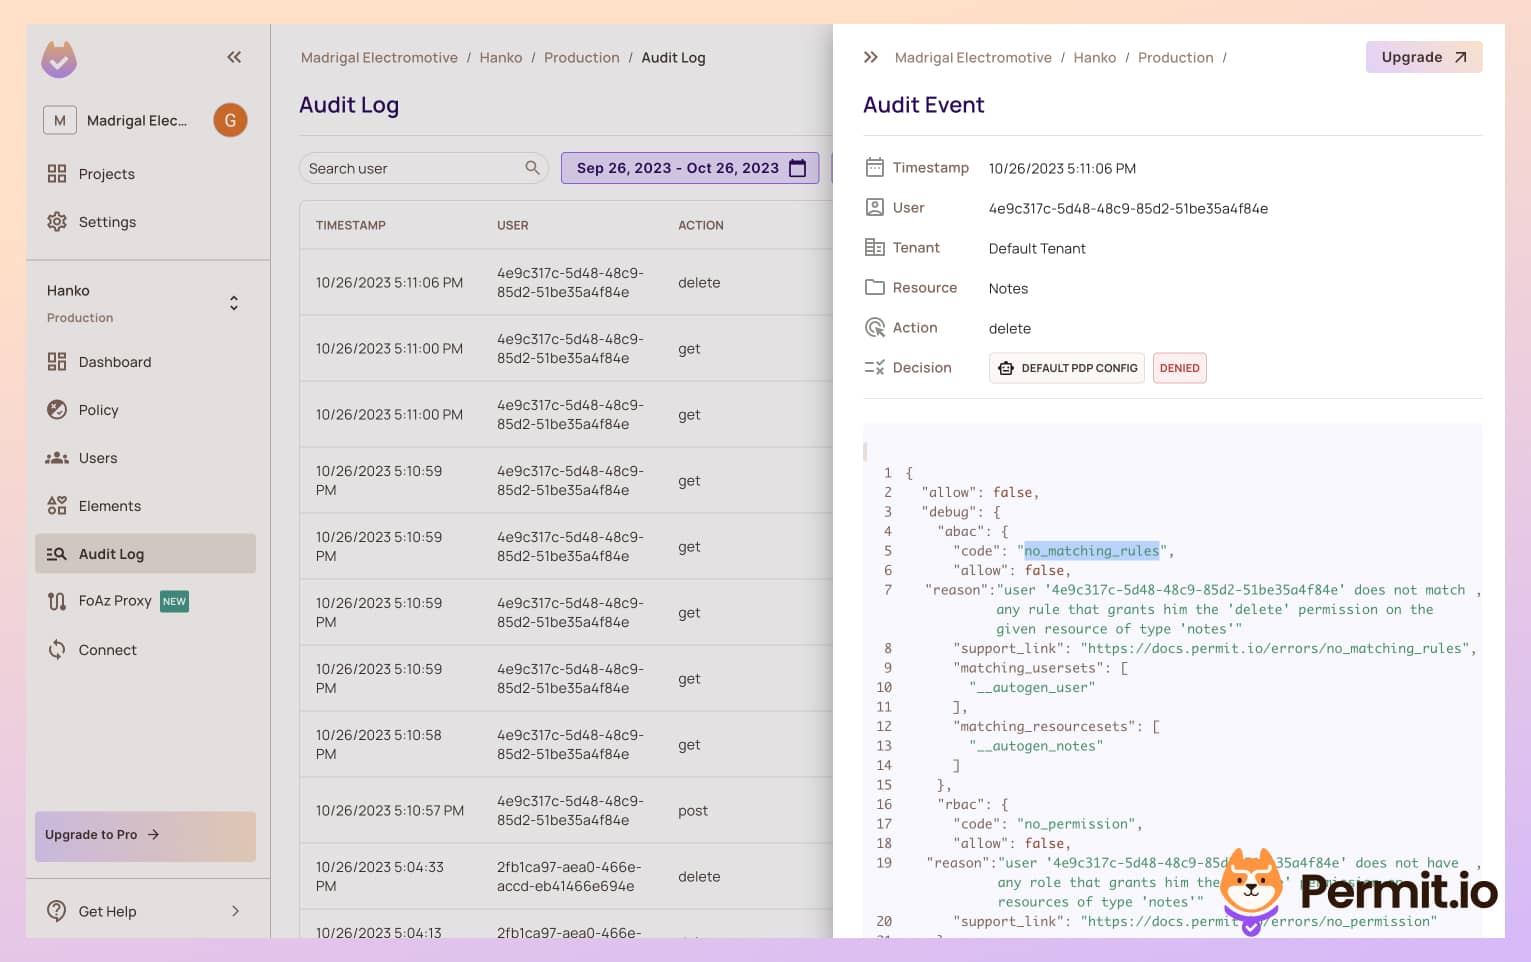
In the Permit Dashboard, go to the Audit Log tab in the left sidebar. You should see that the
postaction was logged. Clicking the log will allow you to see detailed information about the authorization decision that allowed for this action to be performed.Allowwill equaltrueas this user has the User role.
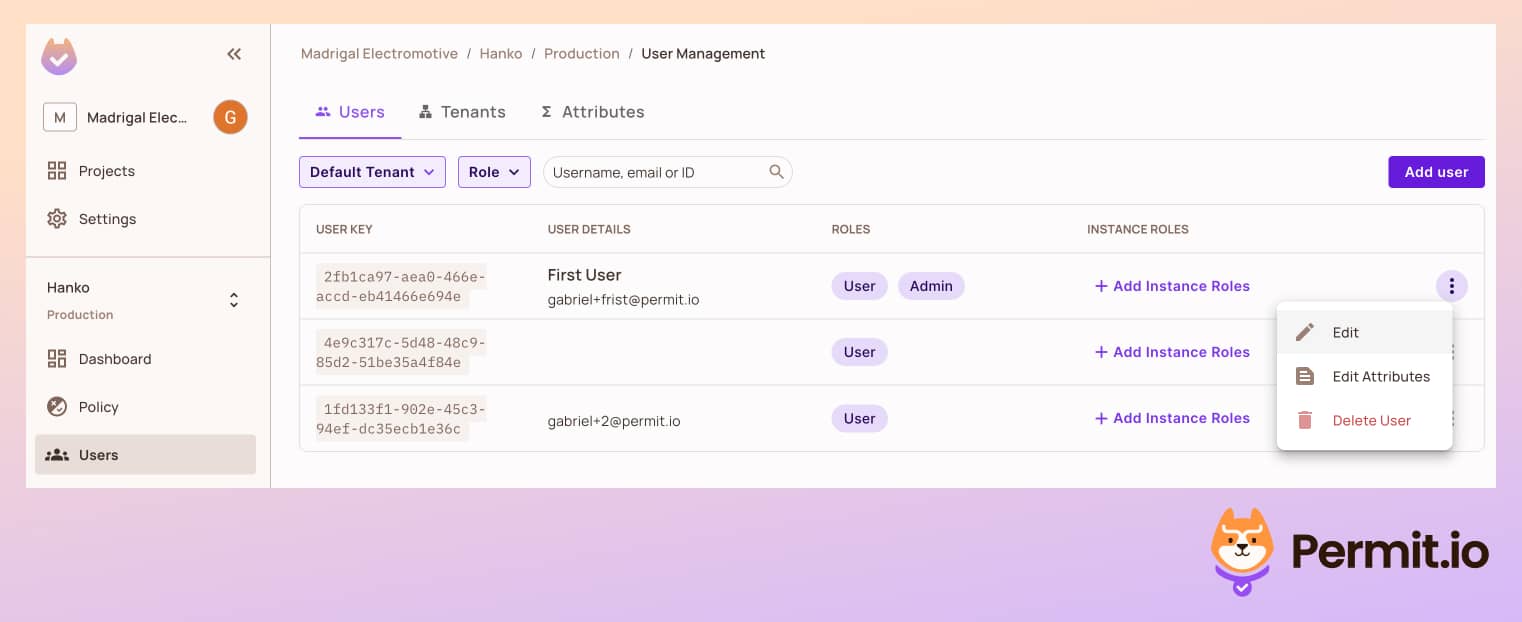
- If we try to delete the note, we will get an error message saying we are not allowed to access this resource. If we grant an Admin role to this user via the Permit UI, the error will be resolved and we will be able to delete the note.
Now that we are done with the Role Based model in our application let's go to the next phase and make our permissions more fine-grained
Add Fine-Grained Attribute-Based Authorization
Note: For this section to run properly, you need to run the Permit.io PDP as a sidecar, You can read how to do that here.
As stated before, the delete action in our app is supposed to be limited to the same user who created the role. This is a more complex policy that cannot be defined by using simple roles - it needs attributes as well.
We can configure this policy in Permit and see it take effect immediately in the application.
- In the Permit dashboard, go to ABAC Rules on the Policy page, and enable the ABAC option.

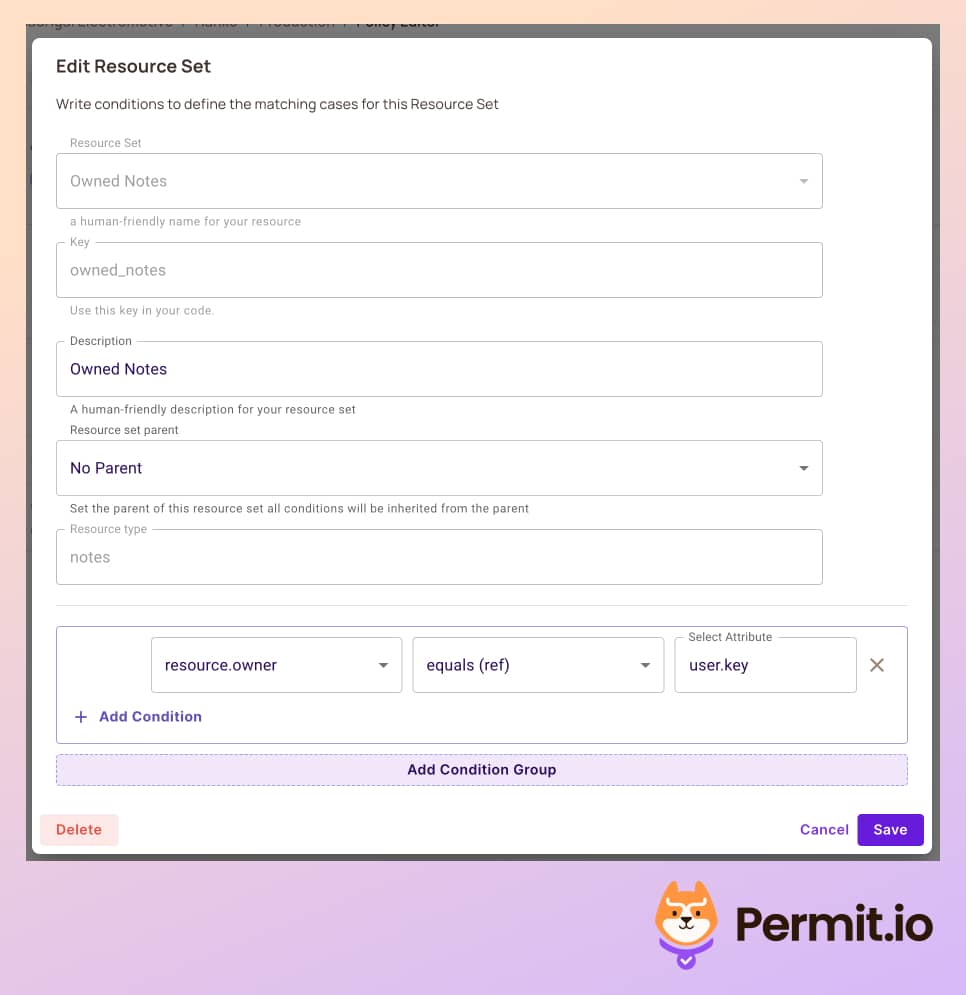
- In the Resources tab, create a new Resource Set rule - this set will create a condition that will be true only if the user is the owner of the note.
- Back in the Policy tab, create a new policy that will allow
put, anddeleteonly for the owner of the note. Mind that we leave the privileged admin role to do all actions.
- At this point, let's add another user to the application. Log out of the application with the current user, and sign up with a new one. This new user should not be able to delete tasks.
-
With this new user, create a new note. You should also be able to delete it.
-
If you log in with a different user after creating the note, you should not be able to delete it anymore, as you are not the one who created it!
Enforce Permissions Everywhere
Sometimes, you will encounter a situation where you need to check permissions in the middle of the application logic. For example, you could want to restrict a particular operation to premium users only.
Using Permit, the policy configuration always remains the same, and you'll only have to use the permit.check function in
every place within the code to determine allowed/not allowed permissions.
new Permit({token: <your_permit_token>});

permit.check(user, action, resource);
Using the permit.check function also lets you make decisions based on data that might not exist in the scope of the request in the
middleware, so you get more granular decisions with no code changes.
Add Fine-Grained Relationship Based Authorization
Another approach for fine-grained authorization that we can use is Relationship-Based Access Control (ReBAC). Assuming a note app, we might want to create workspaces, organizations, and folders for our notes. In this case, we might do not have a dedicated owner field in the note entity, but we have a relationship between the note and the workspace.
Permit also supports the configuration of ReBAC policies, we can easily implement it in our application without changing the
permit.check or any enforcement code in the app. Read more about modeling ReBAC here.