SCIM Integration with Permit.io via Okta
Connecting SCIM with Permit.io
This guide will walk you through integrating SCIM with Permit.io using Okta. SCIM (System for Cross-domain Identity Management) allows you to manage user identities seamlessly across systems.
Prerequisites
Before you start, ensure you have the following:
- Permit API Key
- Permit's project ID and environment ID
- OKTA account
Configuring Okta
-
Add SCIM 2.0 Test App:
- Navigate to Applications -> Applications in your Okta dashboard.
- Click Browse App Catalogue.
- Search for SCIM 2.0 Test App (Header Auth) and click Add.
-
General Settings:
- In the General Settings tab, click Next.
-
Sign-On Options:
- Set this up as a SWA application by selecting Secure Web Authentication.
- Click Done.
-
Configure API Integration:
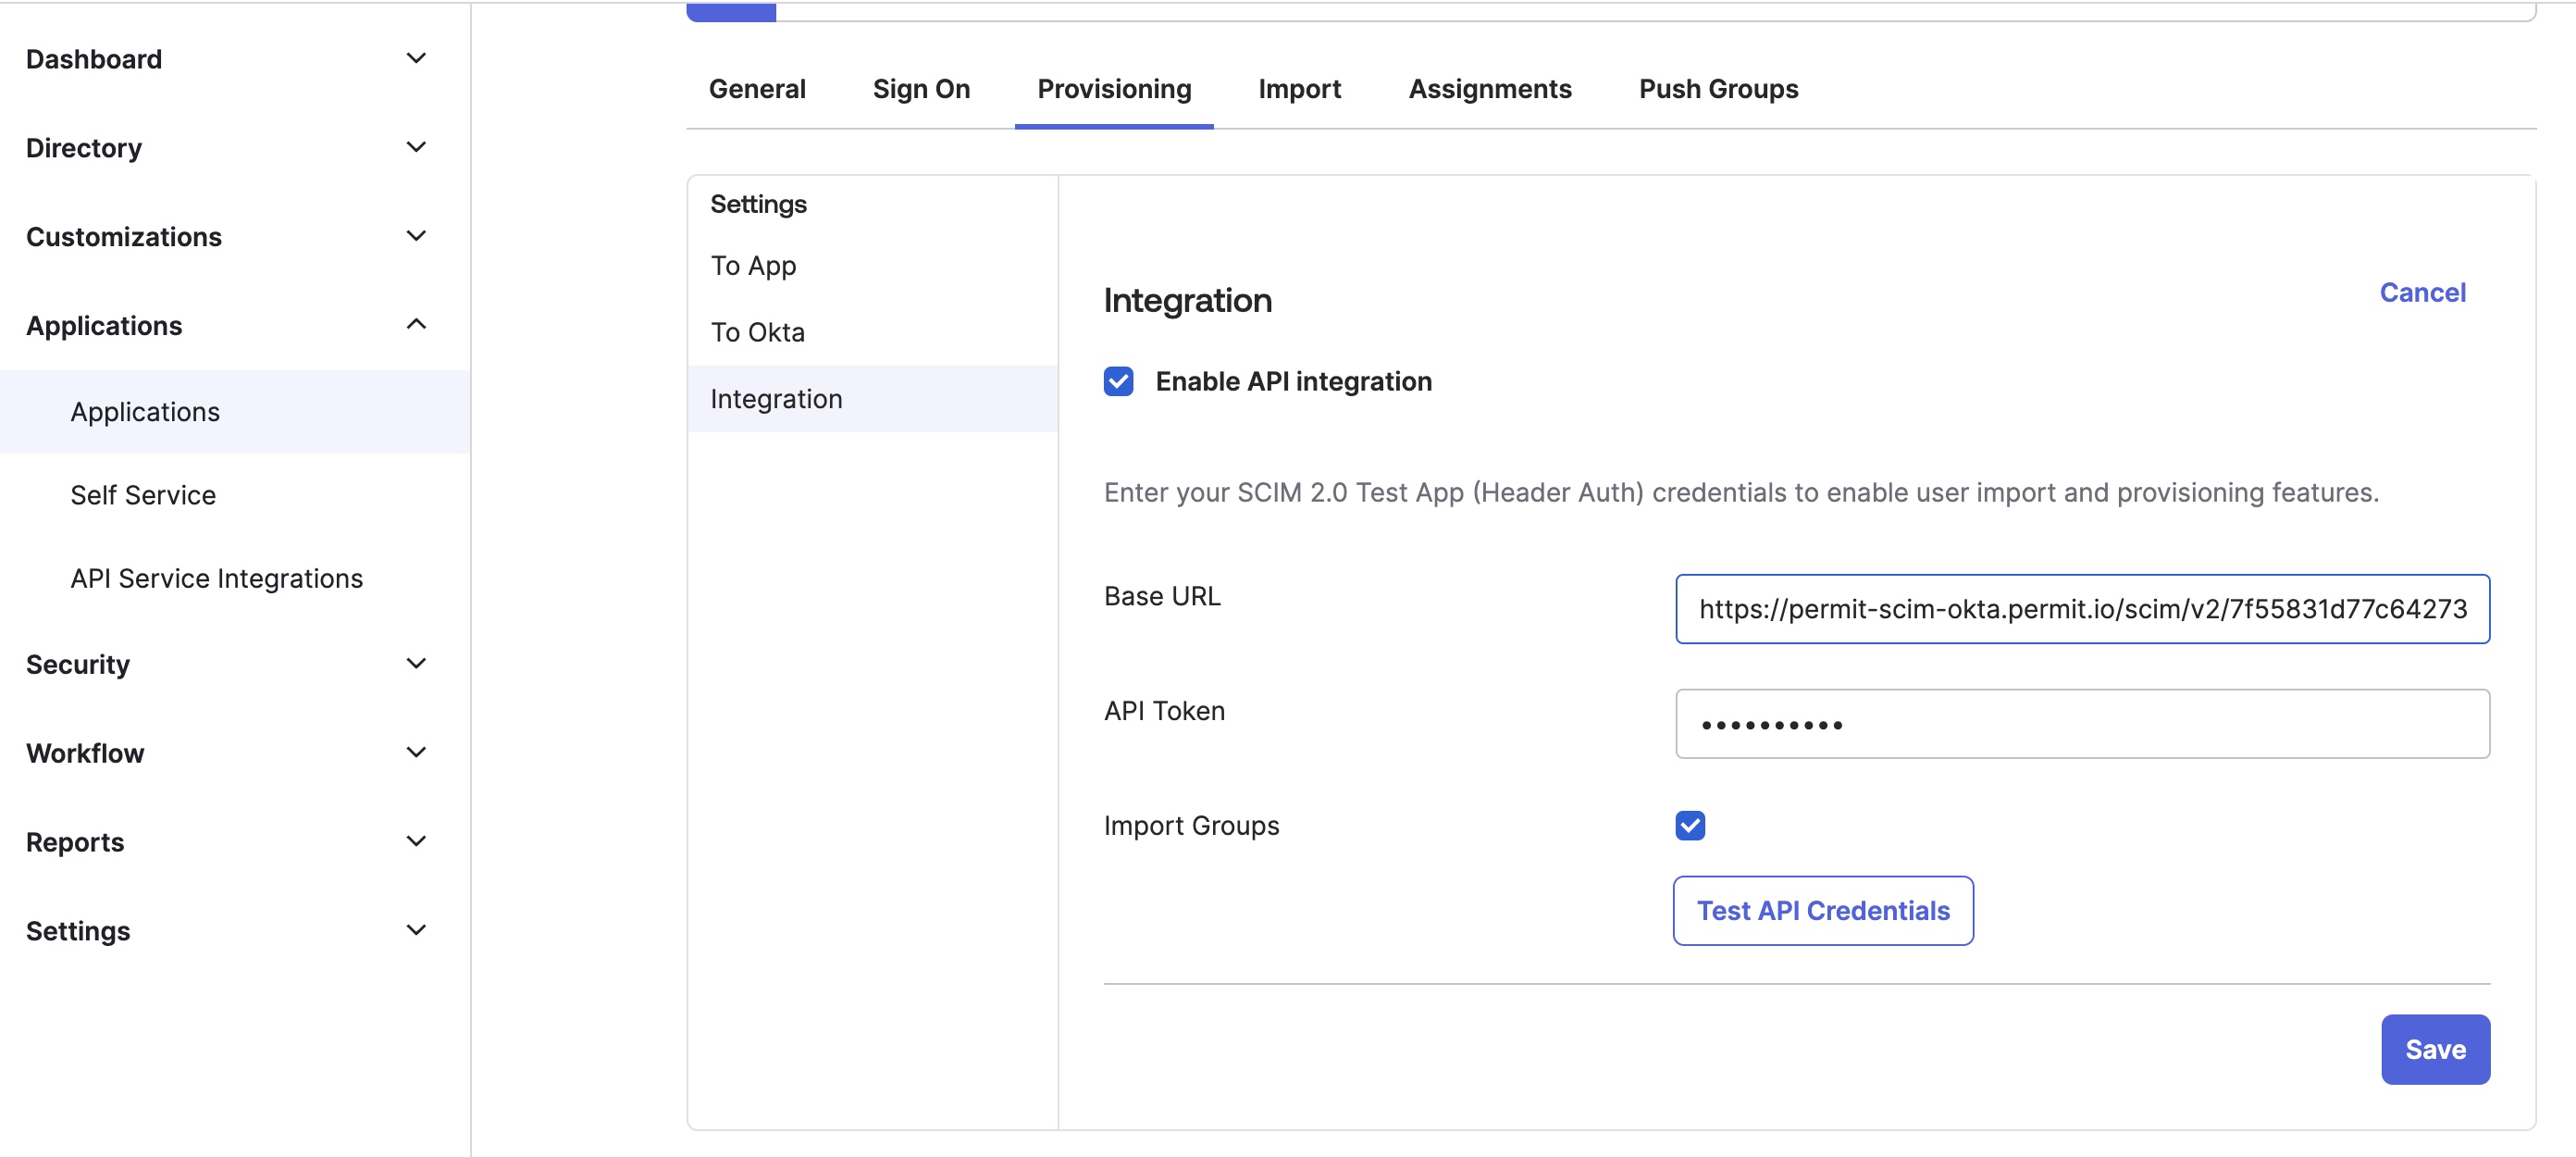
- Go to the Provisioning tab and click Configure API Integration.
- Check Enable API integration.
- In the Base URL field, paste the following URL
https://scim.permit.io/scim/v2/{permit_project_id}/{permit_env_id}. - Optionally base URL for EU users
https://scim.eu-central-1.permit.io/scim/v2/{permit_project_id}/{permit_env_id}. - In the API Token field, enter your Permit API KEY.
- Click Test API Credentials to verify the setup. You should see a success message.
-
Final Configuration:
- Your configuration should resemble the following:
-
Provisioning Settings:
- Click Edit next to Provisioning to App.
- Check the following options:
- Create Users
- Update User Attributes
- Deactivate Users
- Click Save.

-
Manage Users and Groups:
- Use the Assignments tab to add users or groups.
- Use the Push Groups tab to add Okta groups corresponding to Permit.io roles.
Enjoy the seamless integration between Okta and Permit.io!