Run your First Policy Check (Managed Cloud PDP)
Performing your first policy check is a key step in understanding and validating the policies you've configured. The policy decision point (PDP) lies at the heart of Permit's Authorization system, determining whether a user is authorized to perform specific actions on a resource. This ensures that your access control model is working as intended.
This guide uses the Managed Cloud PDP hosted by Permit.io at https://cloudpdp.api.permit.io.
It is fully managed and eventually consistent, and is great for quickly trying out Permit and for many production workloads that don't require strict read-your-own-writes guarantees.
If you already know you need ABAC policies, strict read-your-own-writes consistency, or to keep all authorization traffic inside your own VPC, you can skip ahead to
Run Local Authorization Microservice (Edge PDP).
Before we start: Understanding the check function
The check function acts as a guard at the heart of your application's access control system. It evaluates whether a specific user
has the necessary permissions to perform an action on a resource, ensuring that only authorized users can proceed. By taking key
parameters such as the user ID, action, and resource, the check function queries the policy engine to return a decision.
What exactly are the arguments passed into the
permit.check()function?
user: a unique string id or object that identifies the user performing the action.action: the action performed.resource: the resource (object) the action is performed on. Can be a string or an object.
This guard mechanism is critical for enforcing your configured policies and seamlessly integrating authorization into your application's workflows.
The check function can accept various arguments beyond the user and resource.
Understanding Your Policy Configuration
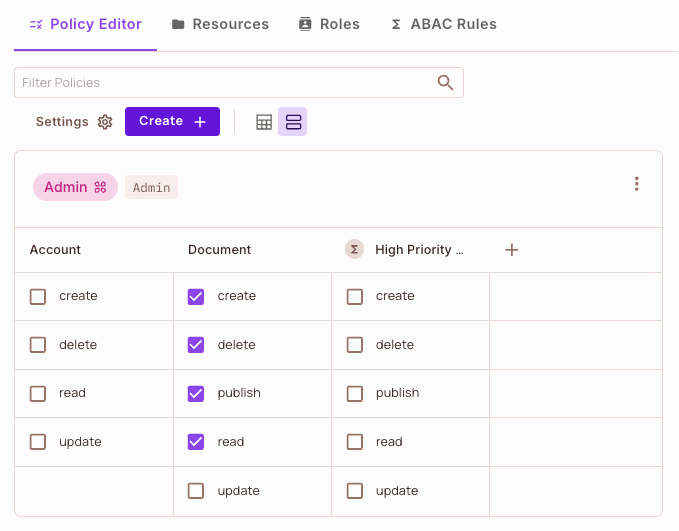
Let's examine the policy we'll be working with. As shown below, the Admin role has permissions to create, delete, publish, and read, but notably, it does not have permission to update.
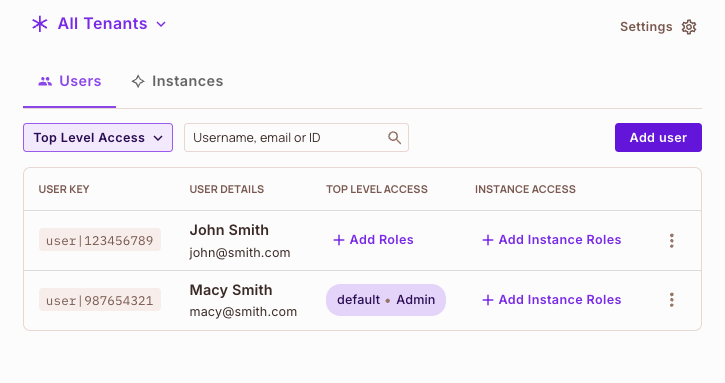
Reviewing User Assignments
We have two users in our setup, but only one of them has the Admin role assigned. For this example, we'll focus on checking the permissions assigned to Macy Smith, who holds the Admin role.
Setting Up the Enforcement Point
Our Permit enforcement point in the code will look like this:
This code snippet:
- Identifies the user making the request
- Specifies the action being attempted
- Names the resource being accessed
- Returns a boolean indicating whether the action is permitted
Testing Initial Permissions
Let's run our first check with the current permissions:
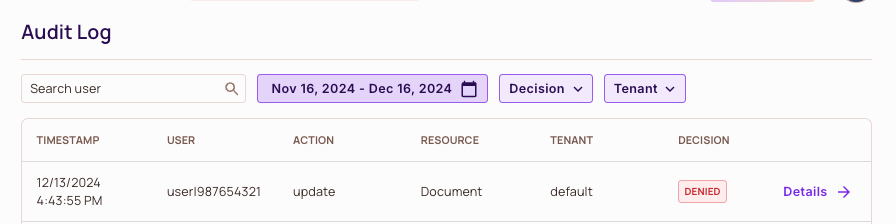
As expected, the check fails because Macy doesn't have update permissions.
Updating Permissions
Now let's alter our permissions and give Macy the ability to update the Document.
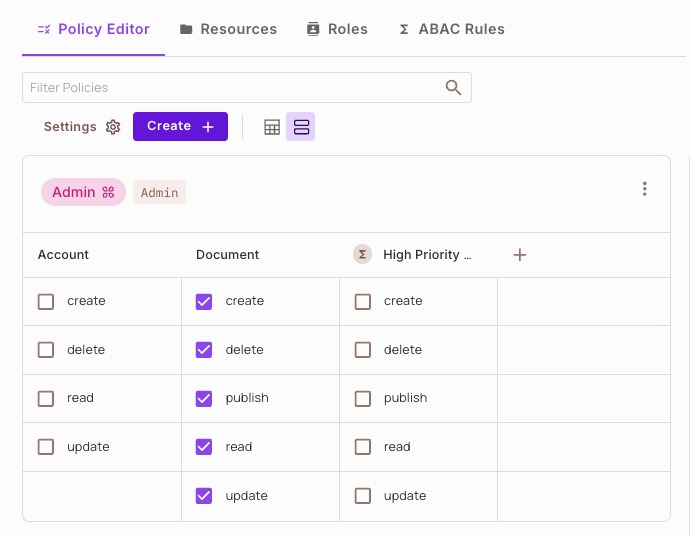
Testing Updated Permissions
Let's run the check again with the updated permissions:
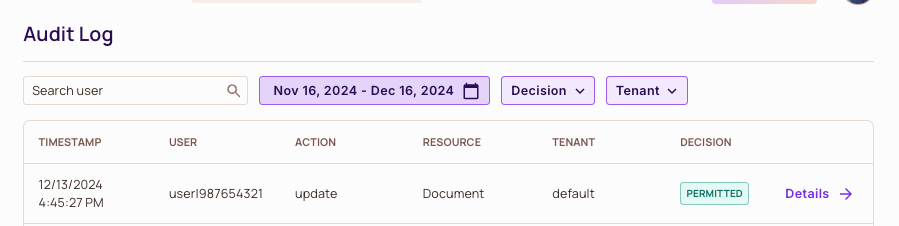
Success! Macy can now perform all the actions, including updates.
For latency-sensitive deployments, we recommend deploying a local PDP to minimize network latency and ensure high availability. Learn more in our Local Authorization Microservice guide and the Cloud PDP Capabilities page.
What did you learn?
By configuring the Cloud PDP for policy checks, you've learned how to:
- Import and initialize the Permit SDK in your project
- Set up an enforcement point in your code using the check function
- Validate user permissions against your configured policies in real time
- Leverage the flexibility of the Cloud PDP to handle RBAC policy decisions seamlessly
Did you know that modern policy checks can process thousands of decisions per second?
Companies like Netflix use similar mechanisms to authorize every single request in their systems—whether it's playing a movie or accessing account settings.
What's next? 🎉
- Set up a local PDP for enhanced performance
- Configure your application for local authorization
- Learn about monitoring and debugging your PDP
Amazing! You've mastered cloud policy checks.