n8n Workflow with Linear MCP Gateway
A walkthrough demonstrating how to set up Permit.io's Agent Security MCP Gateway so that you can trust automated workflows built with n8n.
Problem Statement
Automated workflow builders like n8n allow you to connect to external MCPs — automated tools calling automated tools. But who is monitoring all of this? Where are the checks on the system?
That is where Permit.io's MCP Gateway comes in. Using the MCP Gateway, you can control exactly which tools an agent or workflow can use.
This demo shows how to solve that by placing Permit.io's MCP Gateway in front of a n8n workflow.
Task: Use Permit.io's MCP Gateway to allow an n8n workflow to access only specific tools of a Linear MCP.
Before You Begin
The n8n Workflow
For this demo, assume you use two popular tools for work management: Attio (CRM) and Linear (project tracking). You have an Attio object that tracks all customers. For every new sale, you want to automatically create a Linear issue. Let's automate this with an n8n workflow.
The workflow has three components:
- API Webhook Listener (Attio) — listens for new items added to Attio
- HTTP Fetcher — retrieves the new item data from Attio
- MCP Client — calls the MCP Gateway to create a Linear issue with the item data
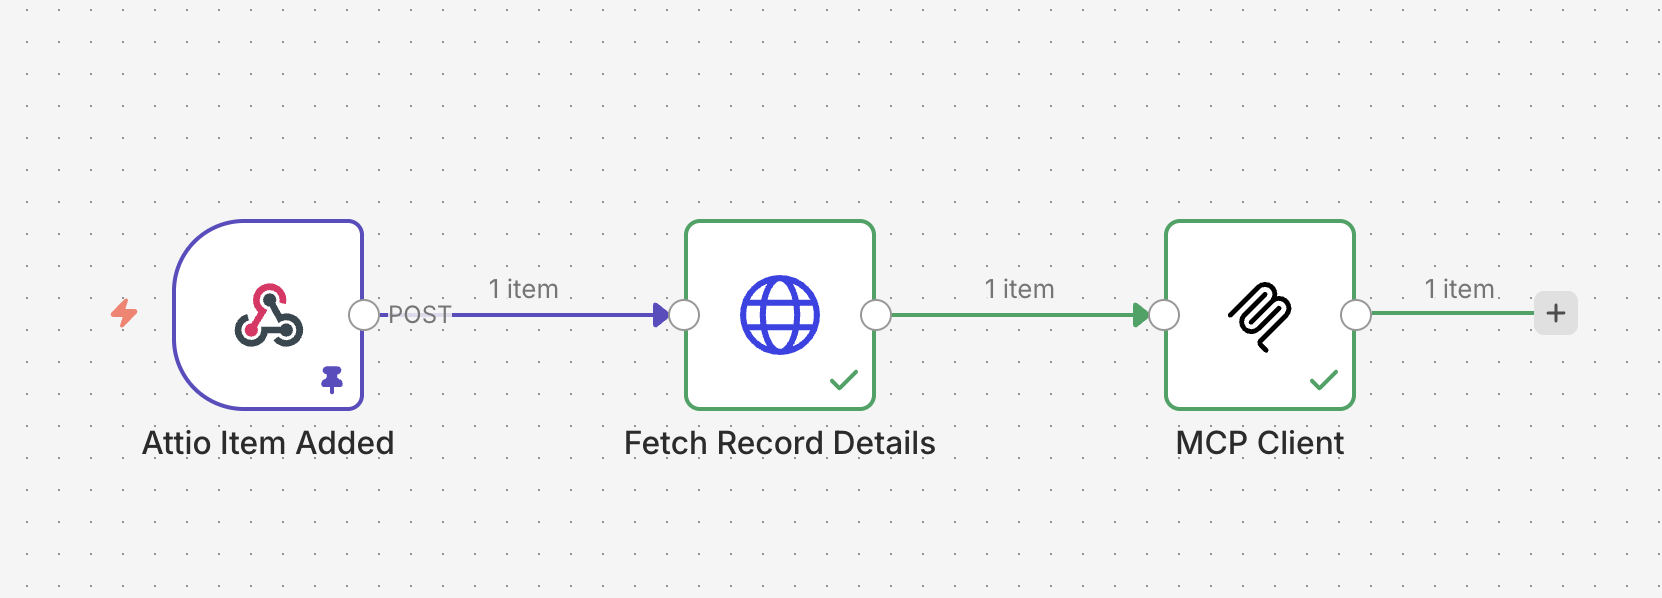
Since this demo focuses on the MCP Gateway integration, we'll skip to component 3 — the MCP Client.
Step 1 — Configure the MCP Client in n8n
-
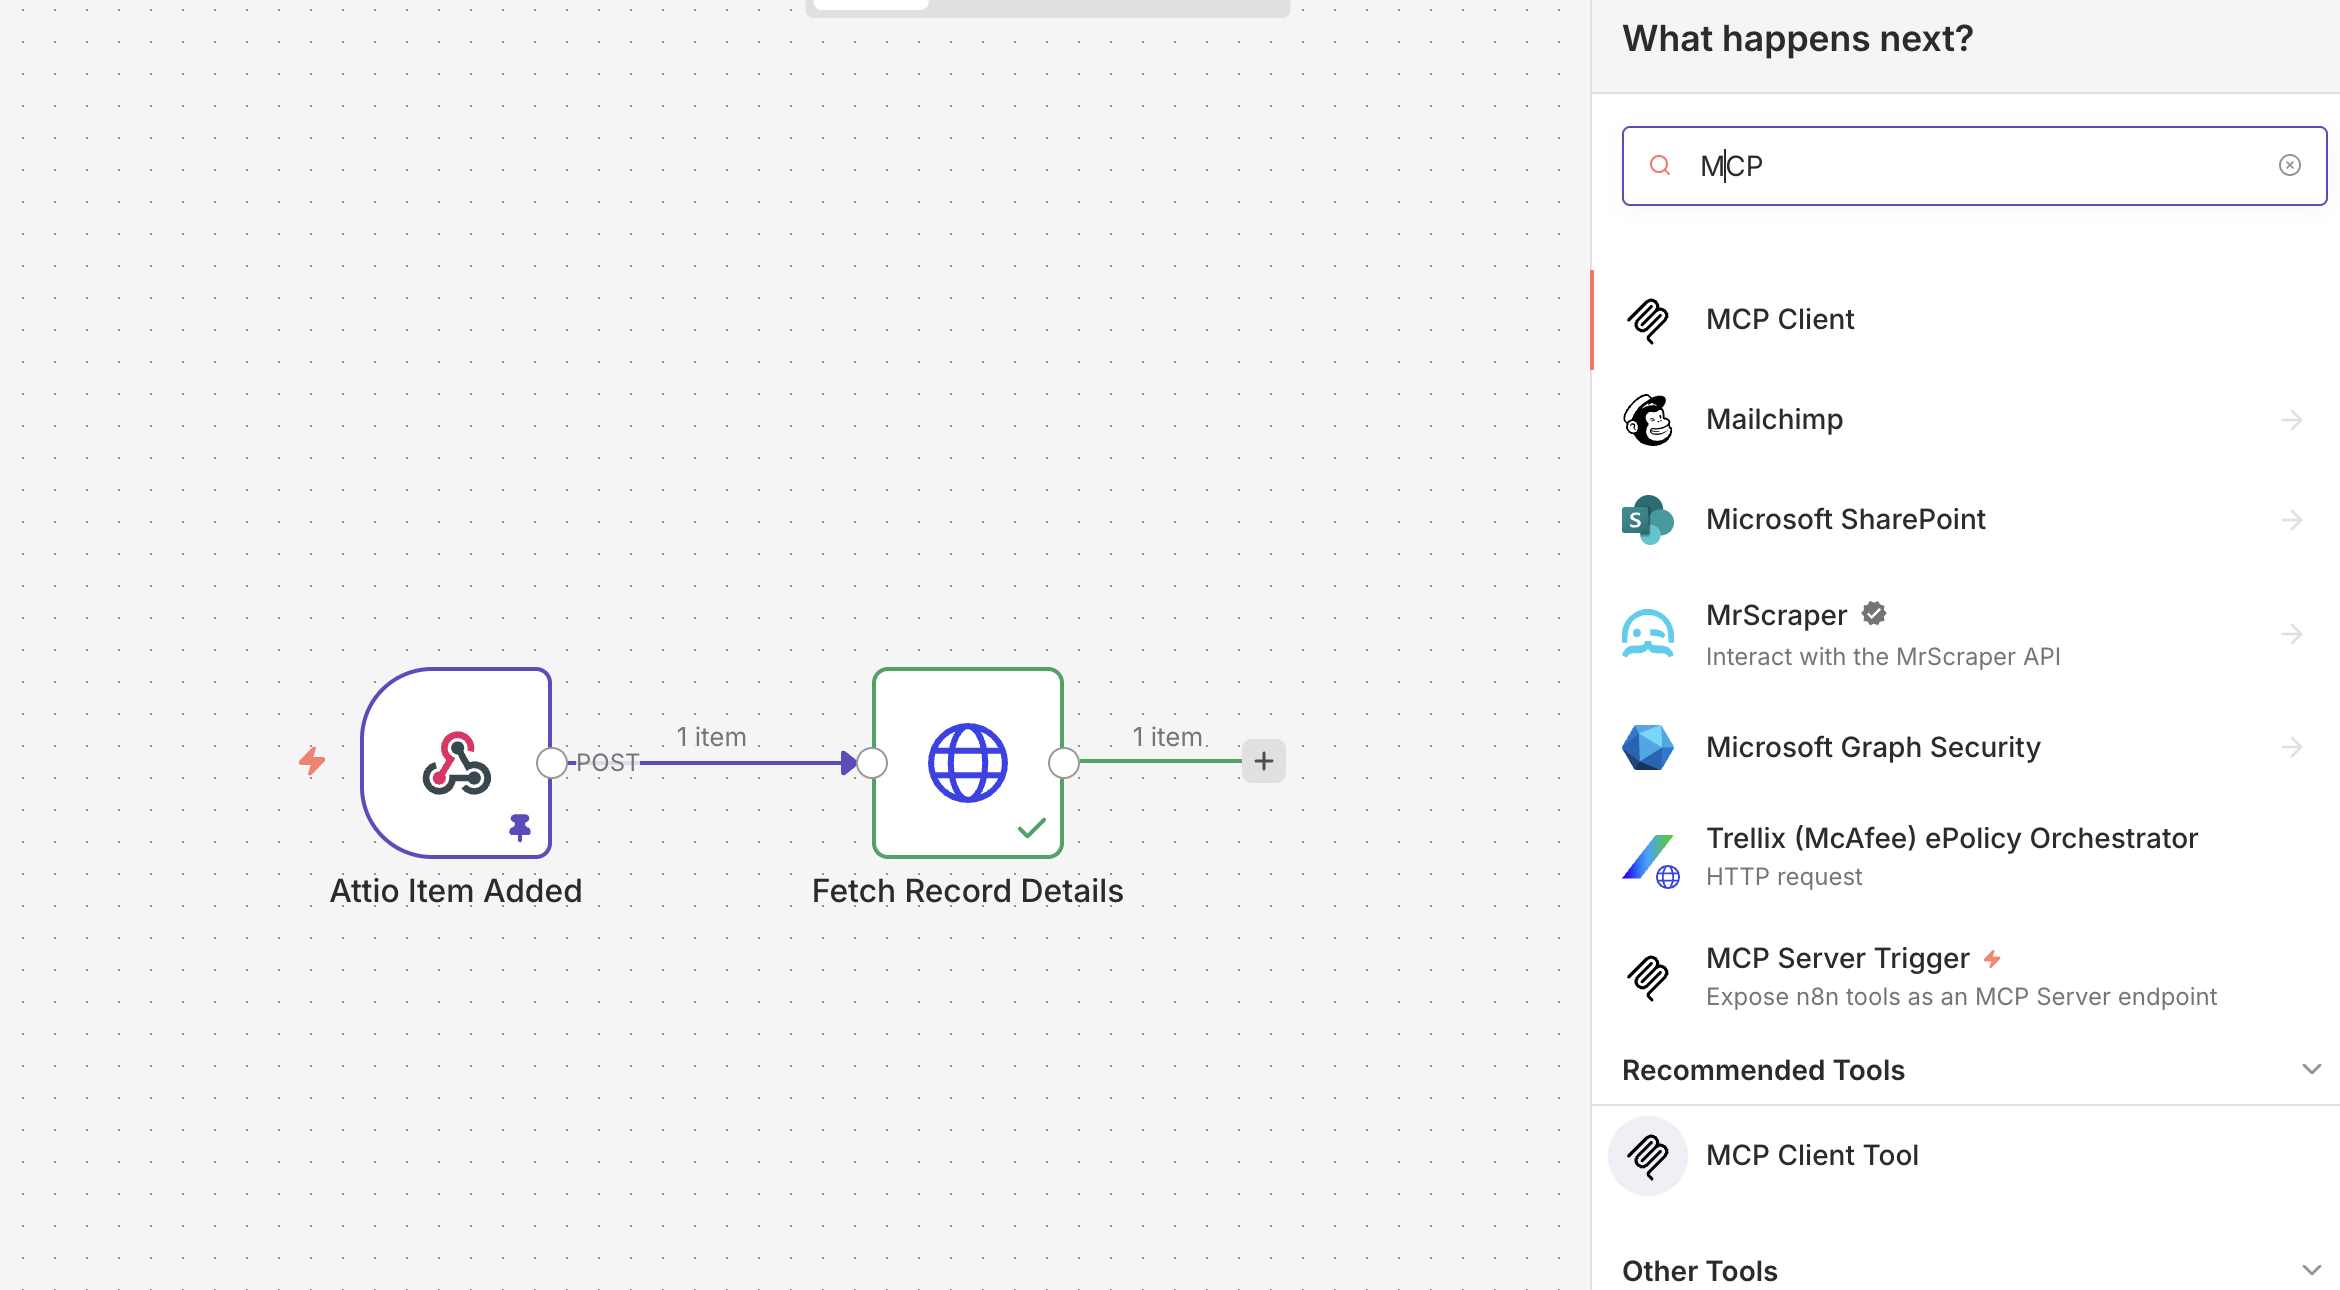
In your n8n workflow, grab MCP Client from the tool selector on the right.
-
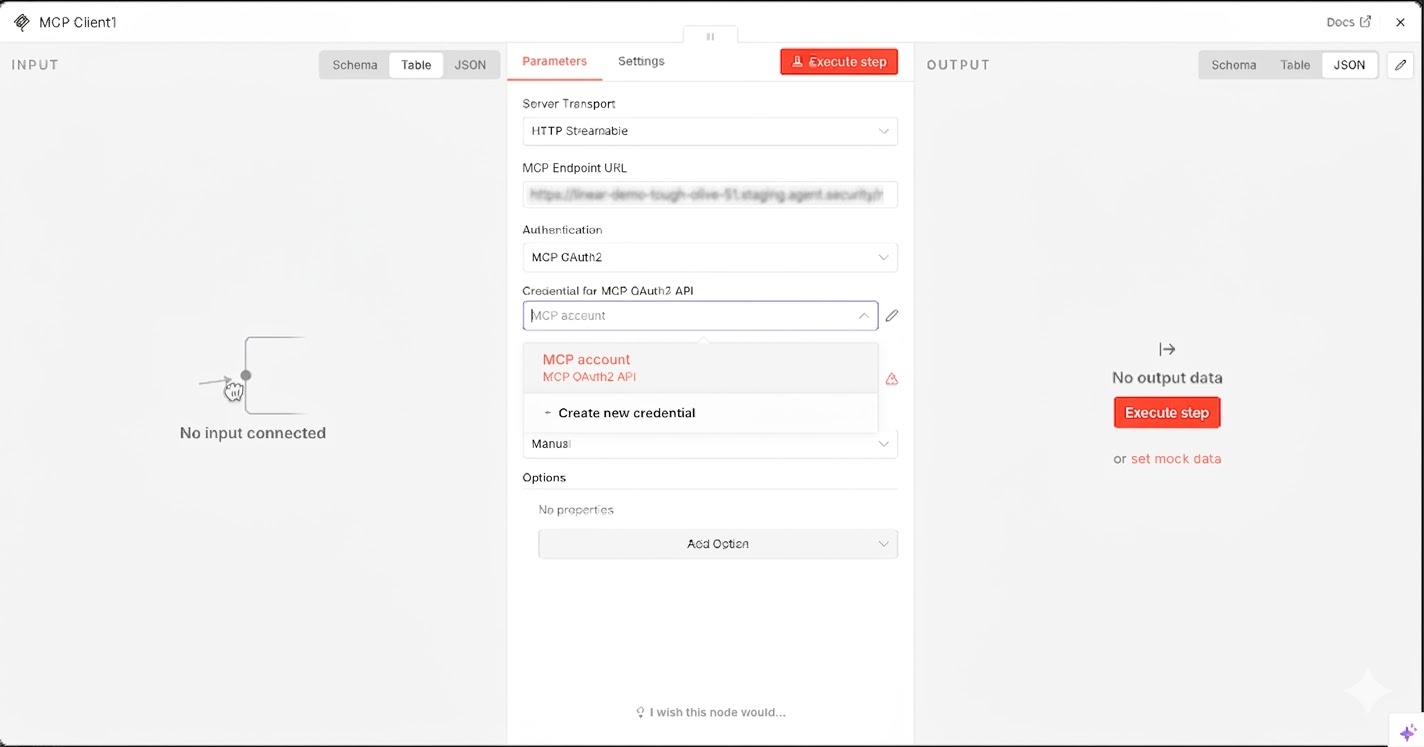
Insert the URL from the Linear MCP you created previously in the Agent Security Platform. For Authentication, select MCP OAuth2 and then Create New Credential.
-
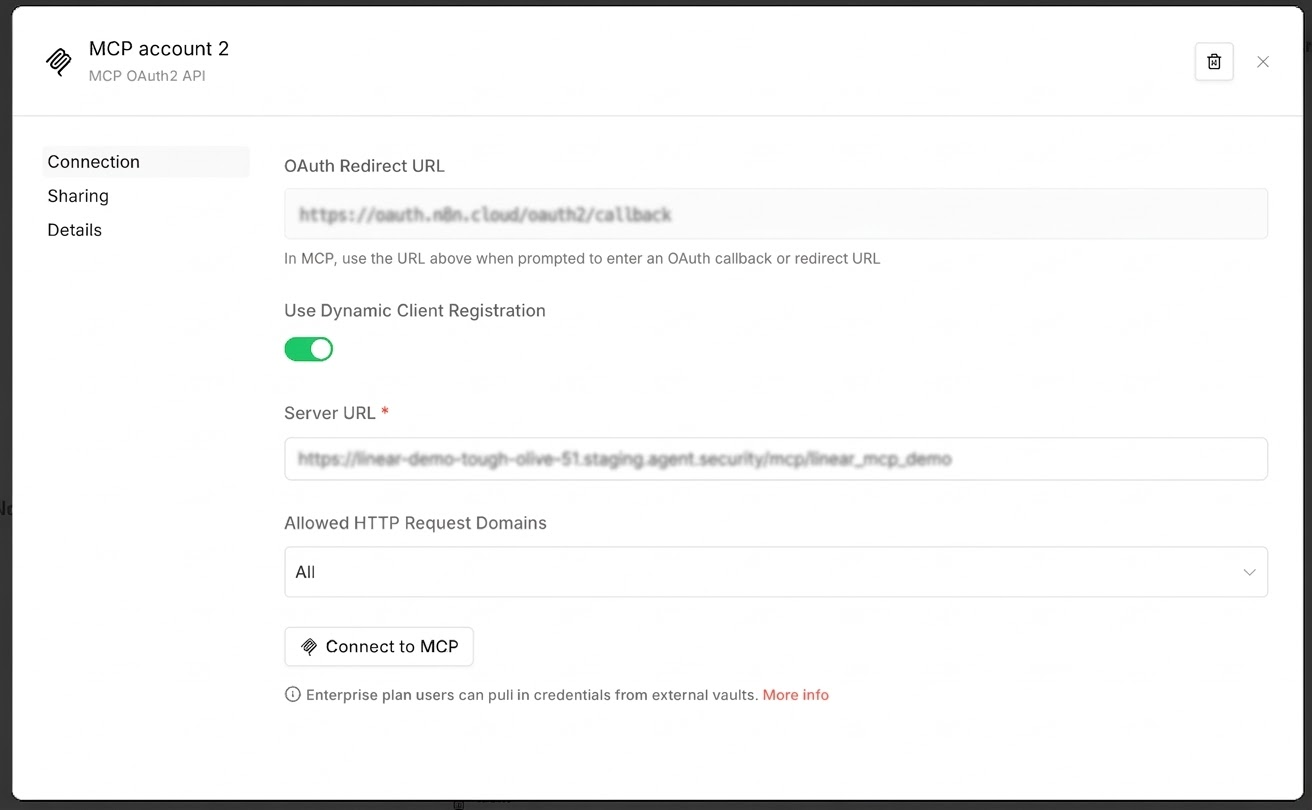
In the Create New Credential modal, enter the MCP Endpoint URL again and press Connect to MCP.
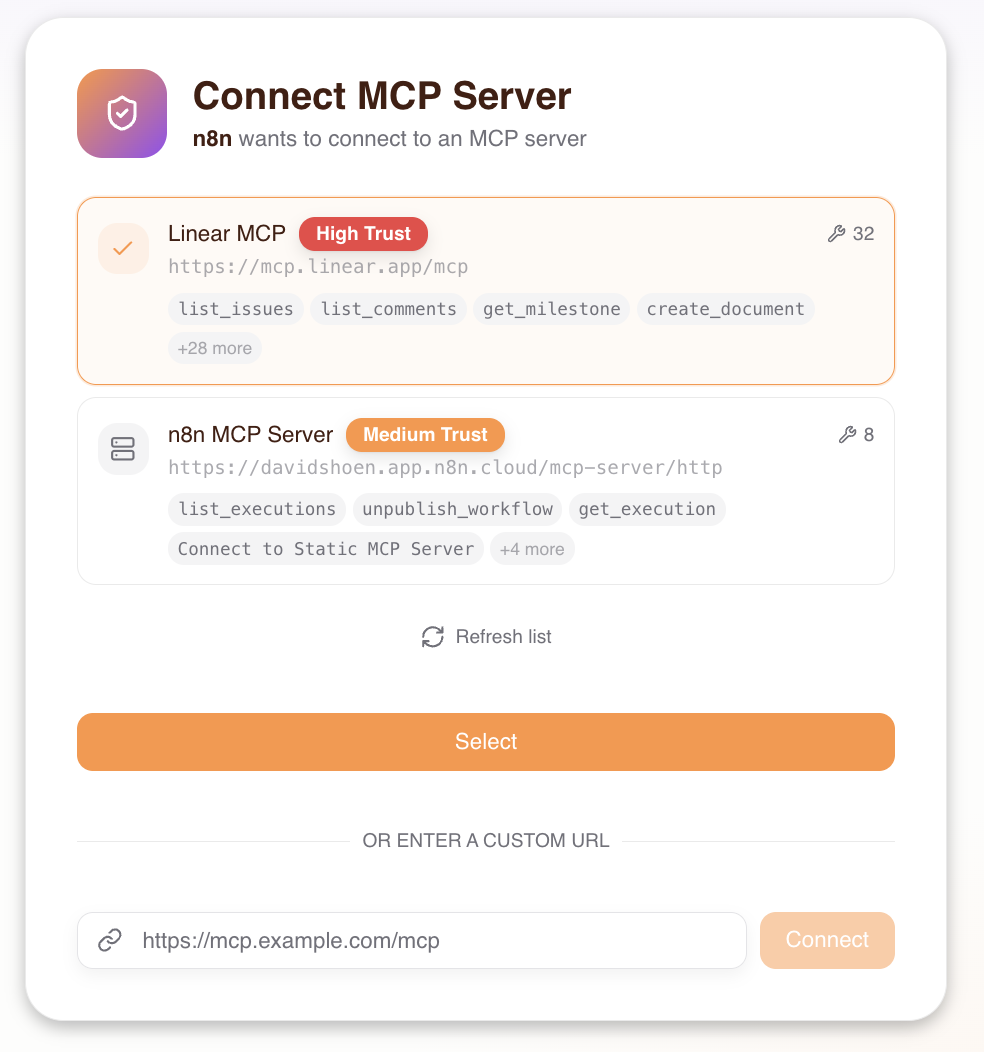
-
This brings you to the Consent Service screen to select which MCP to include for this workflow. Select the Linear MCP.
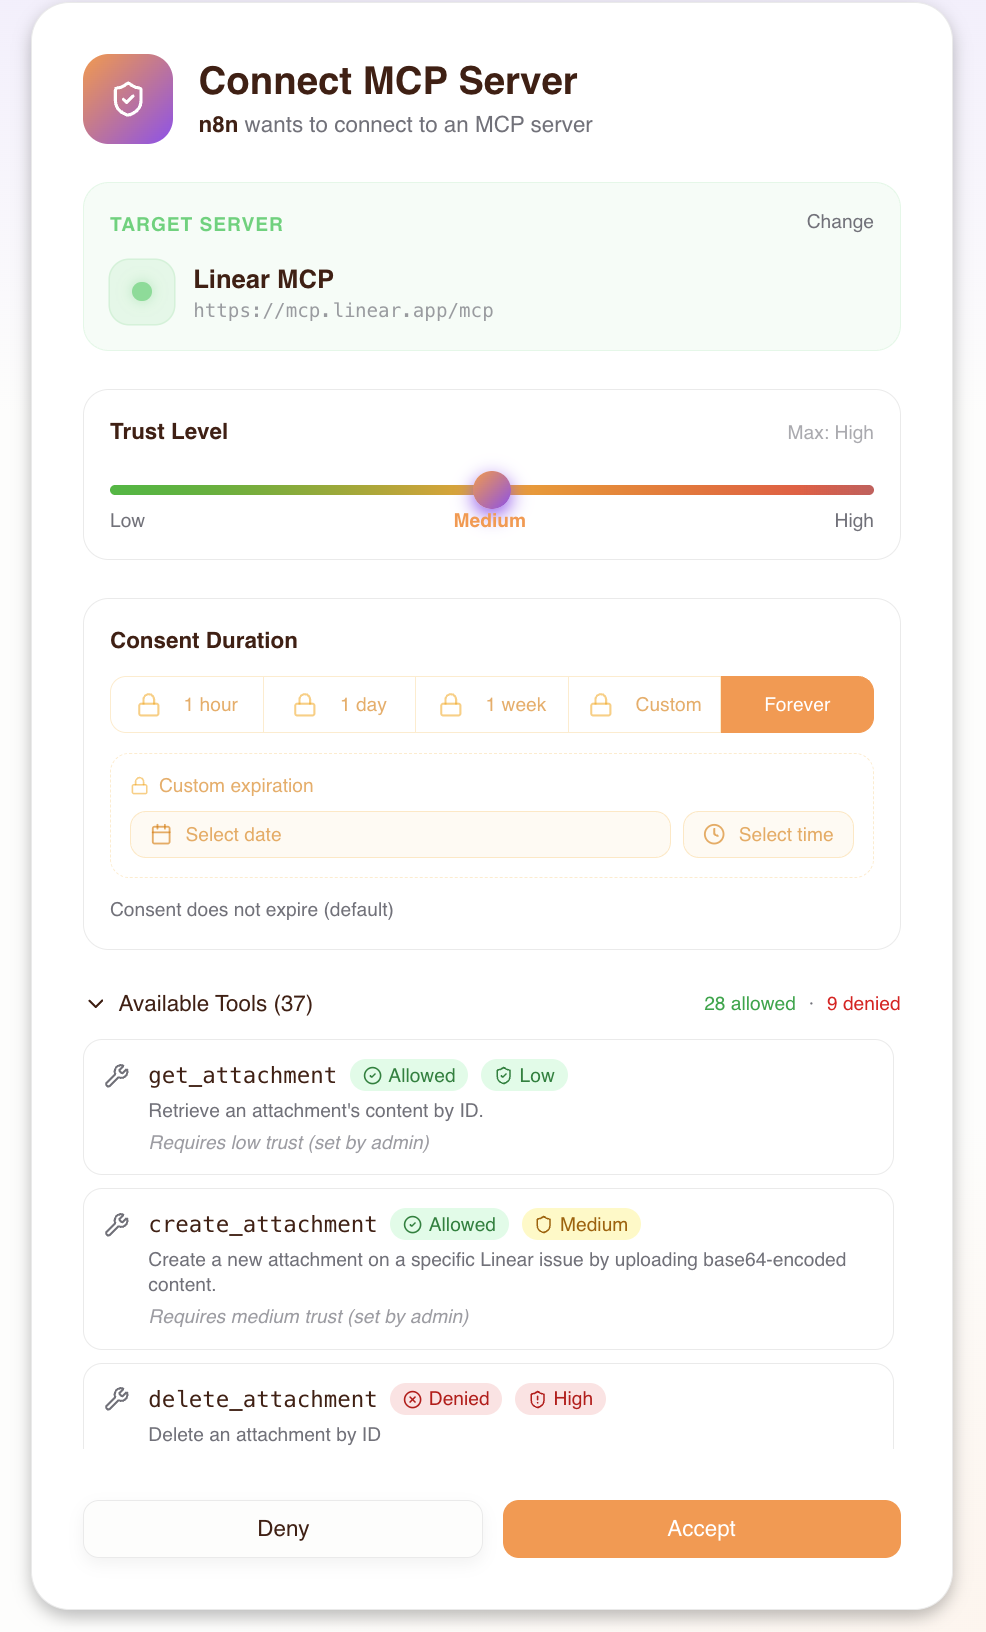
-
You will be prompted to sign in and grant access to Linear. Then you will be asked to import and assign trust levels for all of Linear's tools. This is where you directly control what n8n can do.
Step 2 — Configure the Linear Action
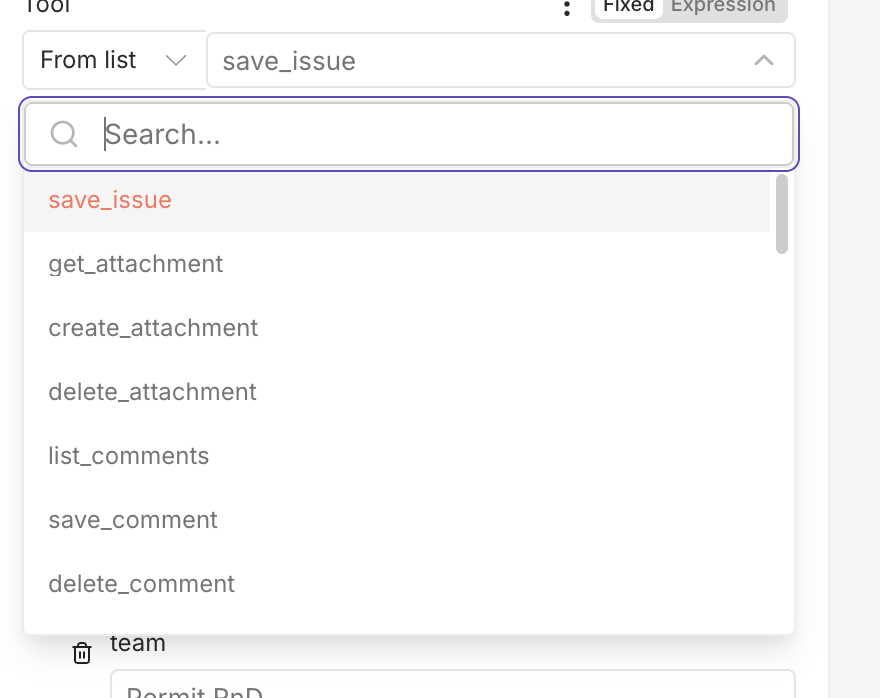
-
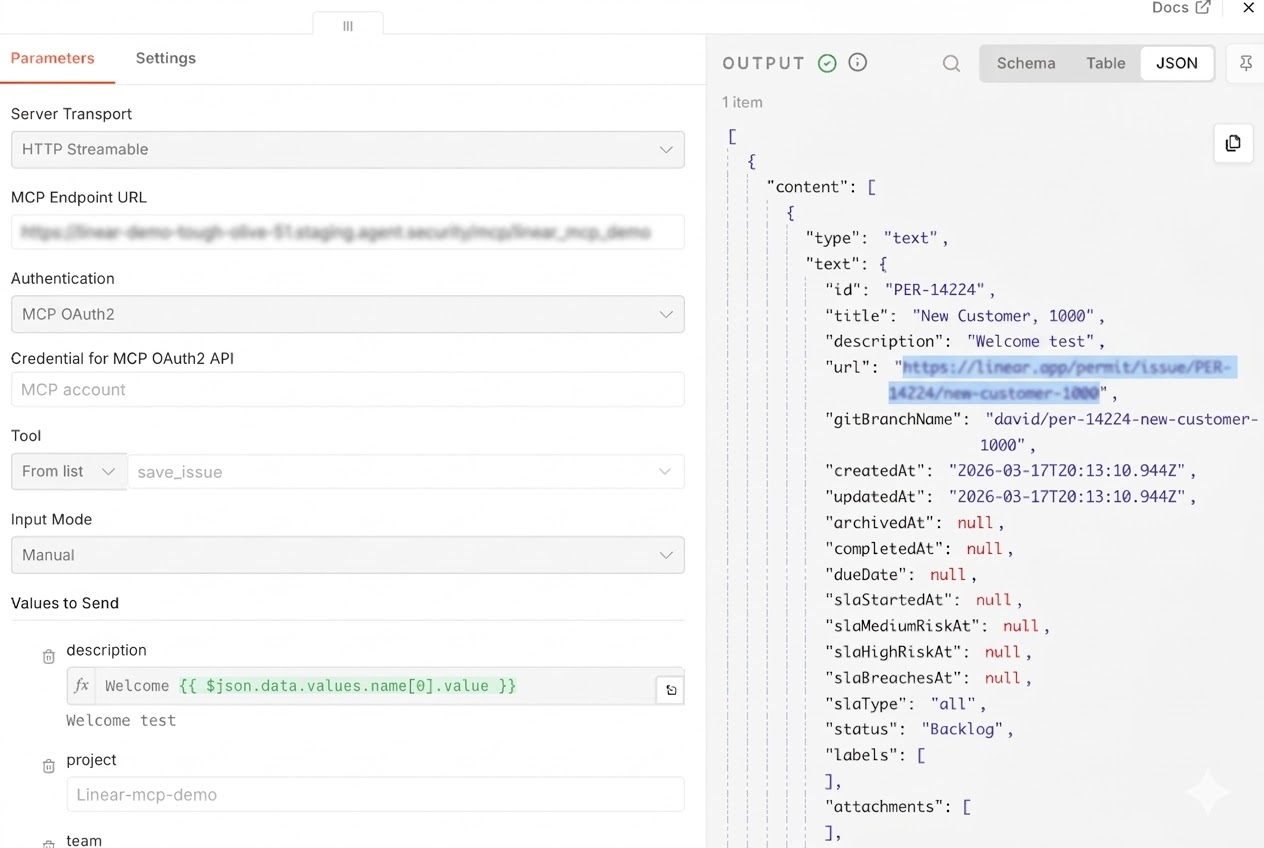
In the MCP Client config area, n8n now shows all the imported Linear tools. Select save_issue.
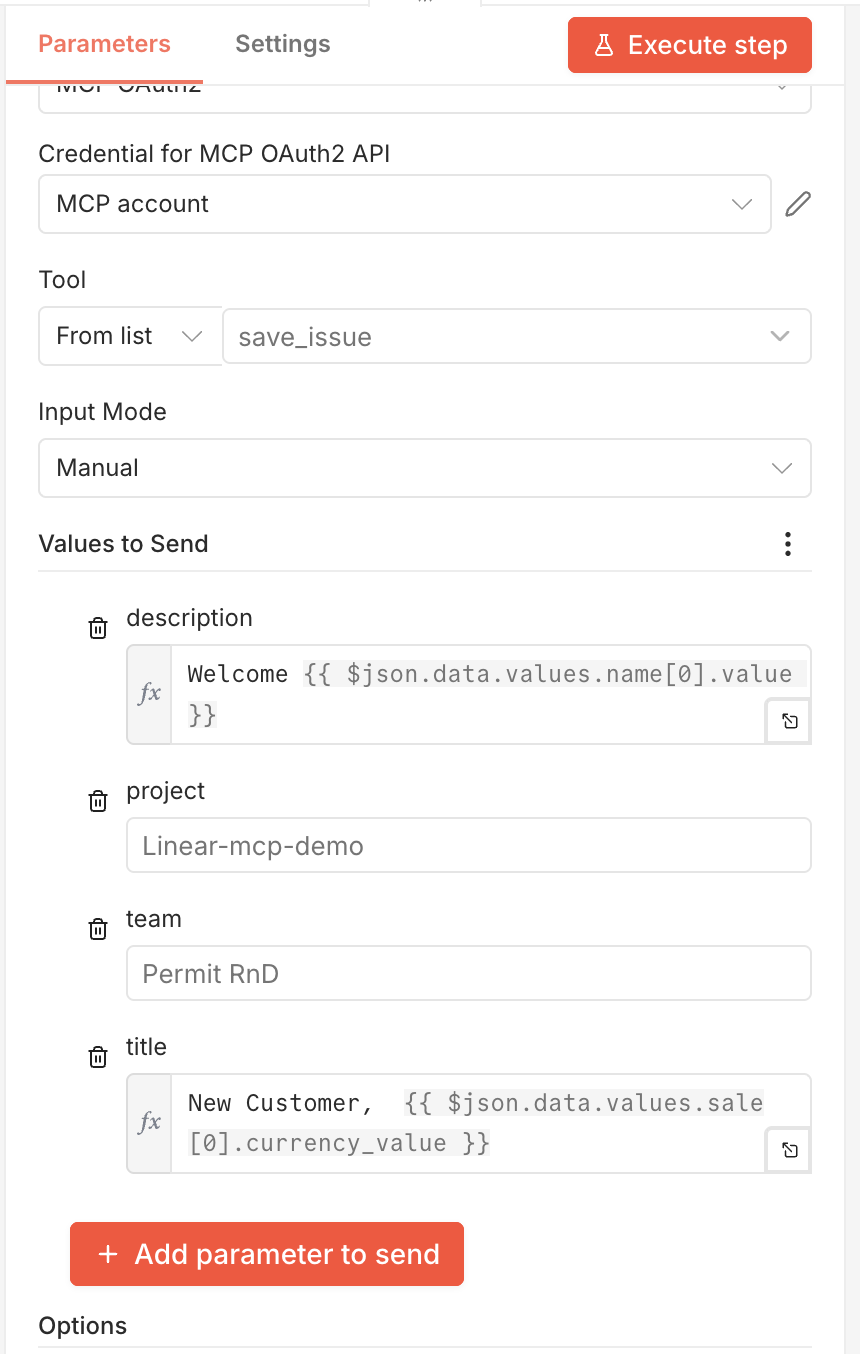
-
Define the team for the issue. Then pass along whatever data you need — for this demo, we use the customer name and sale amount for the Linear issue title and description.
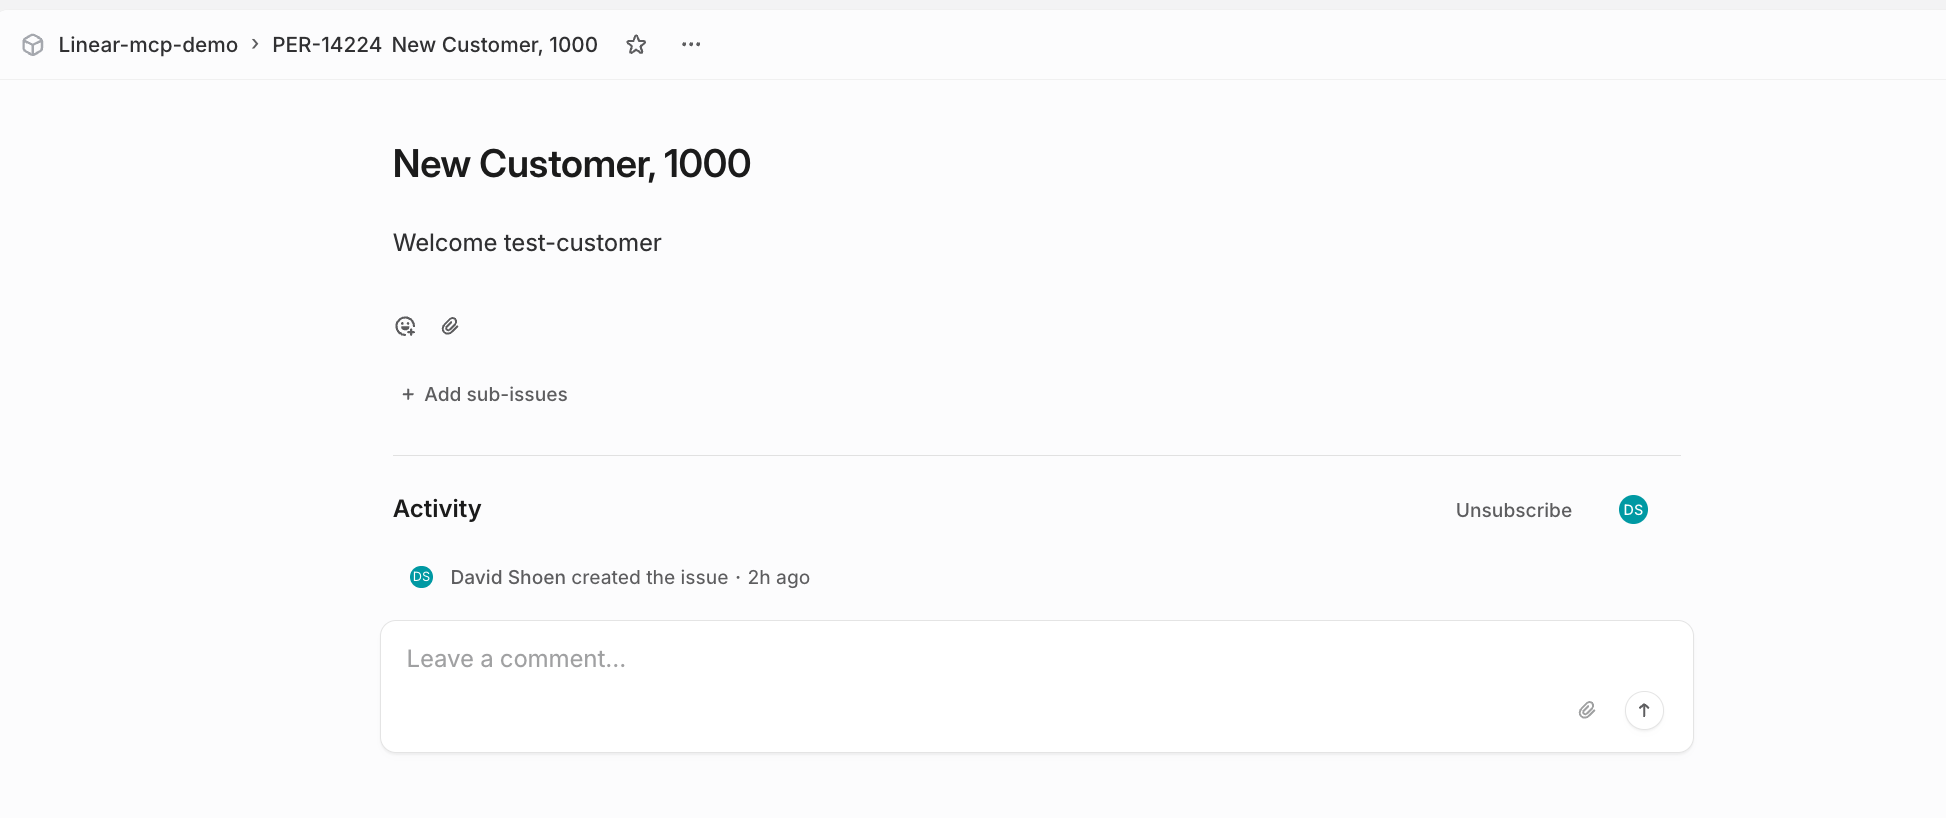
Step 3 — Test the Workflow
As long as the trust level is set appropriately for this user/agent, every time a new item is added to the Attio object, a Linear issue will be created automatically.

Step 4 — Adjust Trust Levels in Real Time
If at any time you want to change what n8n can do with the Linear MCP, go to the Agent Security dashboard and toggle the trust level.
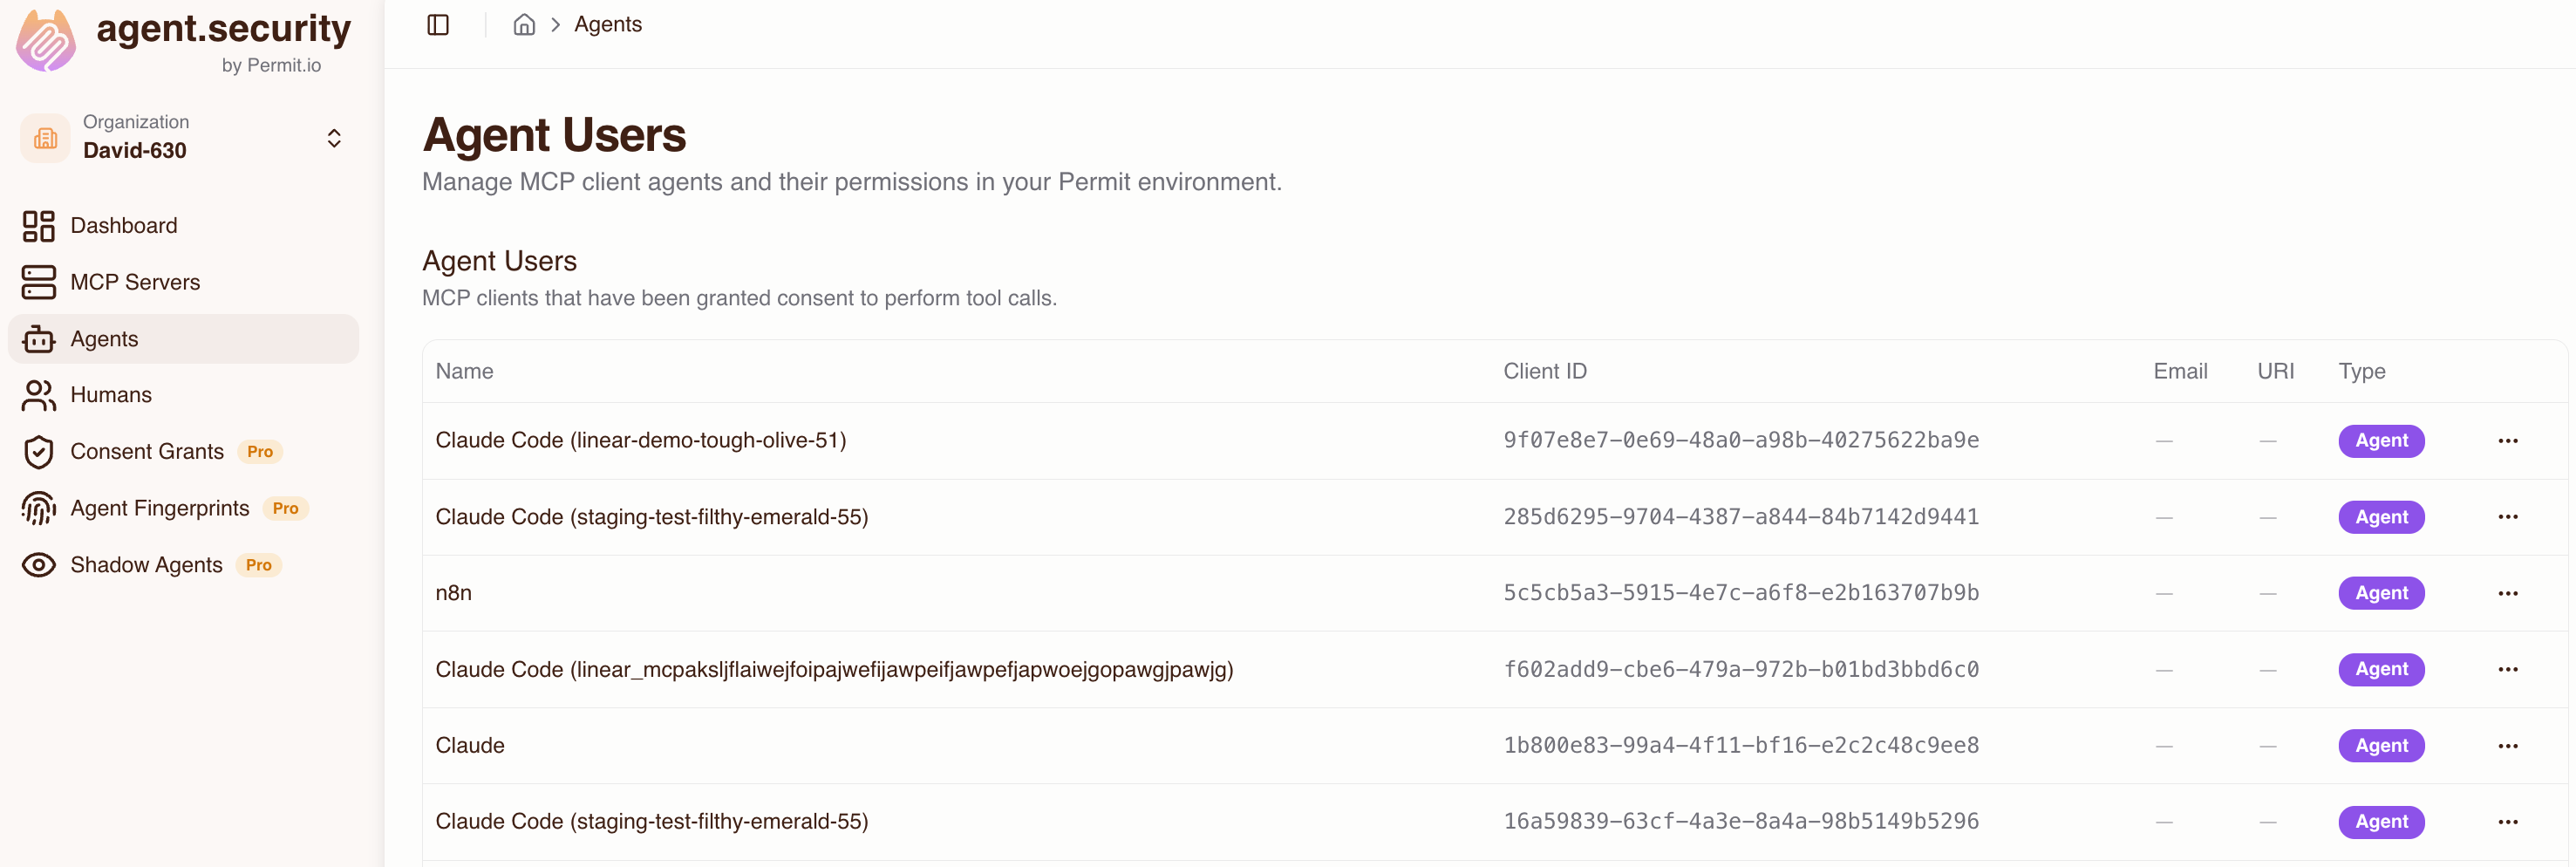

For example, setting the trust level to Low causes the Linear MCP to fail execution — the MCP Gateway blocks the action.

Summary
This demo shows how Permit.io's MCP Gateway gives you real-time control over what automated n8n workflows can do with external MCPs like Linear — without any changes to the underlying MCP server or n8n workflow logic.
| Trust Level | save_issue Result |
|---|---|
| High | Allowed — issue created |
| Low | Blocked — MCP Gateway denies the action |