Linear MCP Gateway Demo
A walkthrough demonstrating how to set up Permit.io's Agent Security MCP Gateway so that users with different trust levels are limited in what they can do with their Linear MCP tools.
Problem Statement
When exposing Linear's MCP server to multiple users or AI agents, everyone gets the same level of access by default. An intern and a team lead can both create issues, delete comments, and modify projects — there's no way to enforce least-privilege access out of the box.
This demo shows how to solve that by placing Permit.io's MCP Gateway in front of the Linear MCP server.
Task: Use Permit.io's MCP Gateway to allow a Developer (High trust) to create Linear issues and a Project Manager (Medium trust) to only list Linear issues.
Before You Begin
Step 1 — Set Up Your Host and MCP
-
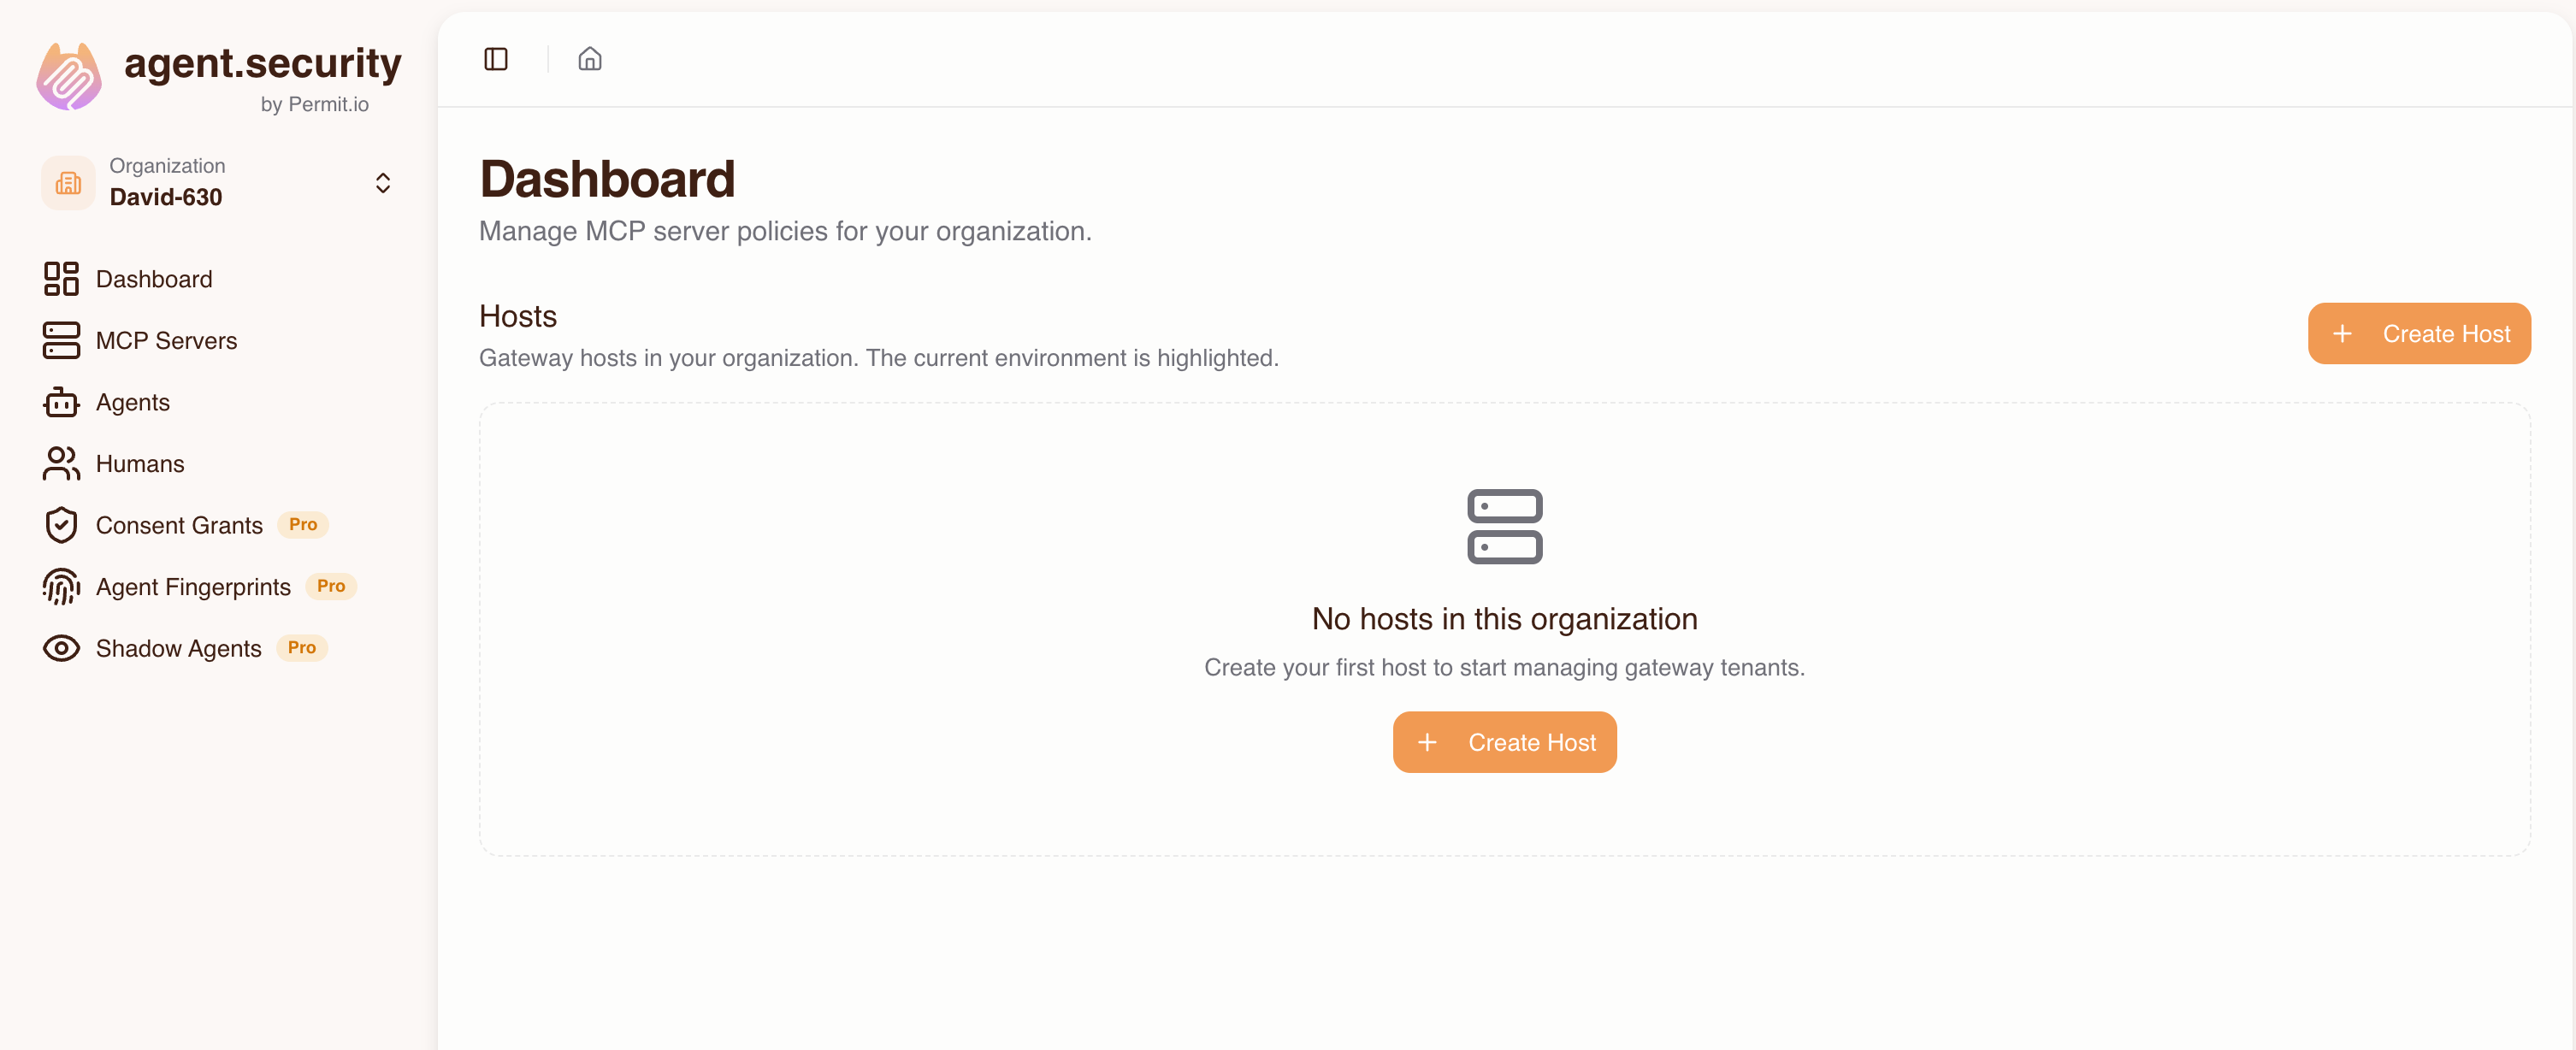
Go to the Dashboard and select Hosts, then click Create Host.
-
Fill in:
- Subdomain — choose a prefix (e.g.,
my-tenant). A unique suffix is auto-generated. - Project — select the Permit project that contains the environment you want to use.
- Environment — select the Permit environment this host will use. The environment cannot be changed after the host is created.
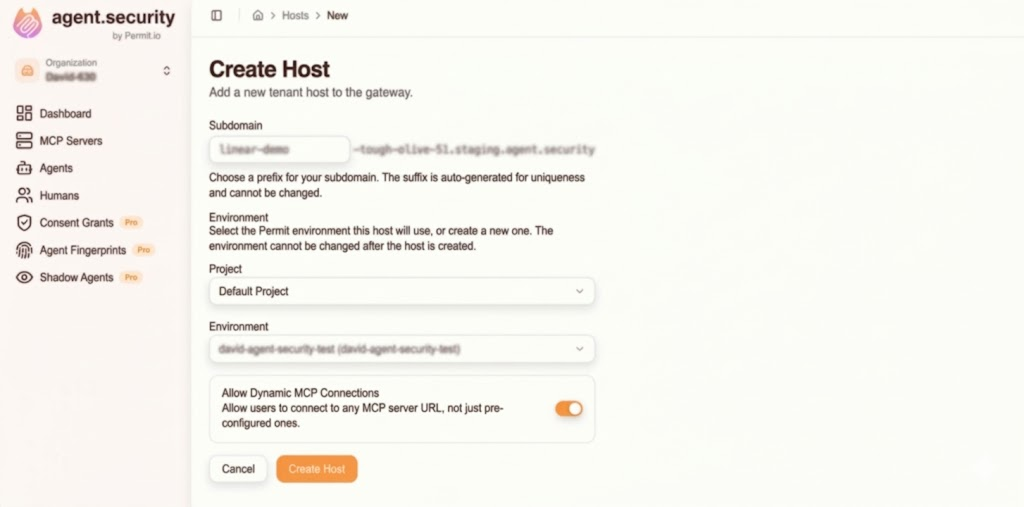
- Subdomain — choose a prefix (e.g.,
-
Click Create Host.
-
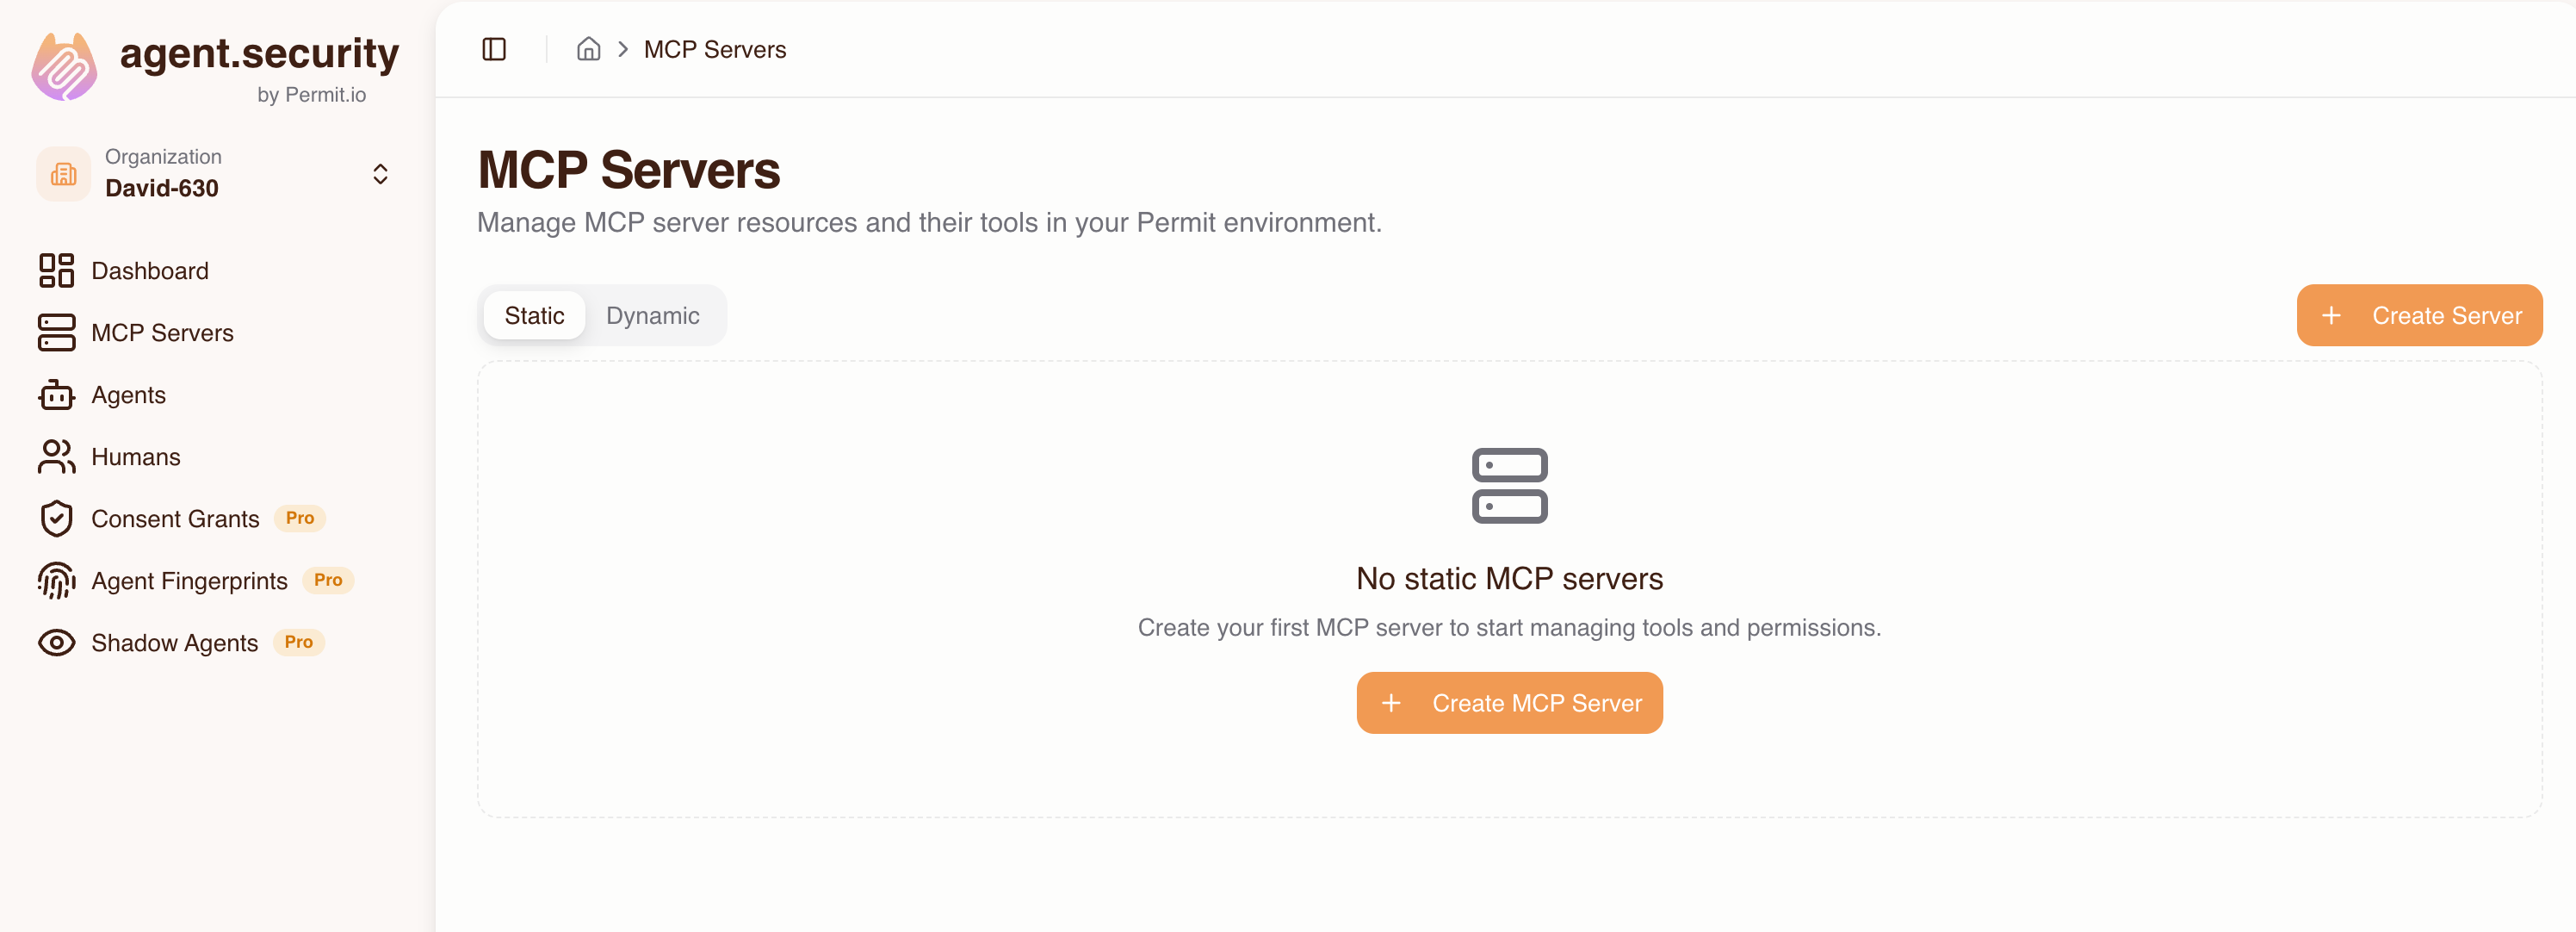
The Host you created exists but has no abilities because it is not linked to an external MCP. Click MCP Servers to create an MCP server.
-
Enter the Linear MCP URL:
https://mcp.linear.app/mcp. Upon pressing Connect, you will be prompted by Linear to sign in.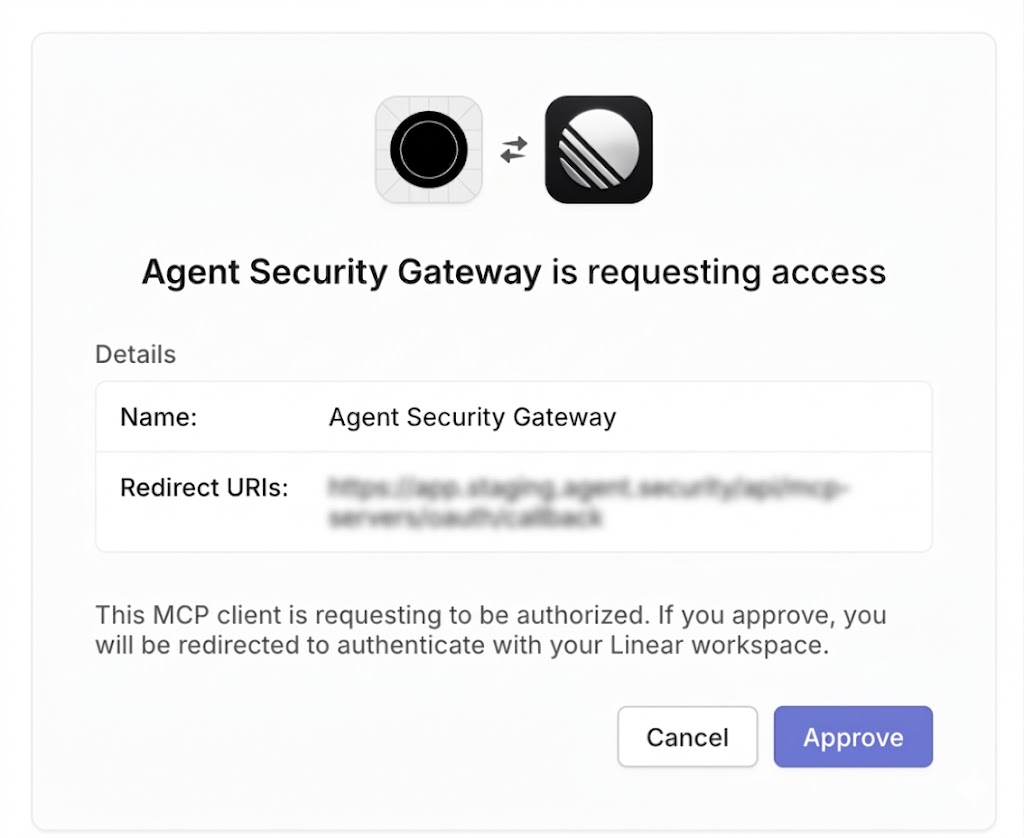
-
All of the tools available to the Linear MCP are shown as imported. For this demo we only need two tools:
list_issuesandsave_issue. Setsave_issueto High trust andlist_issuesto Medium trust. You can adjust tool trust levels afterwards as well.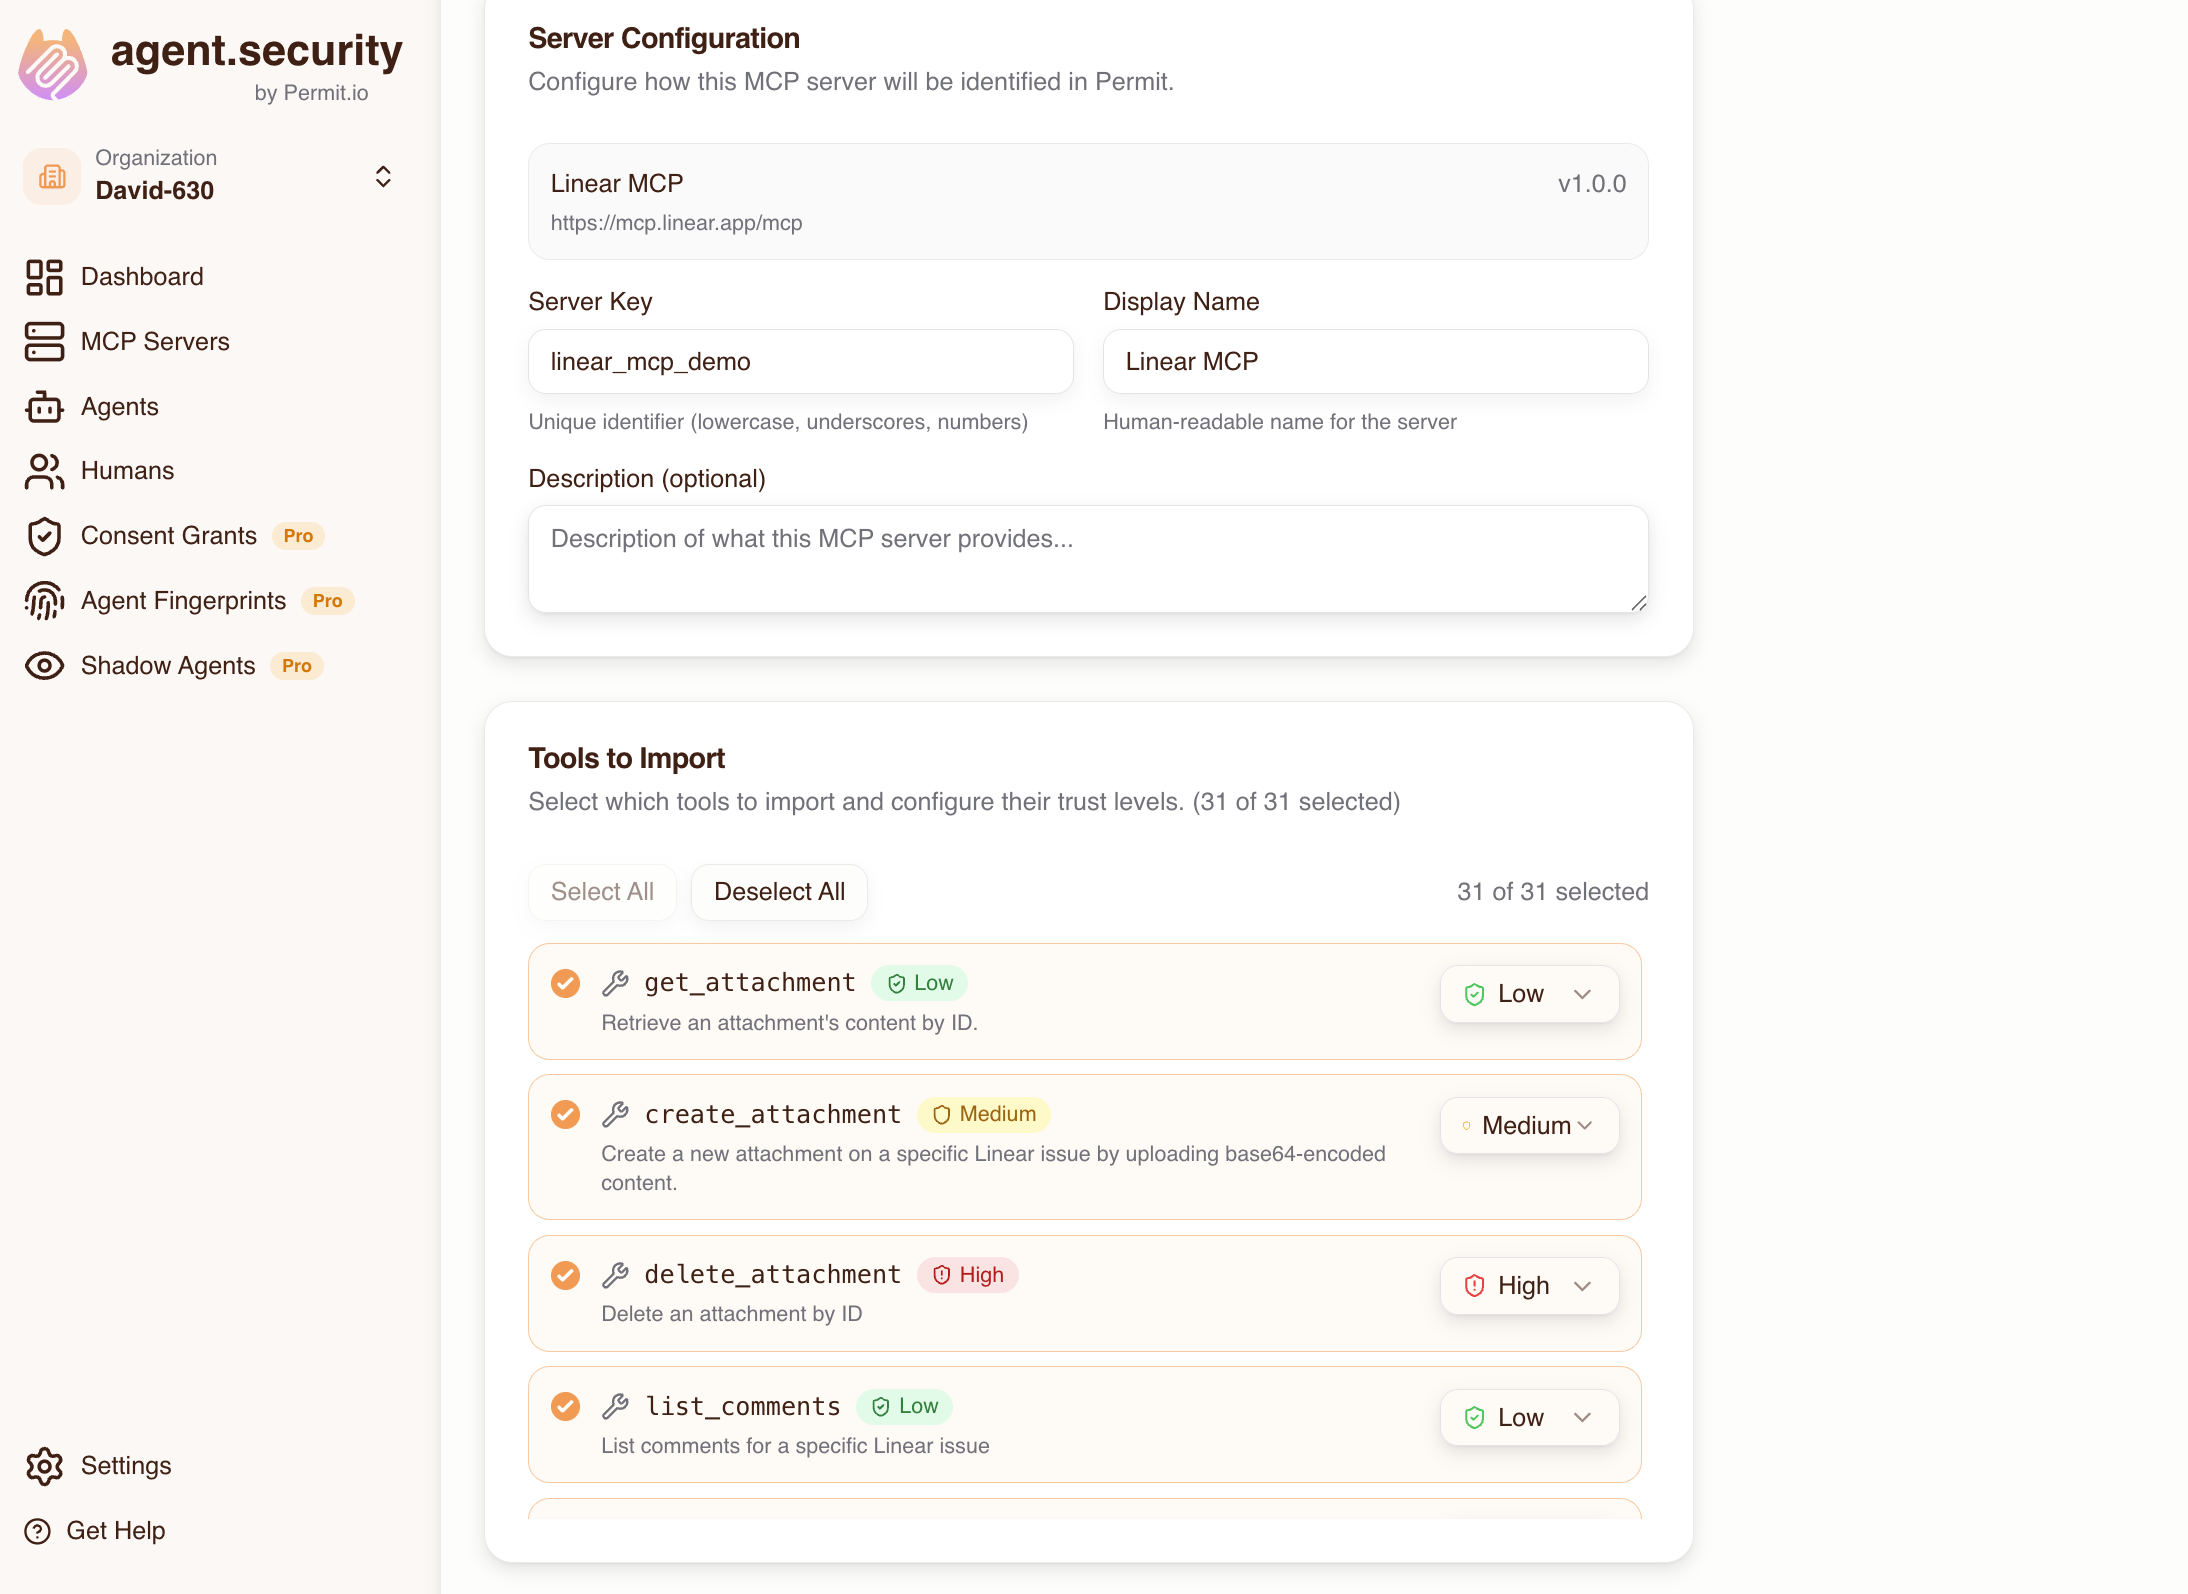
Your MCP Gateway now has Linear MCP abilities.
Step 2 — Add Users
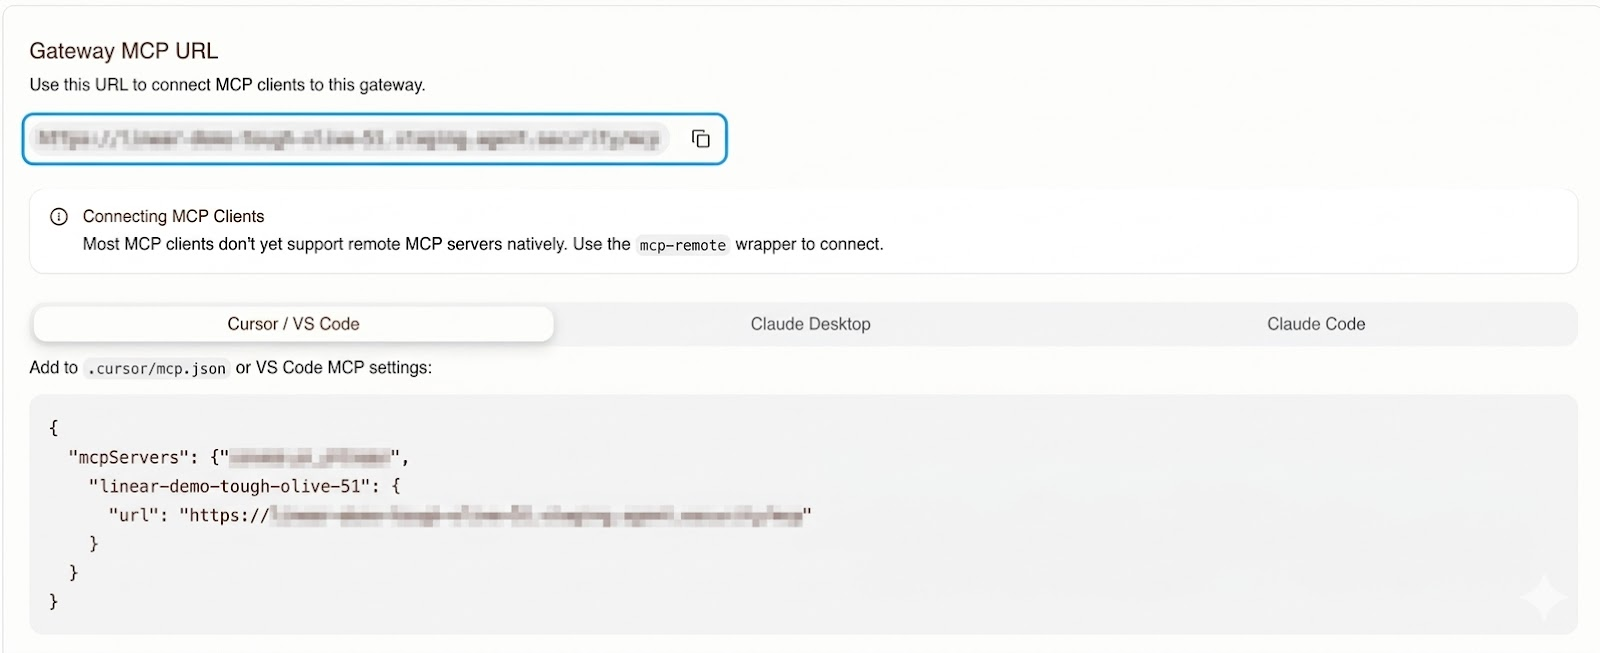
To add users in your organization, they will need the Gateway MCP URL found in the Dashboard tab.
Developer Signs Up with Claude Desktop
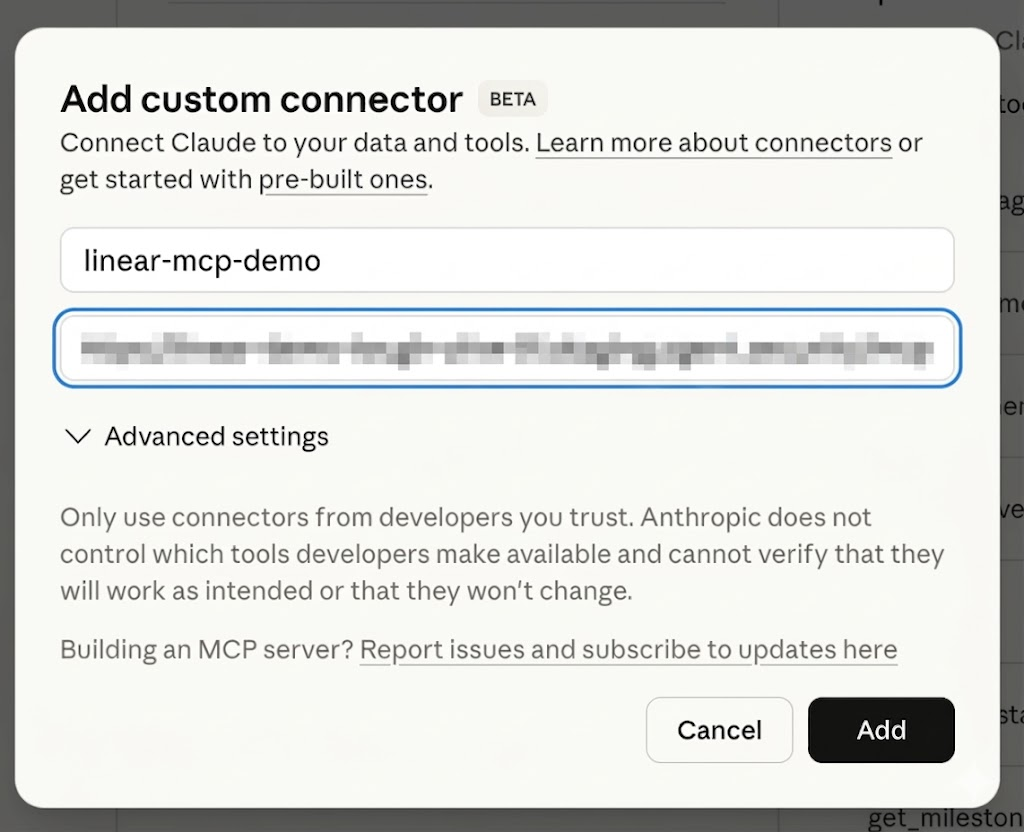
The Developer can add the MCP configuration object found in the Dashboard into the Claude Desktop config file, or add the MCP URL via the Claude Desktop UI.
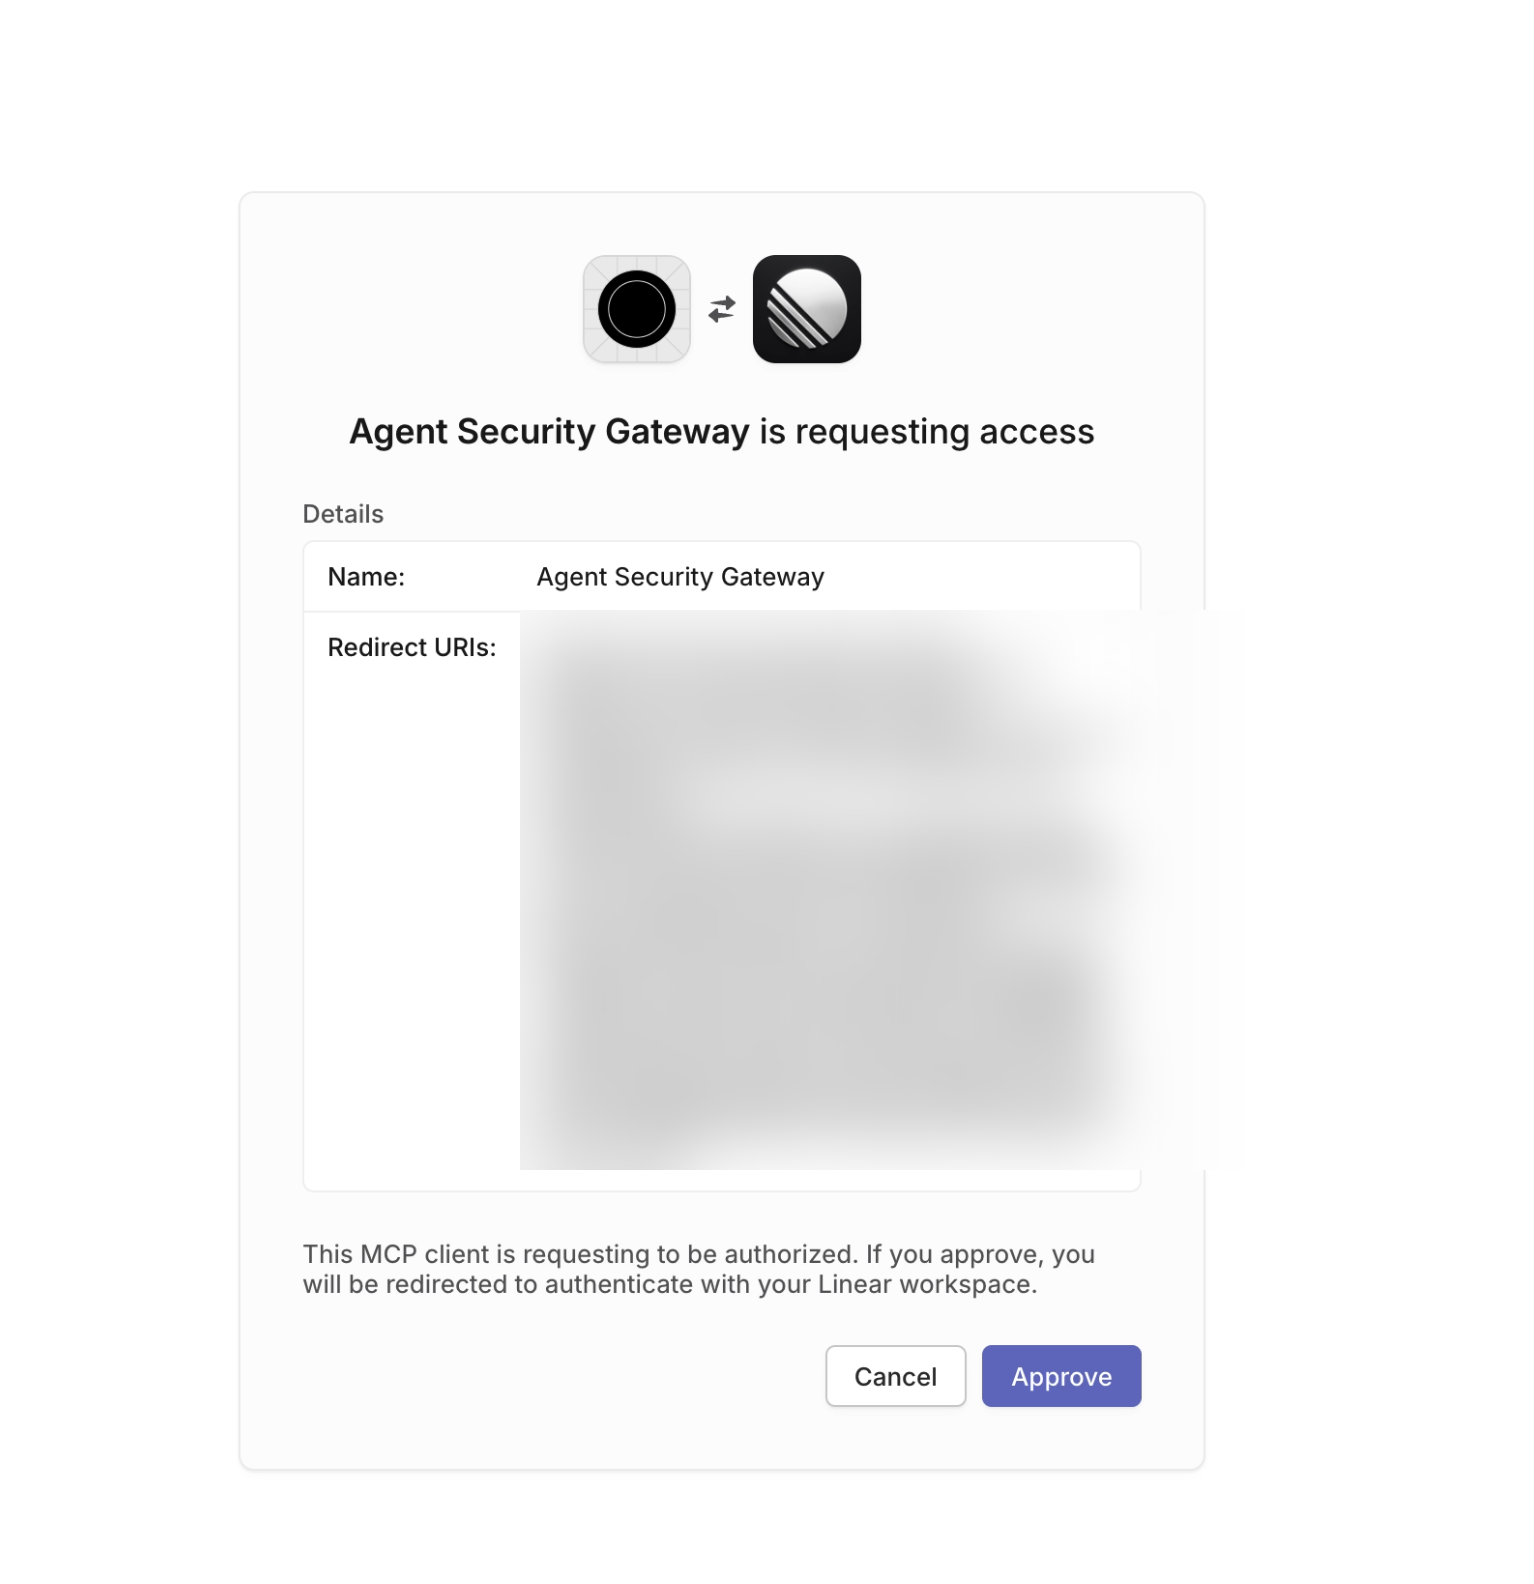
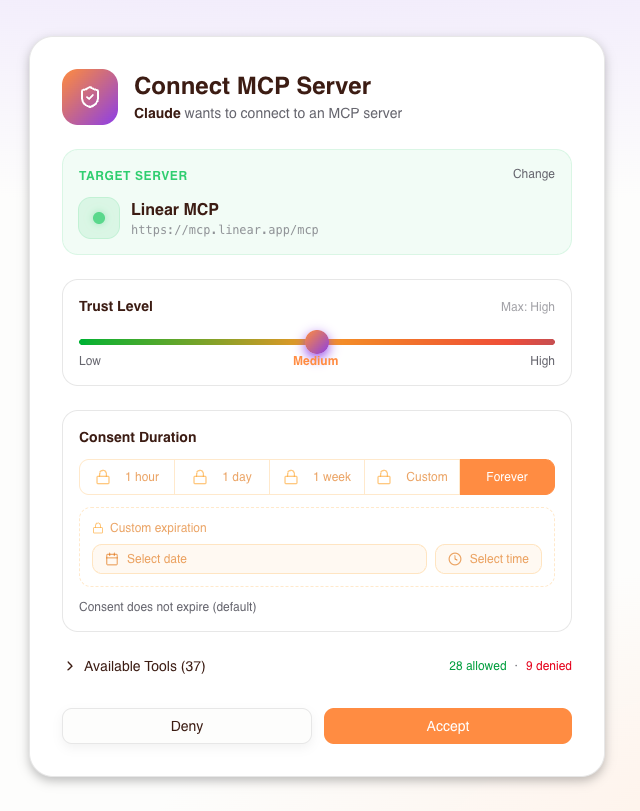
Upon adding the MCP connector and connecting, the Developer will be brought to the MCP Gateway Consent Service to sign in or register an account.
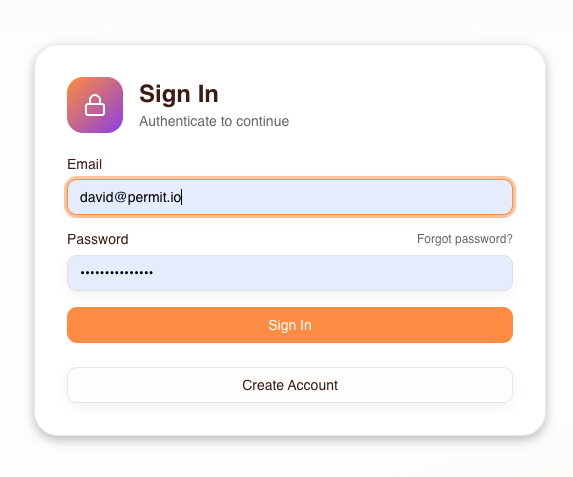
Upon signing in, the new user will not have any MCPs available because the admin has not yet granted access.
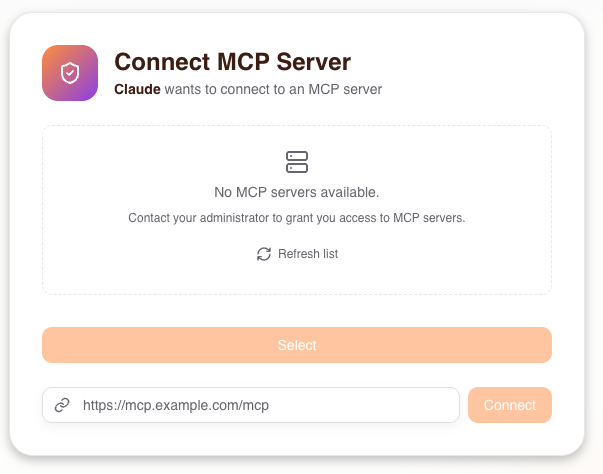
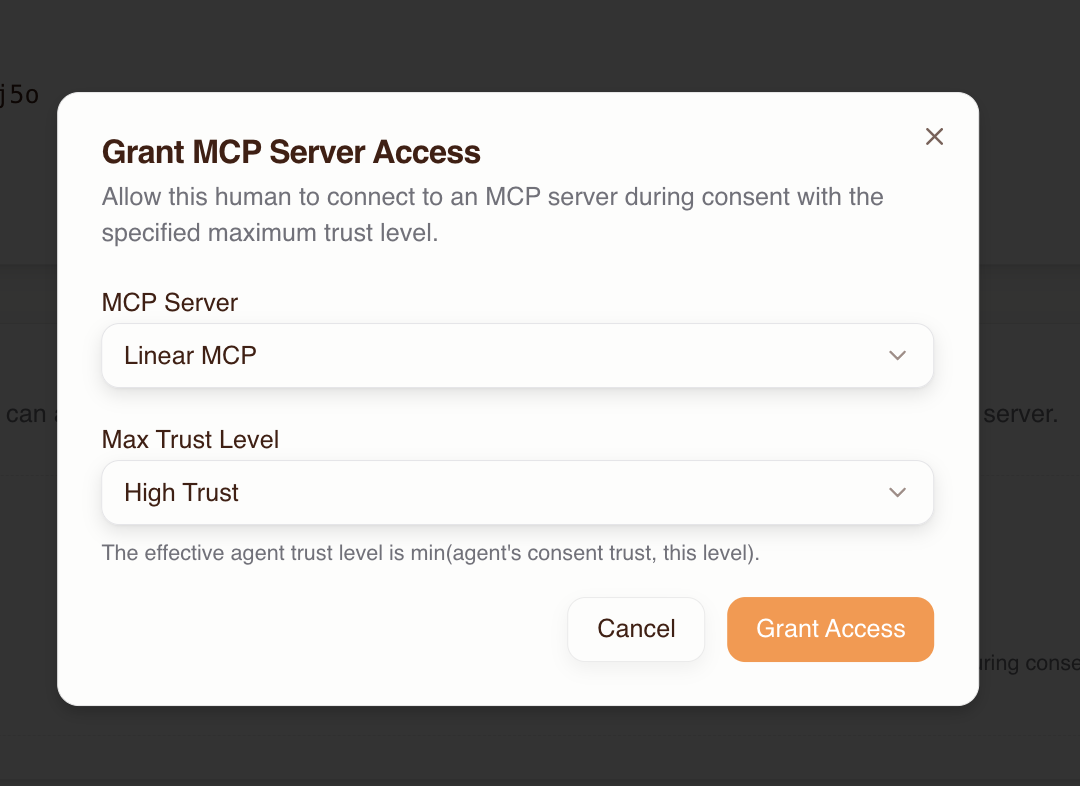
Navigate to Humans in the Dashboard — you will see the new user has registered. Grant the user MCP Server Access to the Linear MCP created previously. Because this user is a Developer, set the Max Trust Level to High.
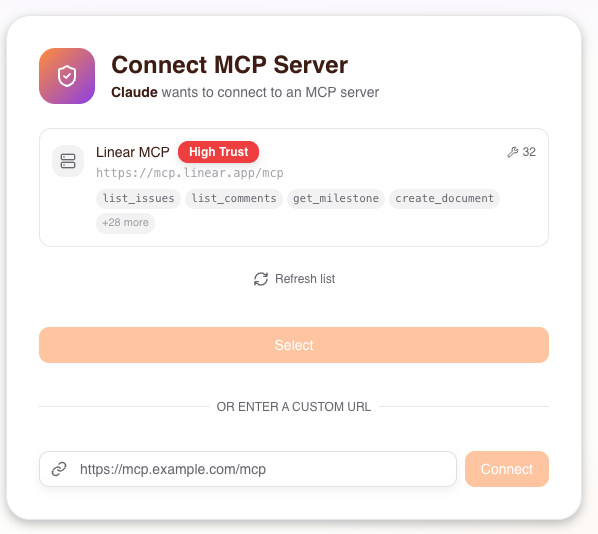
After refreshing, the user will see the MCP available for selection. Upon selecting it, they must authorize via Linear.

The user can also set restrictions on their agent's use of the MCP. See the Consent Service documentation to learn more.
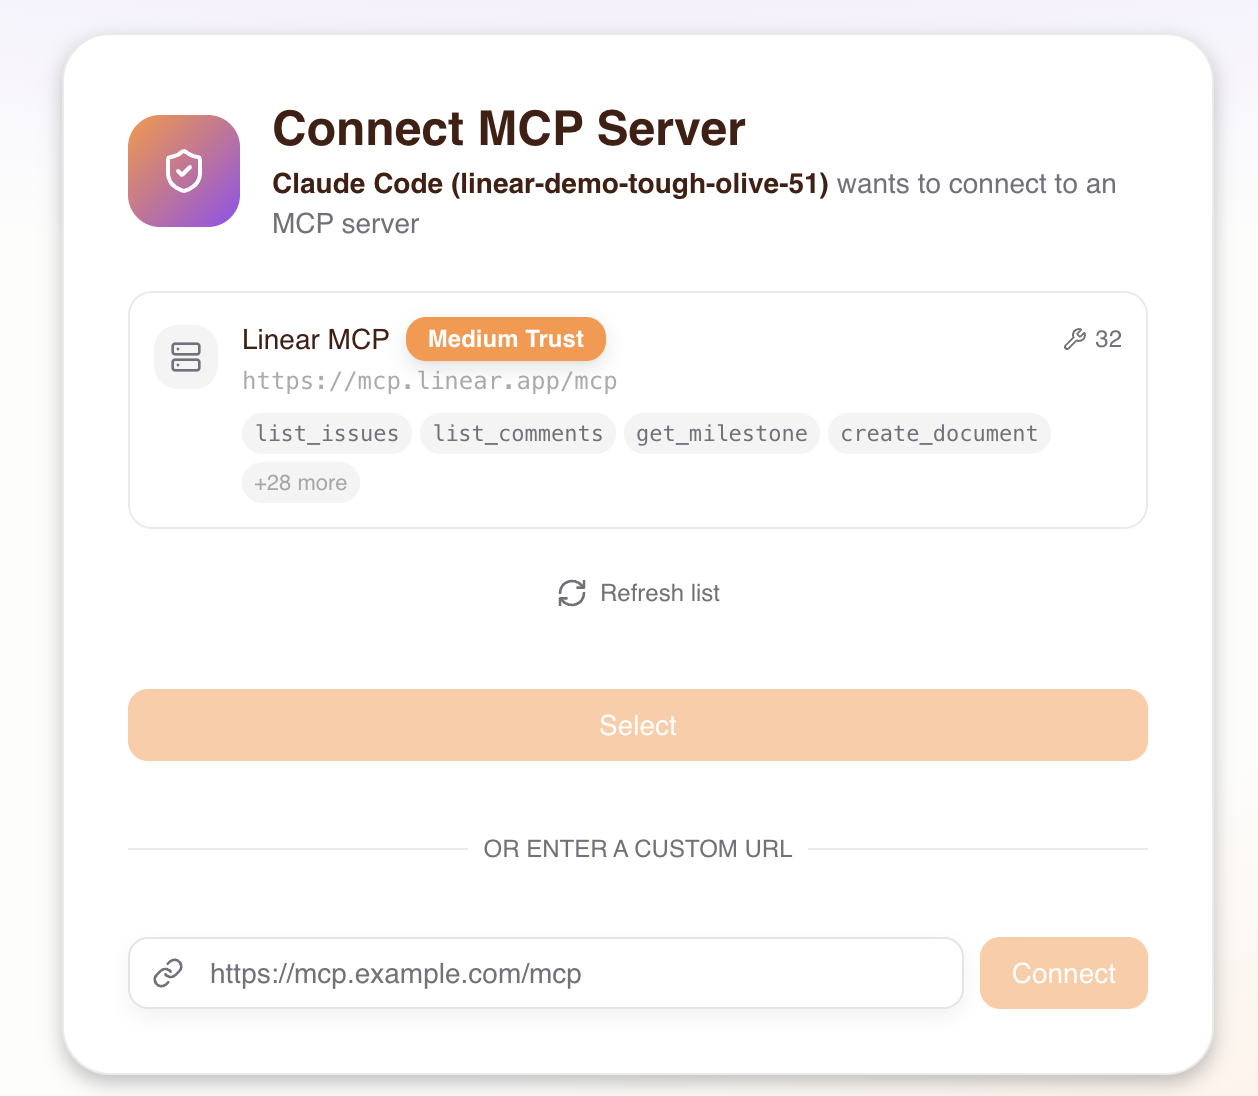
Project Manager Signs Up with Claude Code
The signup and consent service procedure is the same as described above. The only difference is that when the admin assigns access, the Max Trust Level is set to Medium instead of High.
This is what the Project Manager will see when connecting Claude Code to the MCP:
Step 3 — Test Actions by User
PM (Claude Code) Tries to Create Issue
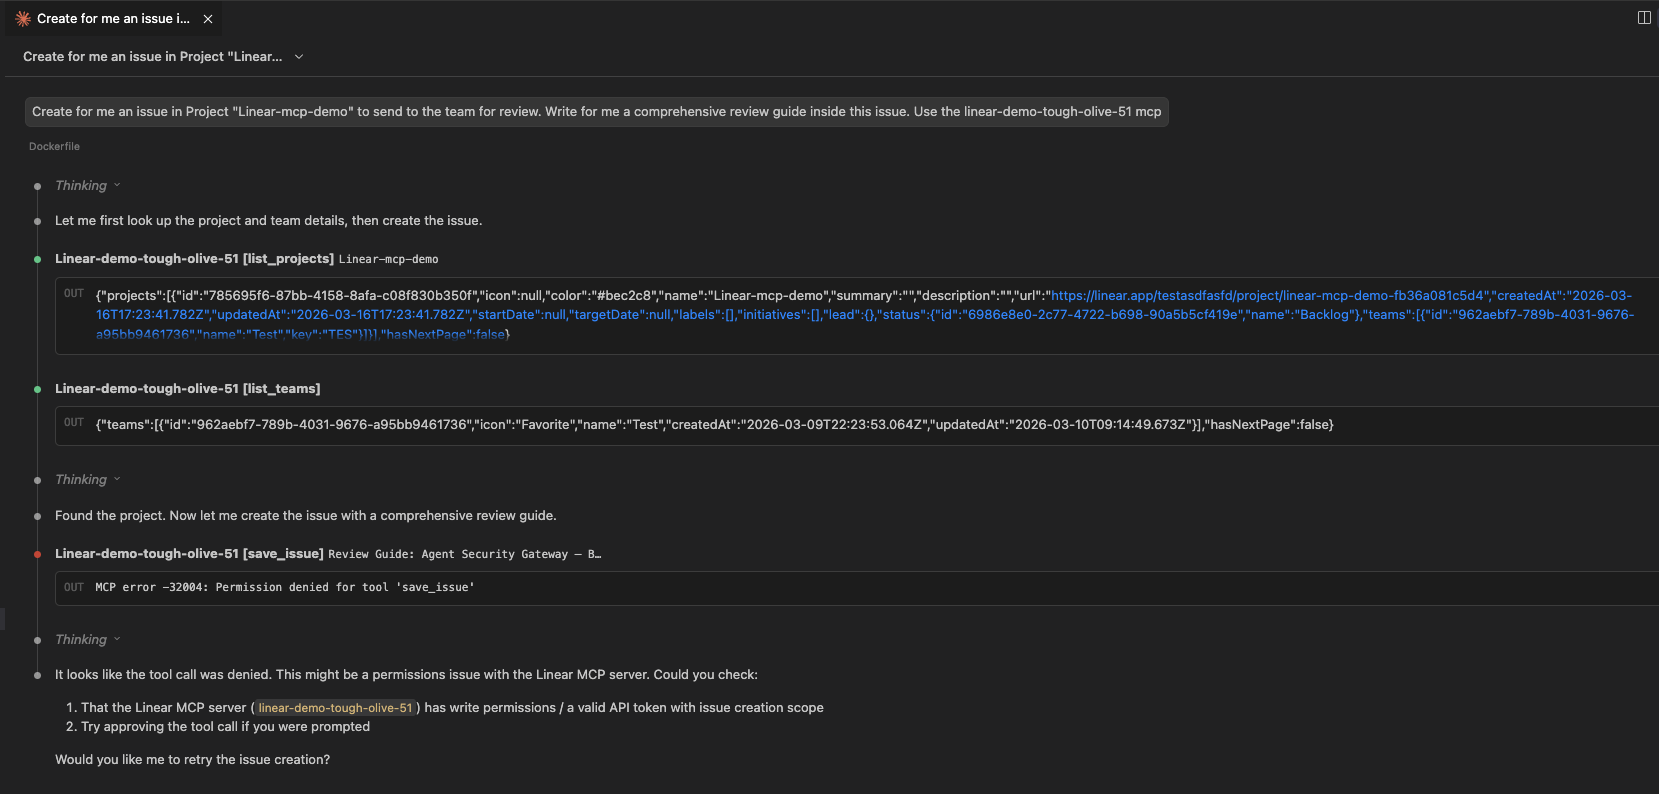
As expected, the PM does not have a high enough trust level and is returned Permission Denied for save_issue.
Developer (Claude Desktop) Tries to Create Issue
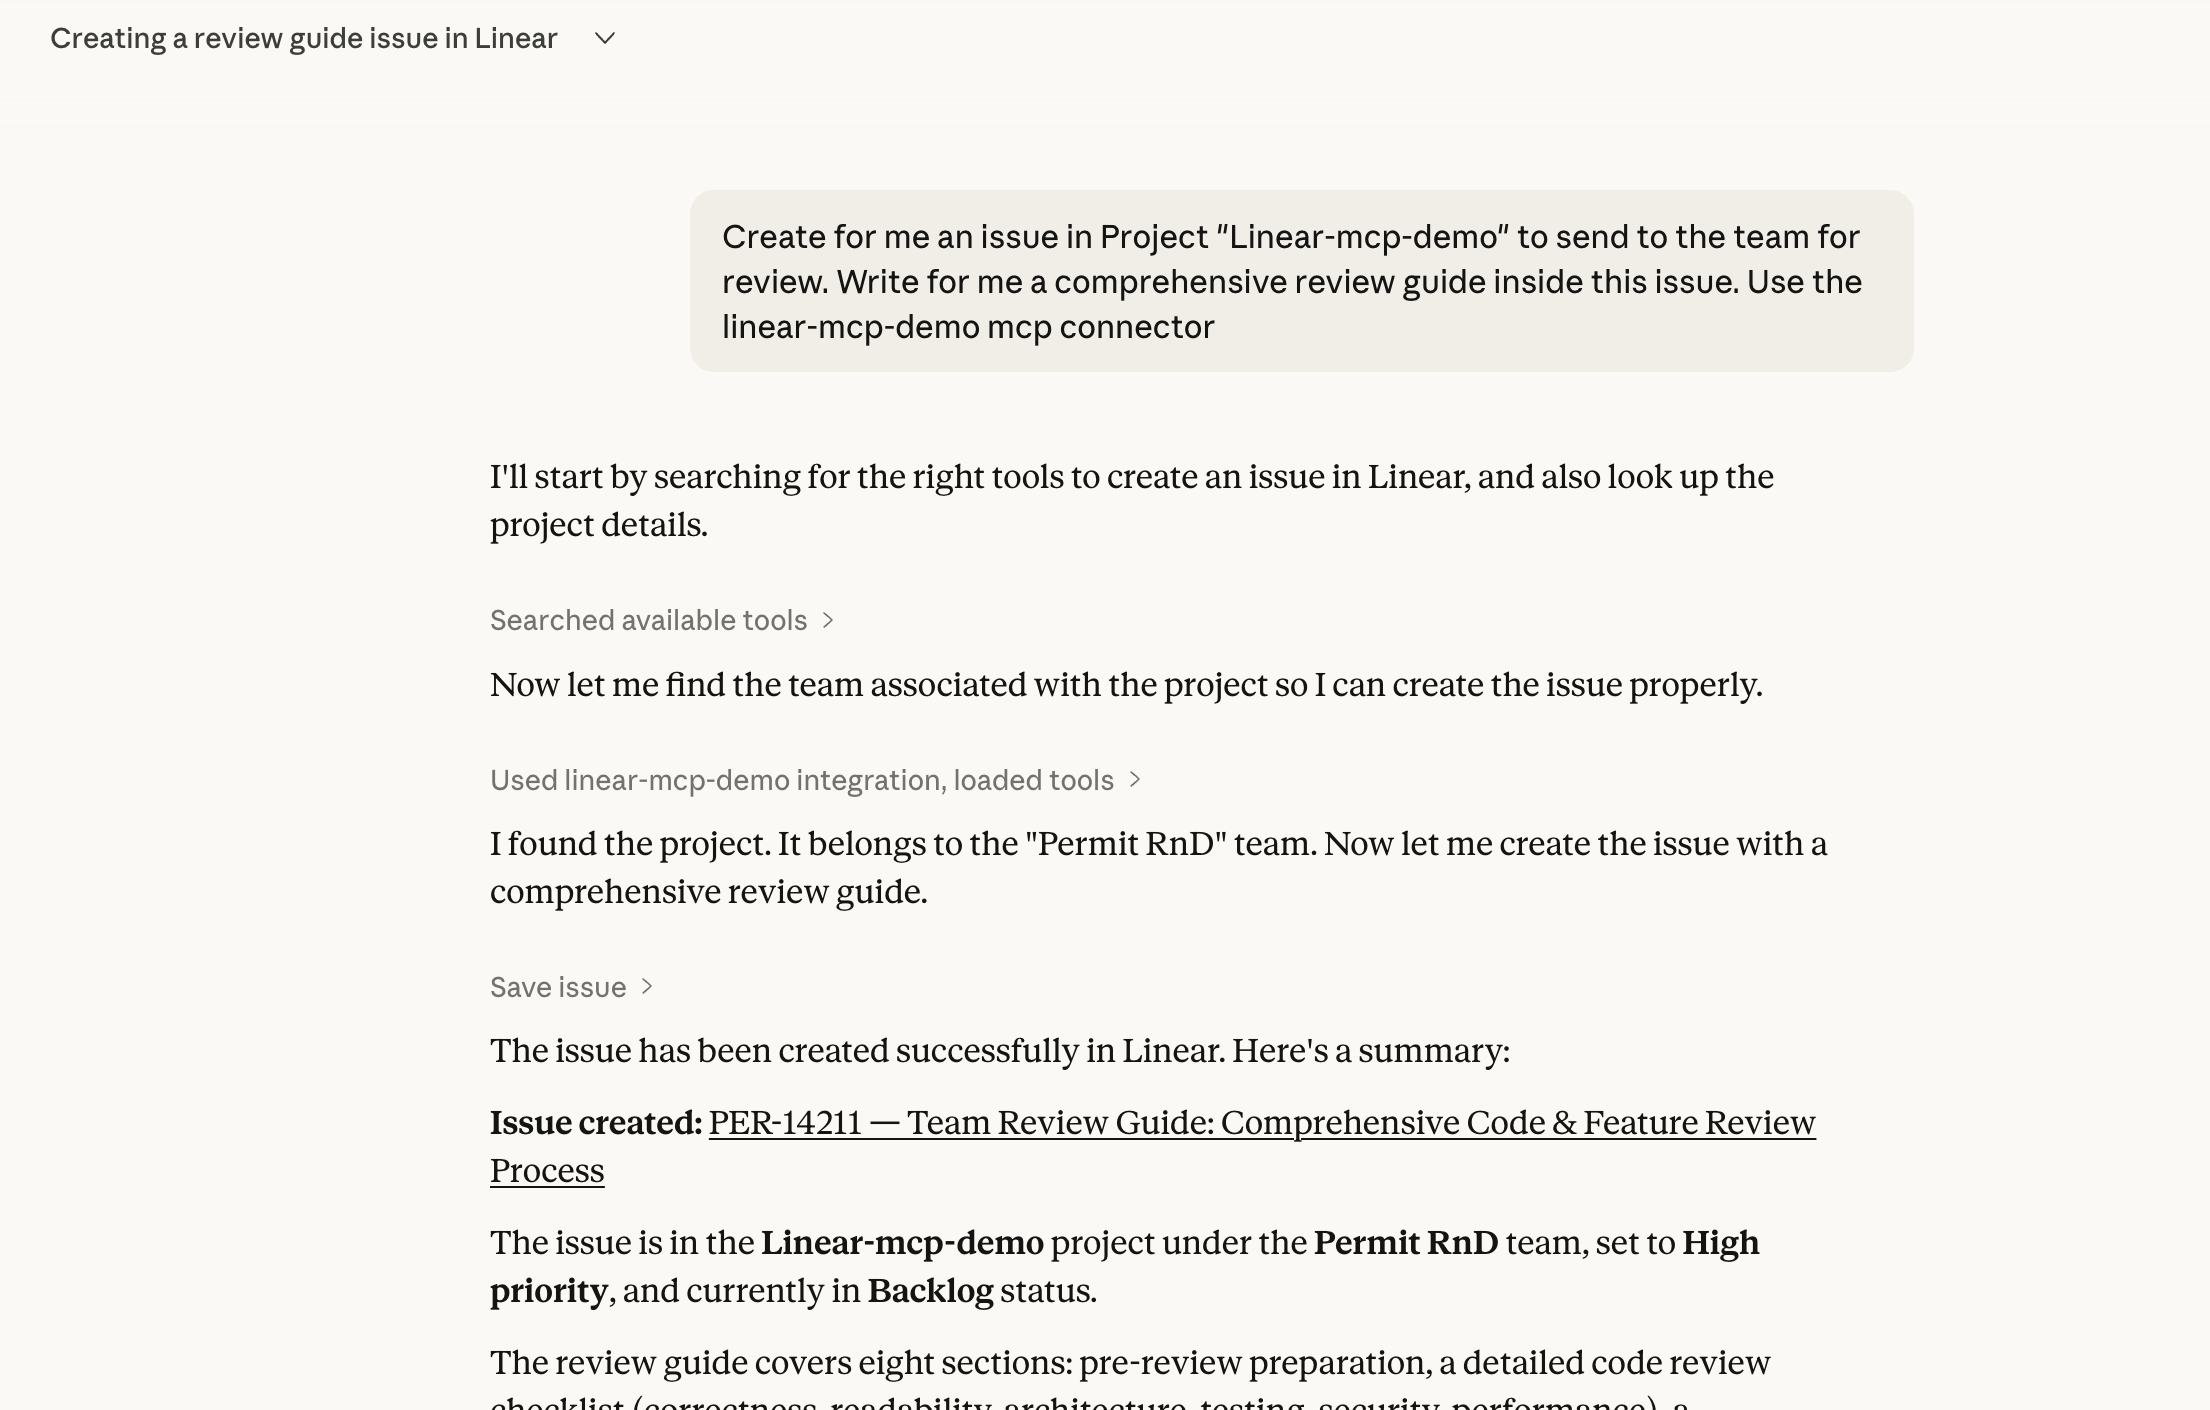
As expected, the Developer successfully creates an issue.
Both Users List Issues
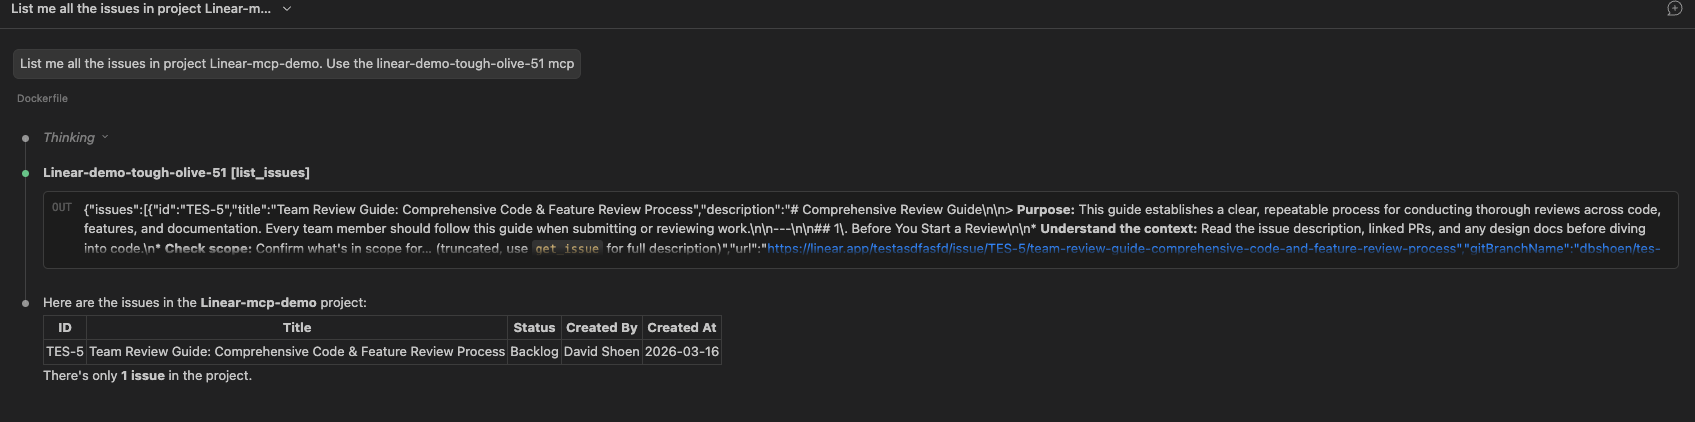
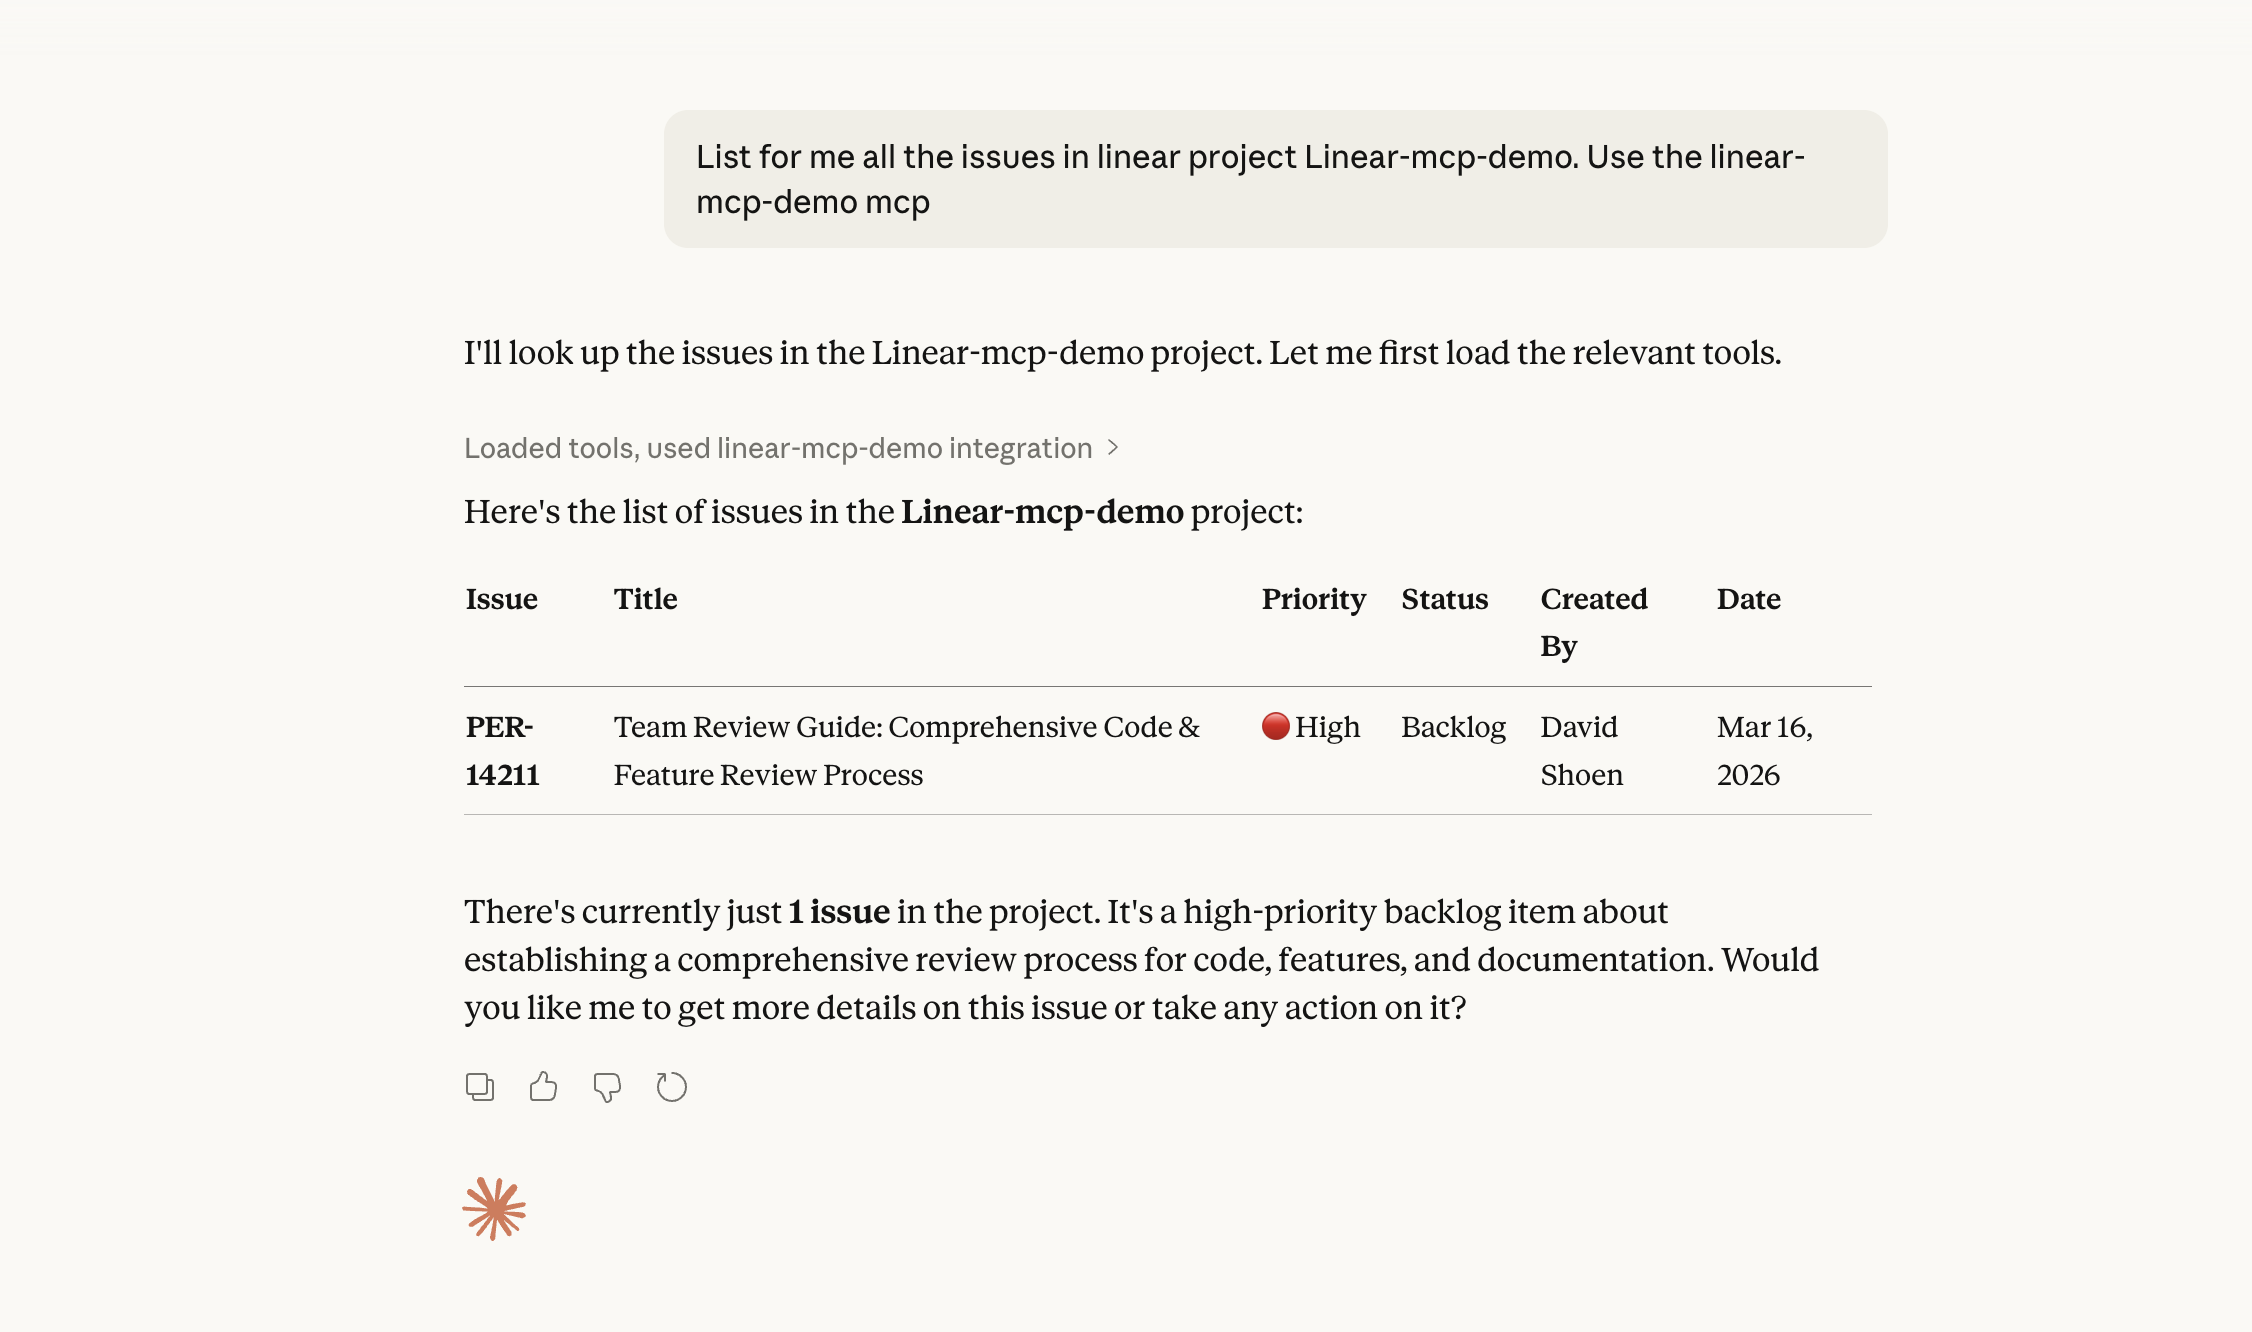
As expected, both the Project Manager and Developer succeed in listing issues — their trust levels meet the Medium trust requirement of the list_issues tool.
Summary
| User | Trust Level | list_issues (Medium) | save_issue (High) |
|---|---|---|---|
| Developer | High | Allowed | Allowed |
| Project Manager | Medium | Allowed | Denied |
This demo shows how Permit MCP Gateway enforces least-privilege access on MCP tools based on trust levels — without any changes to the underlying Linear MCP server.