Building Your First ABAC Policy
Attribute-Based Access Control (ABAC) allows you to create sophisticated access policies based on attributes of users, resources, and the environment. In this guide, we'll walk you through creating an ABAC policy step by step.
Our Example Scenario
Throughout this guide, we'll work with a practical example that demonstrates ABAC's power:
"Students at Stanford University who study full-time are the only ones that can rent University bicycles after 5pm."
This policy involves multiple attributes:
- User attributes:
university,is_full_time - Resource attributes:
time - Action:
rent
Let's build this policy together!
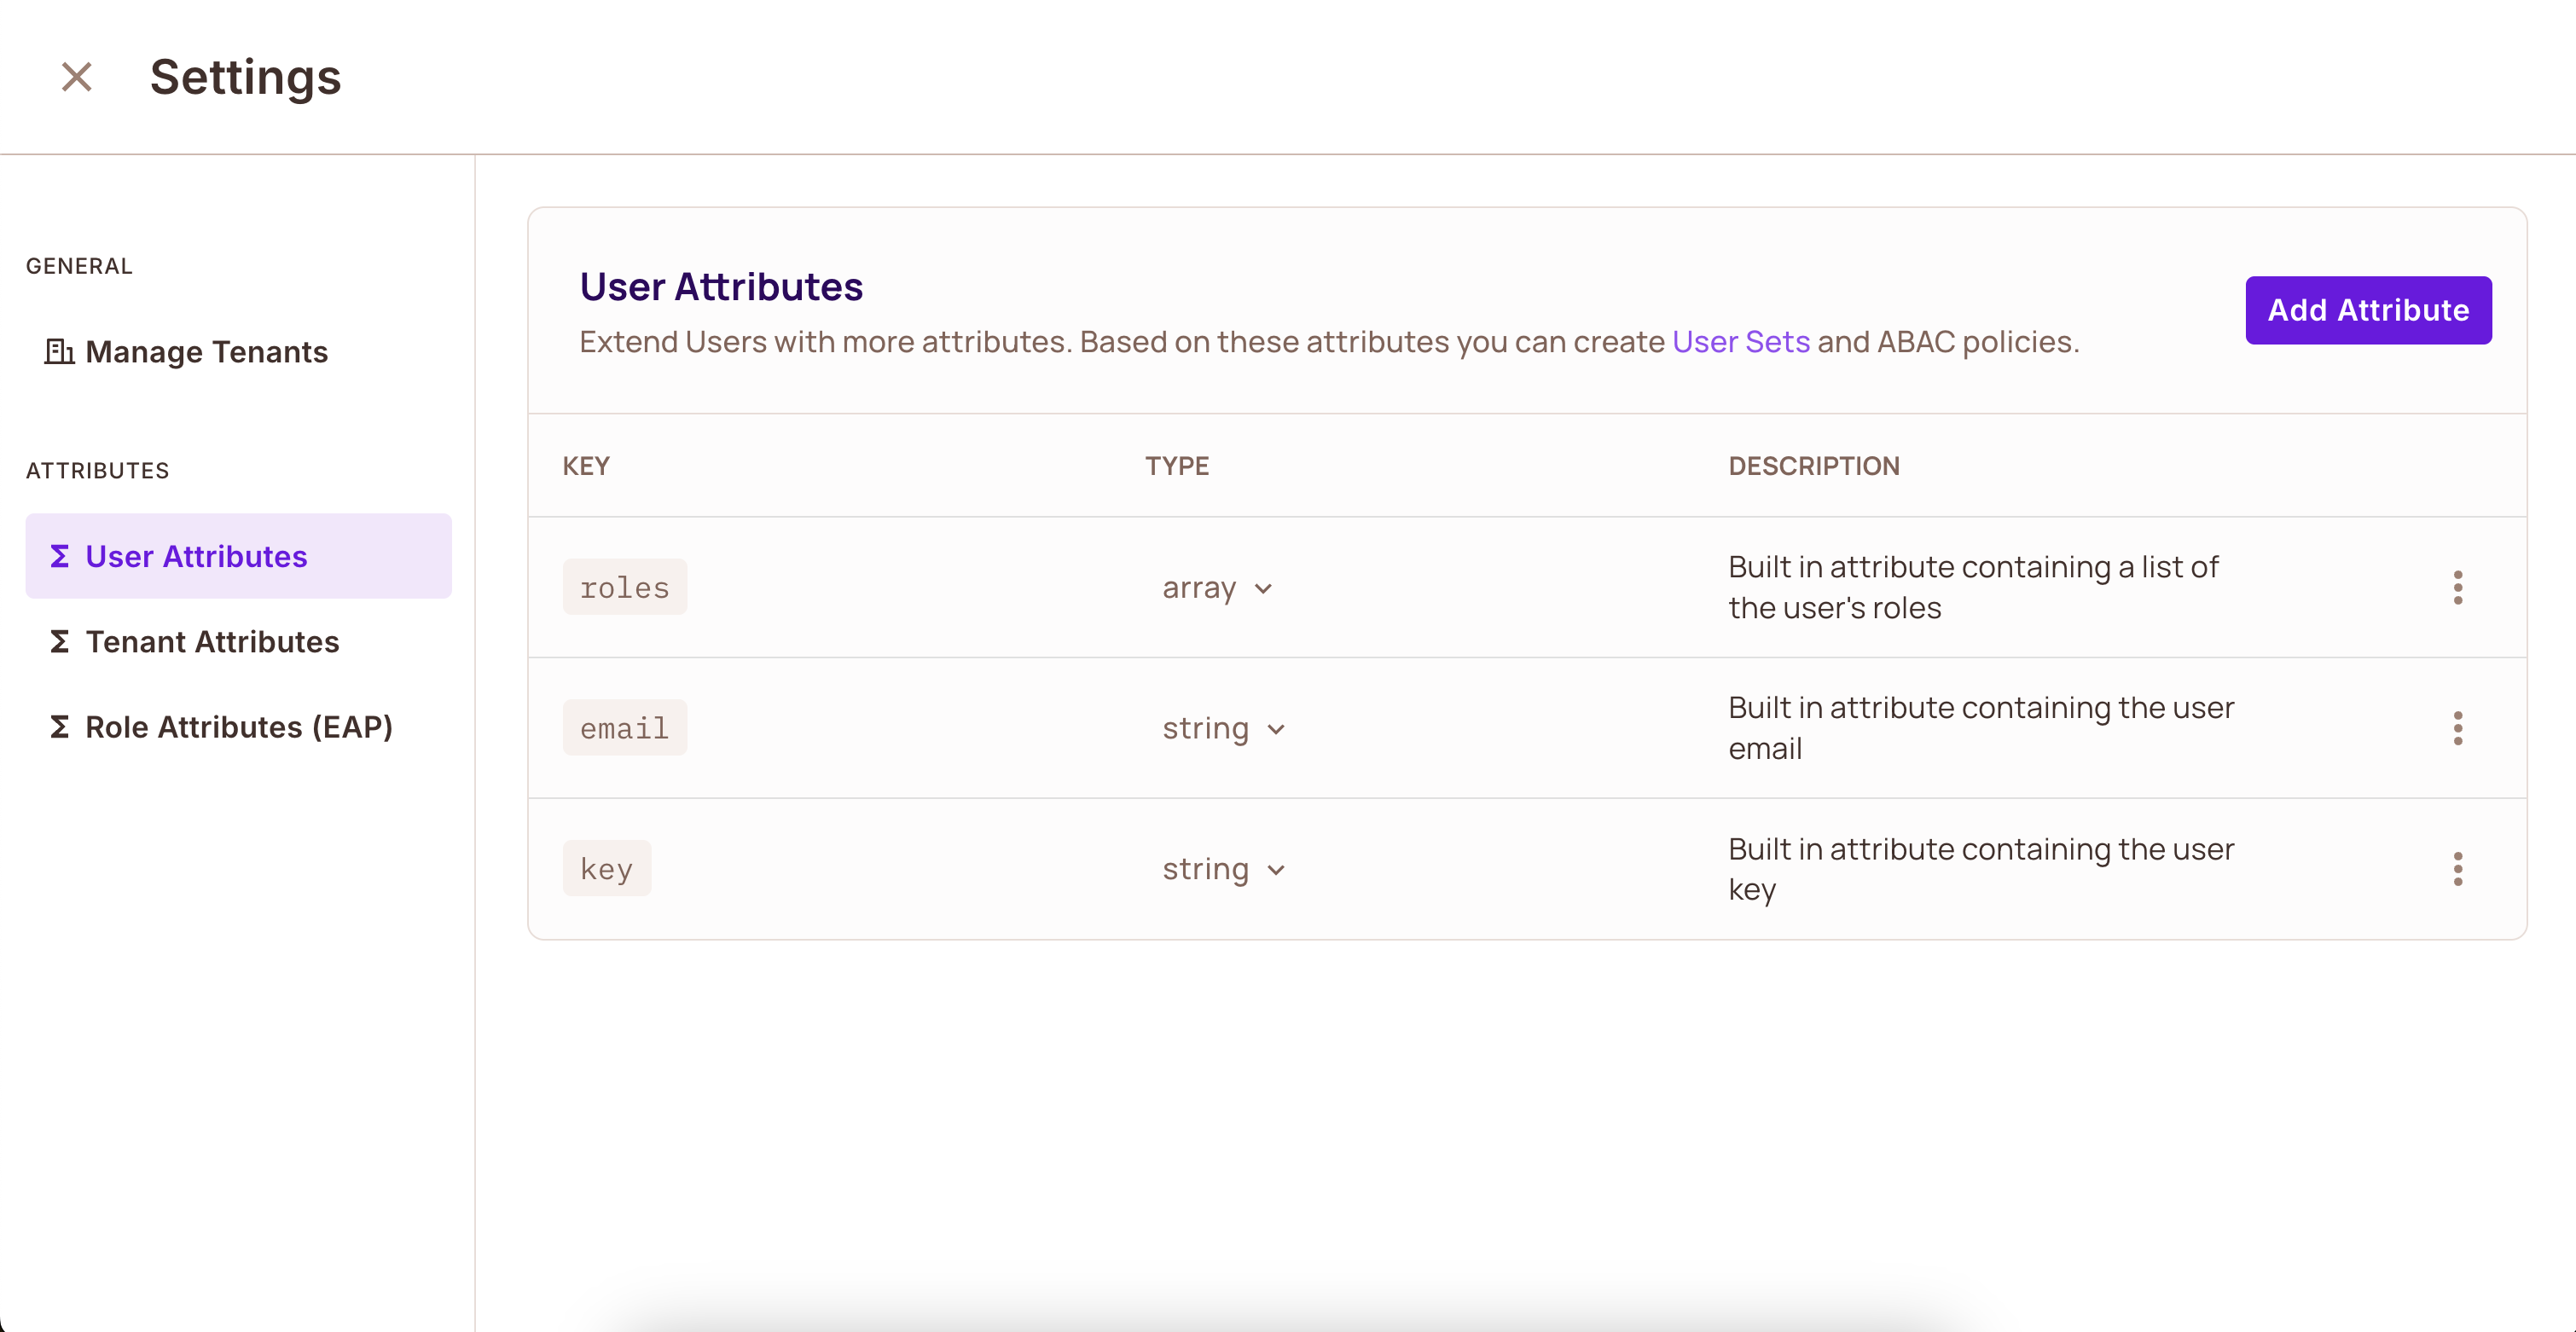
Step 1: Creating User Attributes
User attributes define characteristics of your users that influence their access rights.
- Navigate to the Directory panel
- Click the Settings button
- In the User Attributes side panel, click Add Attribute
For our bicycle rental example, we need two user attributes:
university: The university the student attendsis_full_time: Whether the student is enrolled full-time
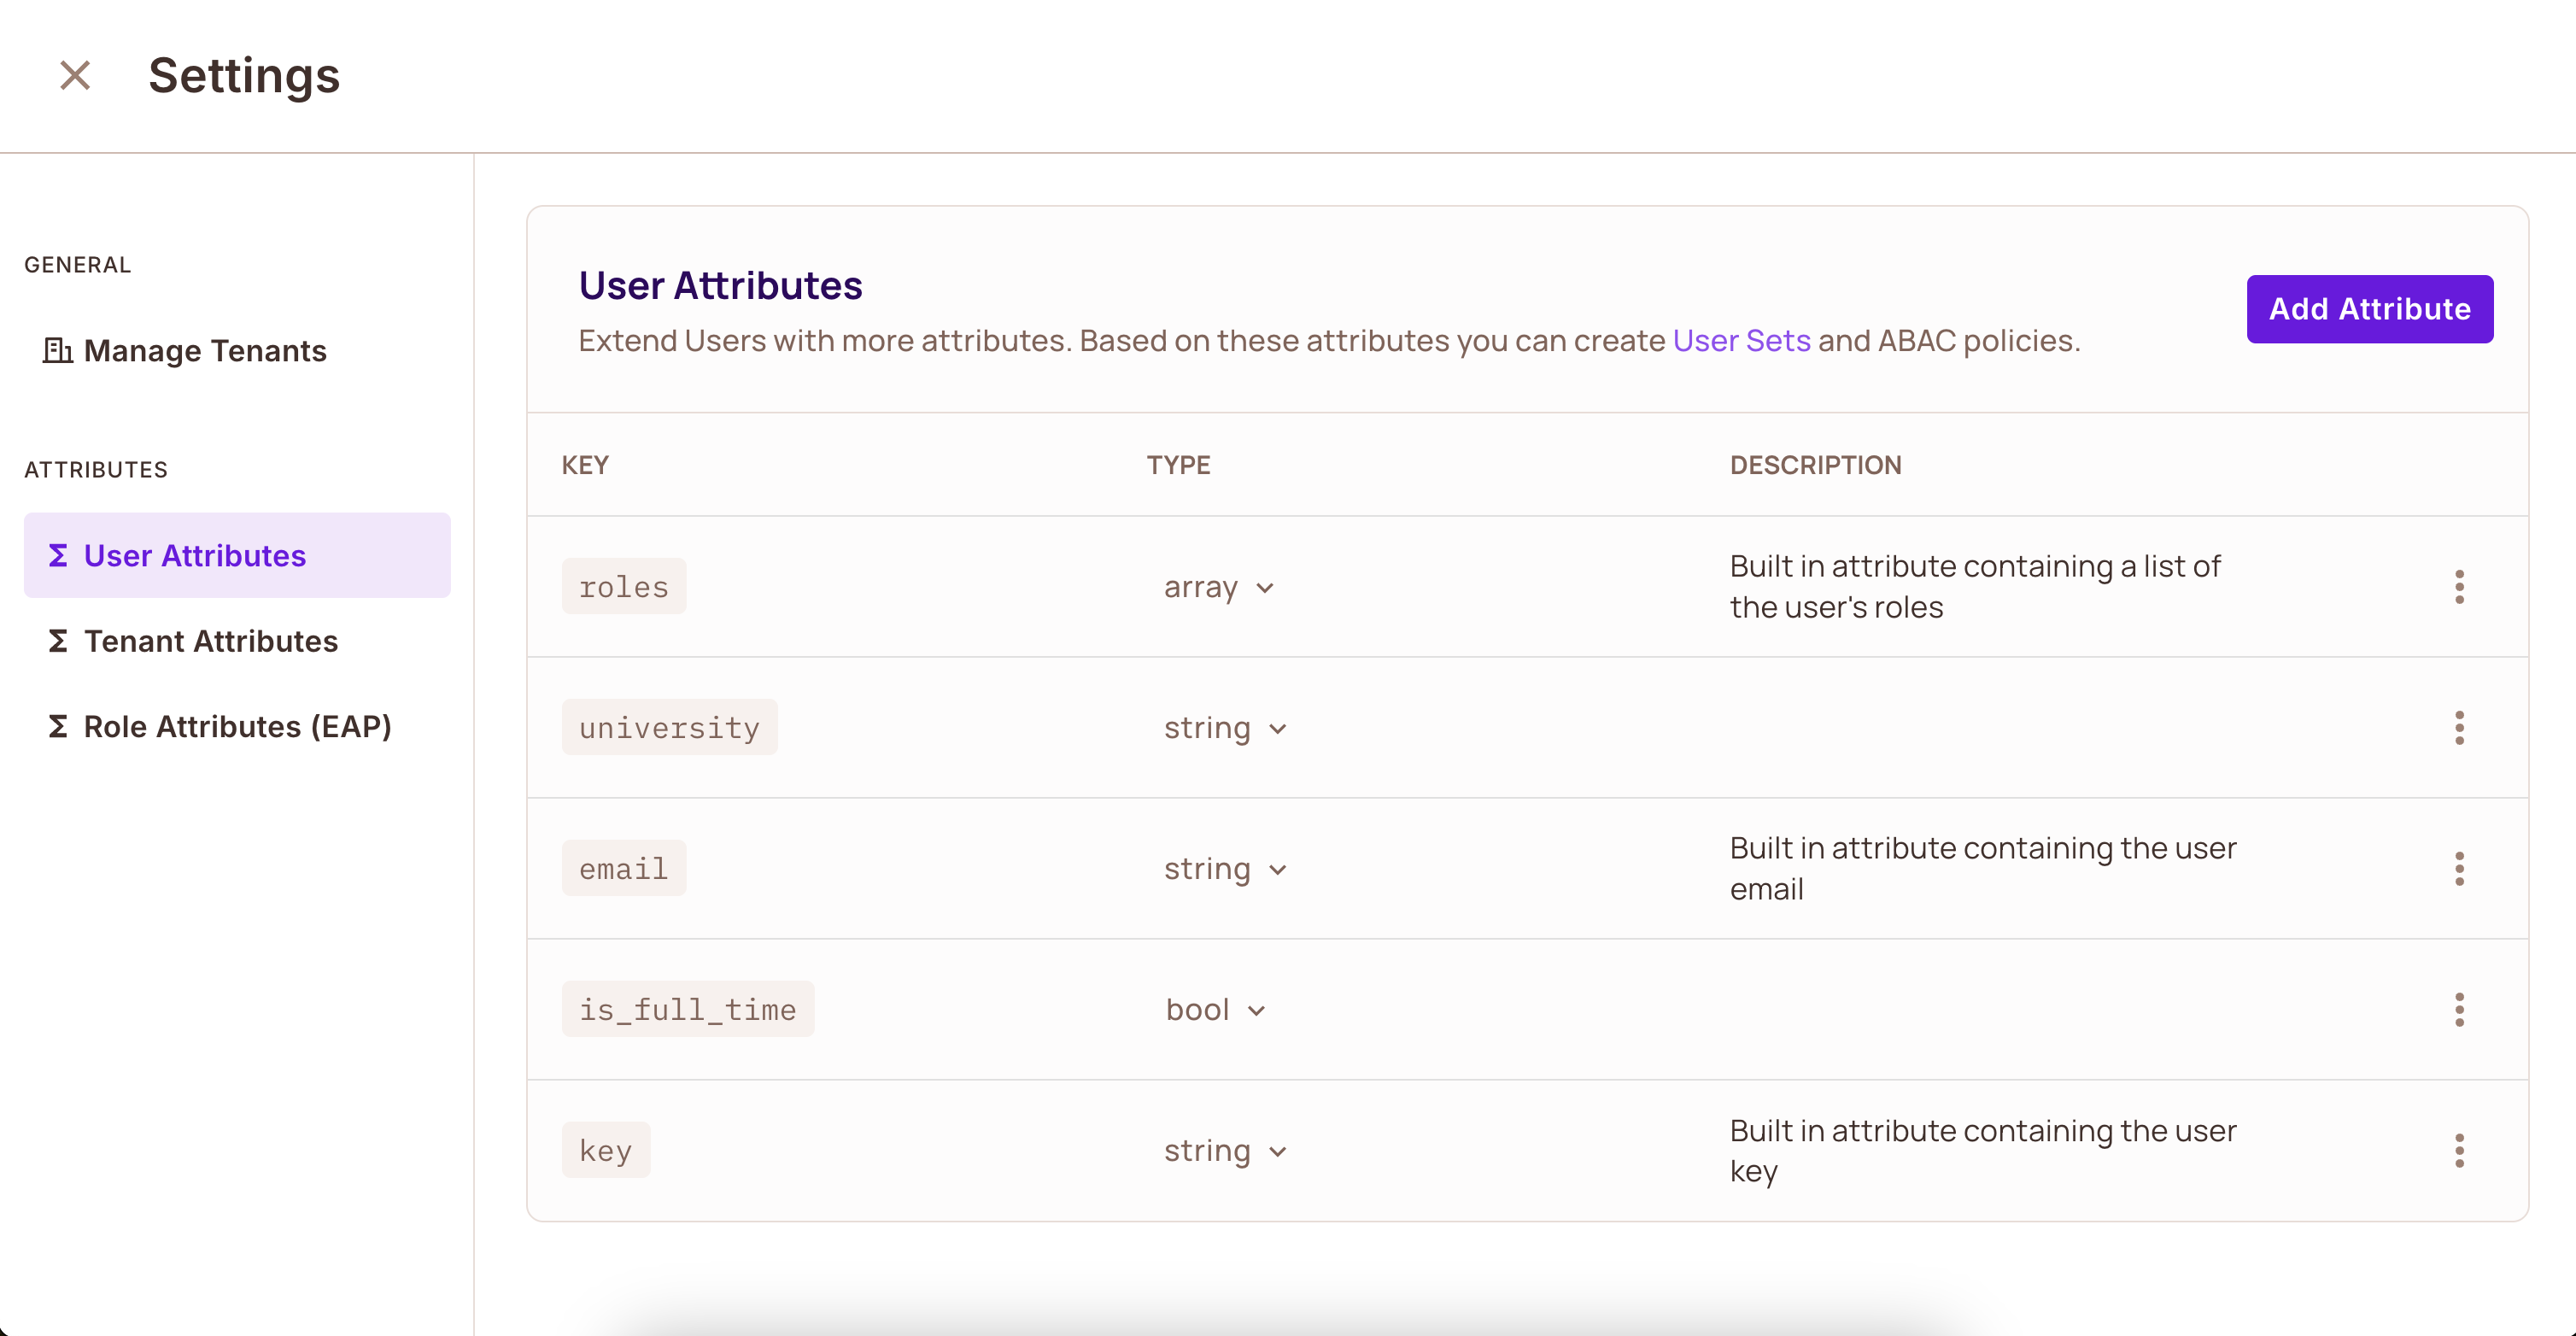
Remember to click Save after defining your attributes.
Step 2: Creating Tenant Attributes
Tenant attributes apply to entire organizations or groups within your system.
- Navigate to the Users panel
- Click the Tenant Attributes button
- Click Add New Tenant Attribute
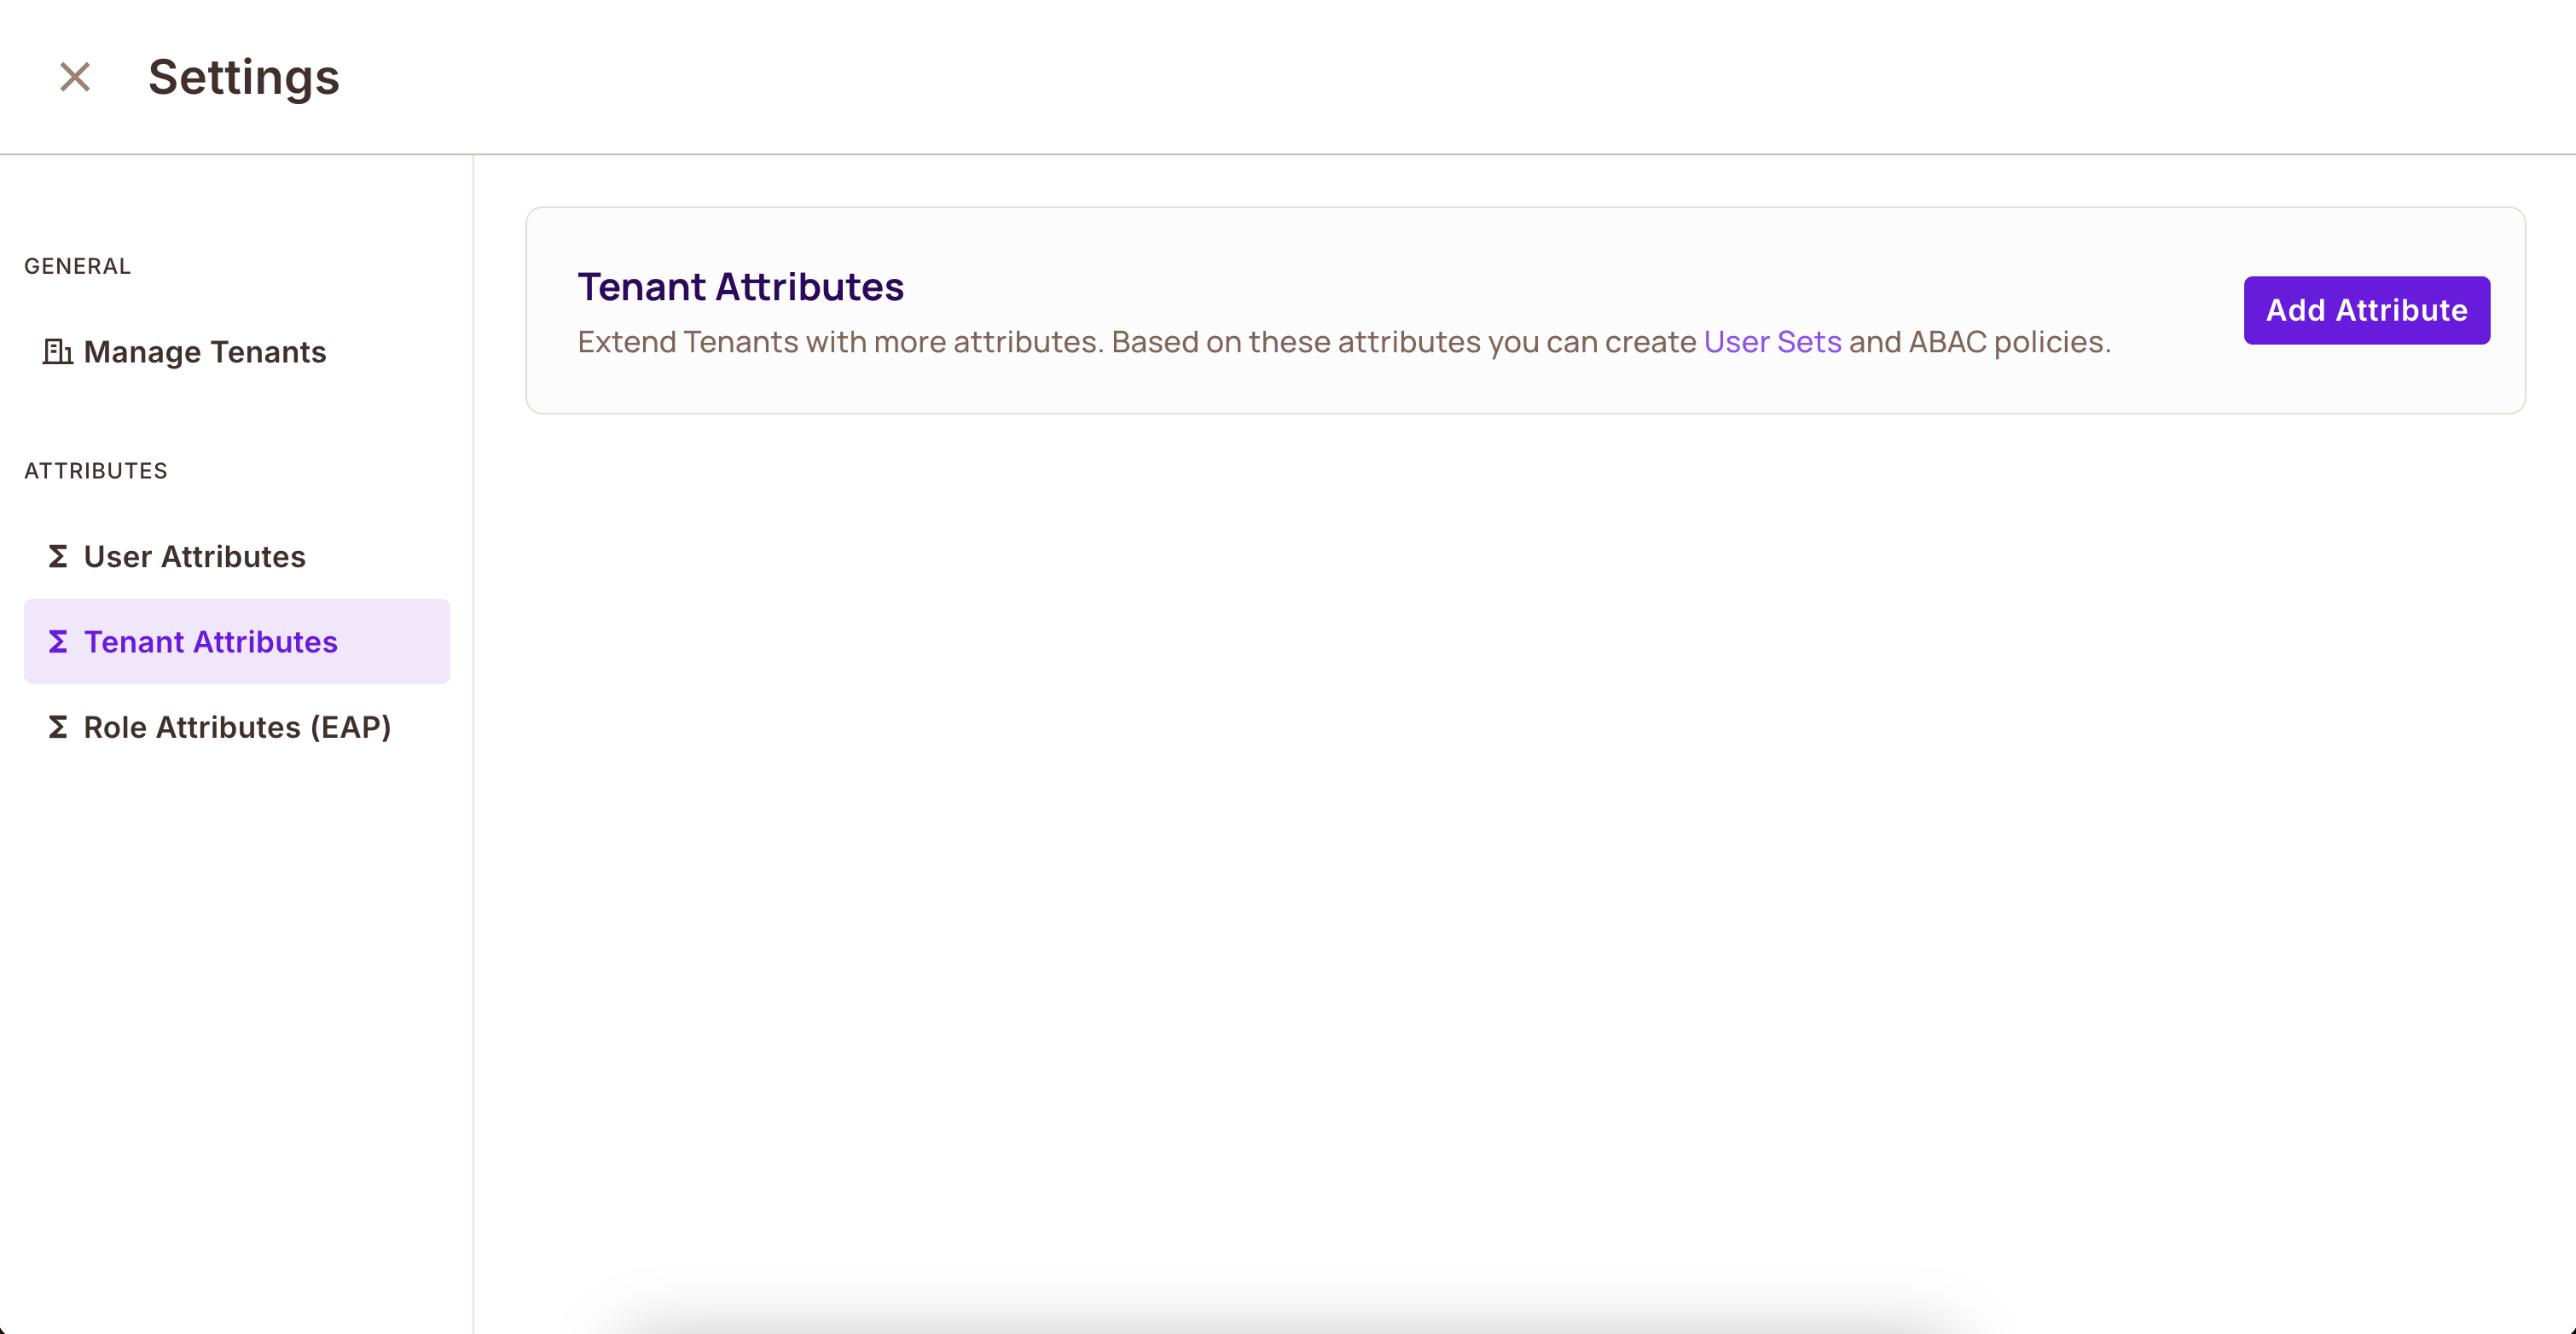
Example tenant attributes might include:
is_paying: Whether the tenant has an active subscriptiontier: Service tier leveluser_count: Number of licensed users
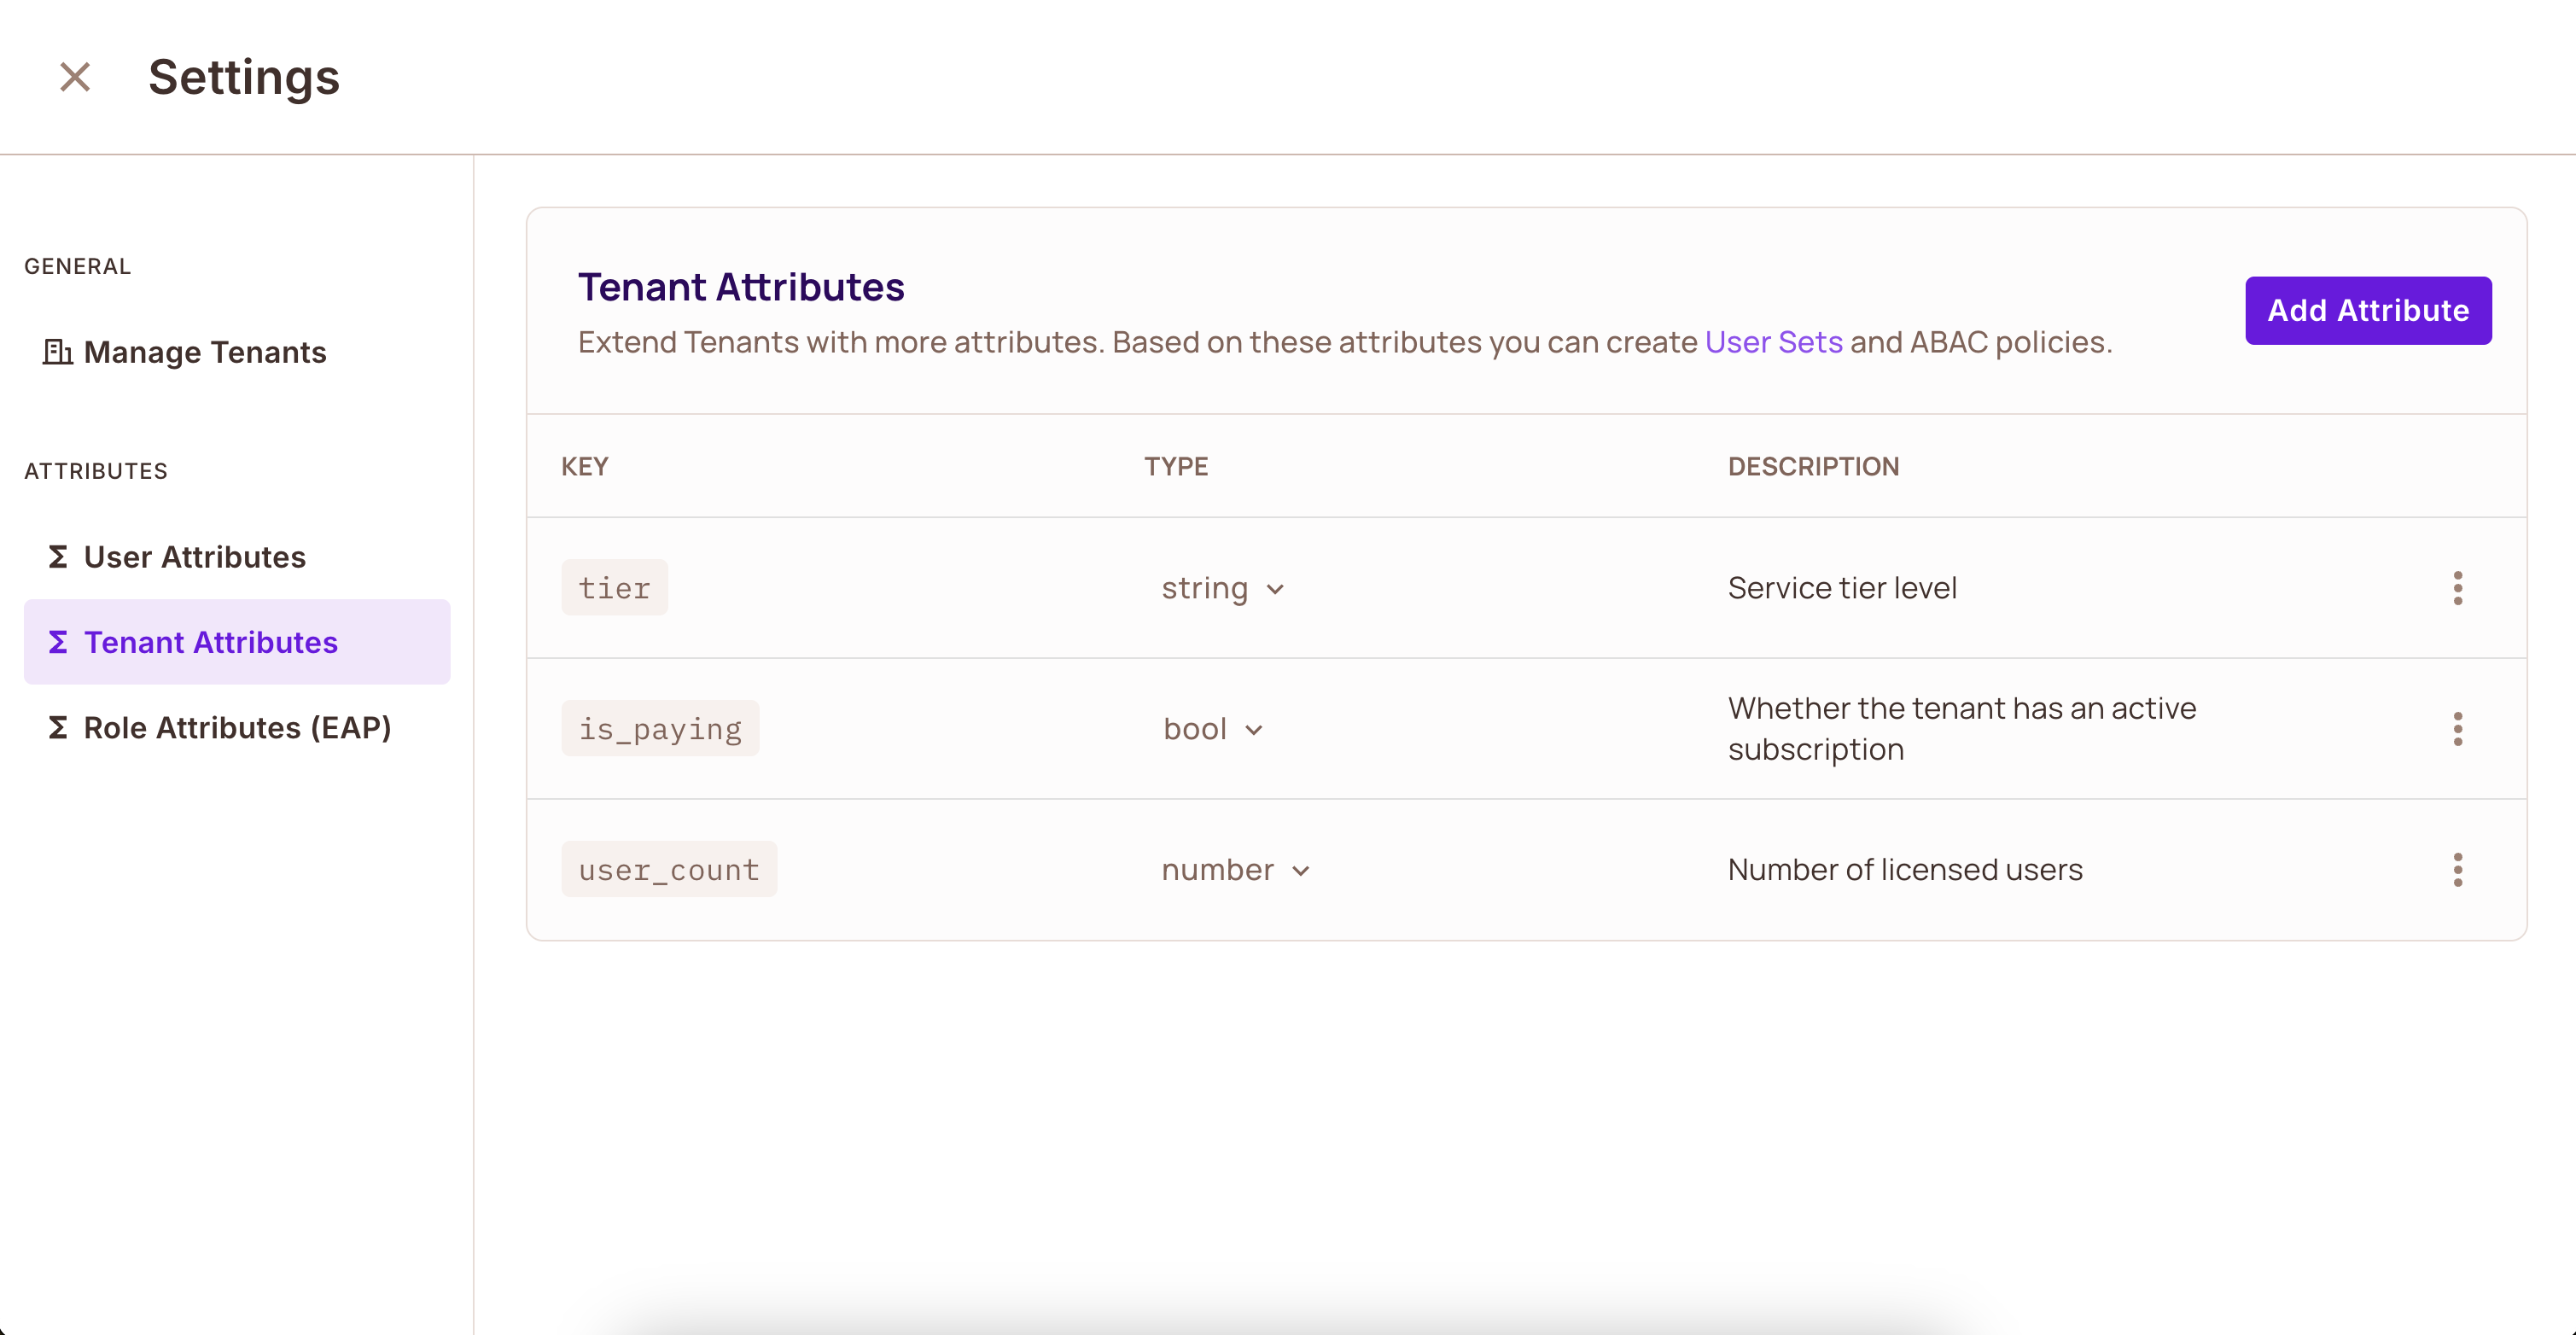
Don't forget to click Save your tenant attributes.
Step 3: Defining Dynamic Role (User Set)
Dynamic roles are groups of users that share common attribute values. Think of them as dynamic sets that automatically include users based on their attributes.
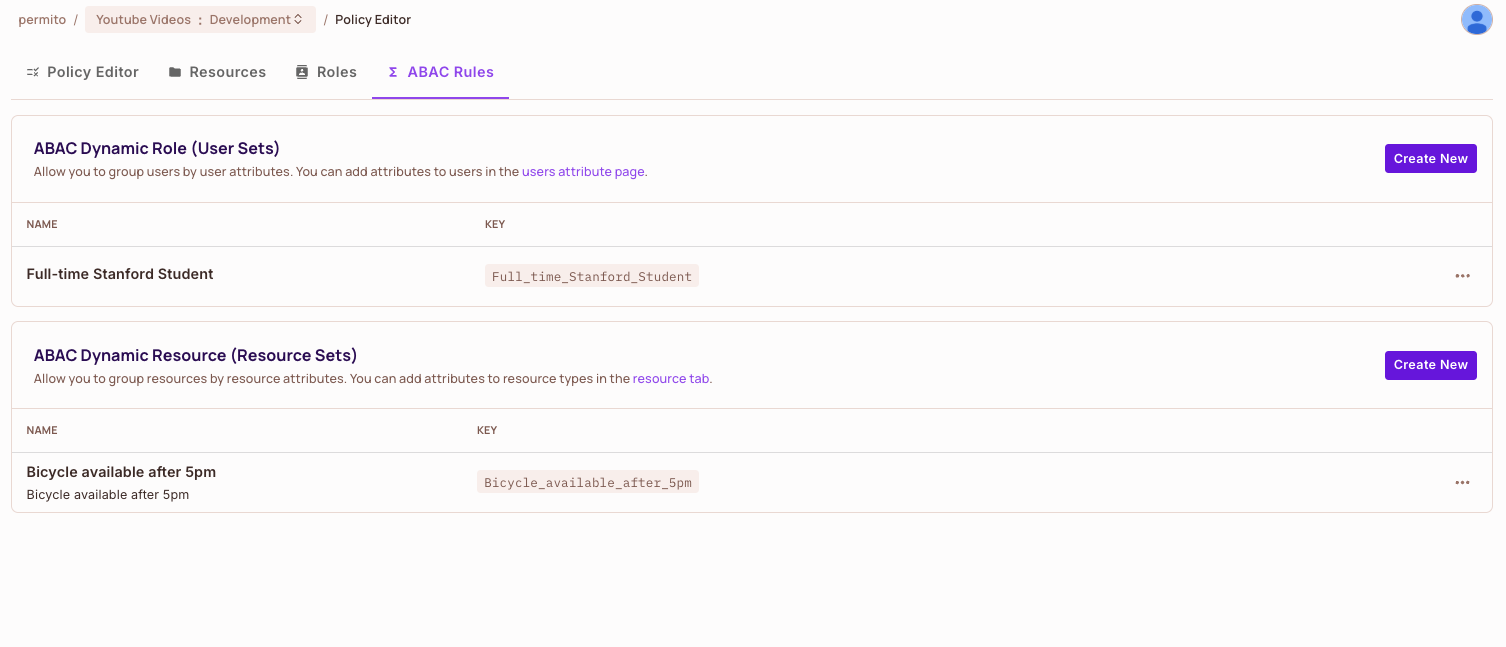
To access the creation of ABAC rules, navigate to Policy > ABAC Rules.
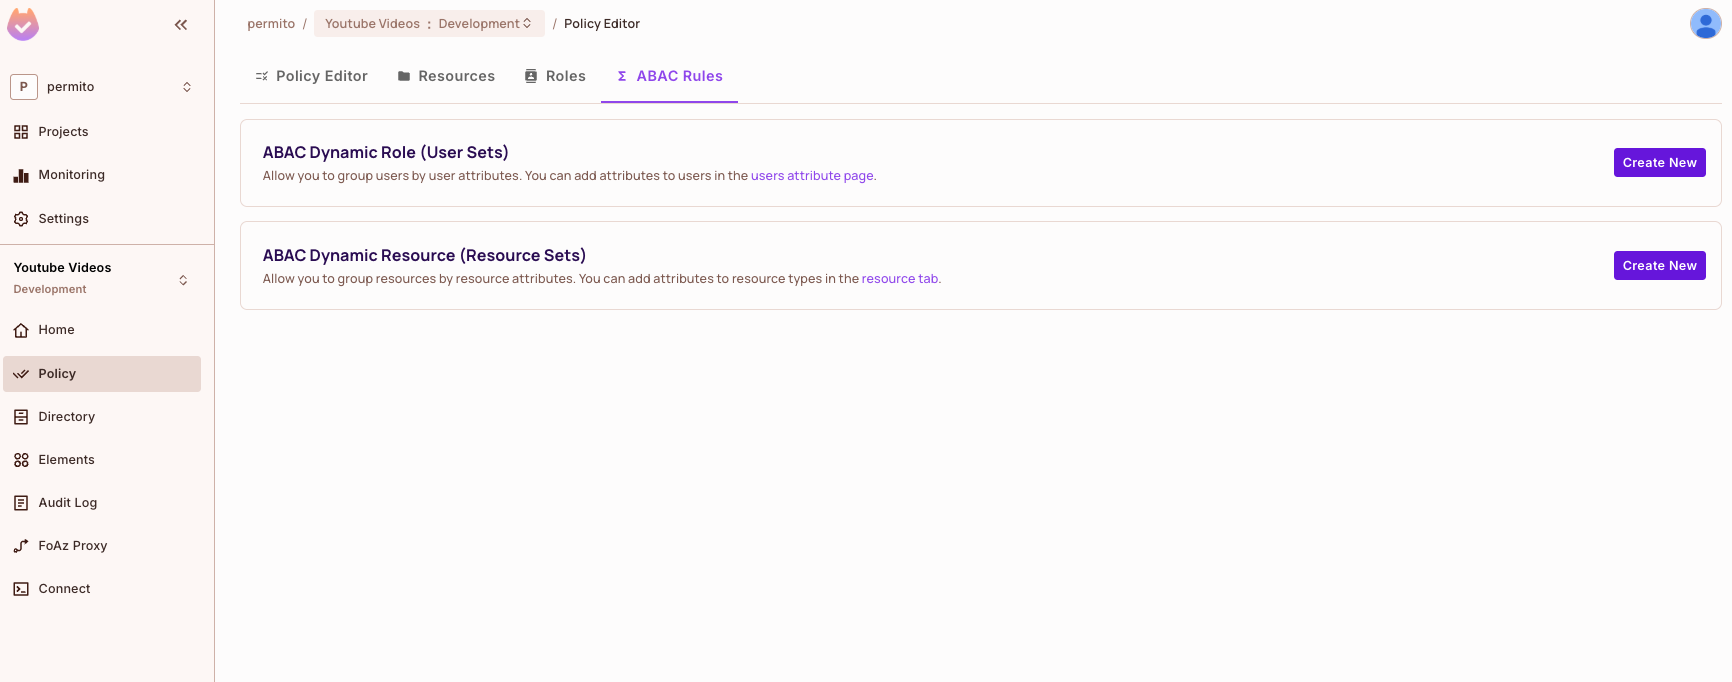
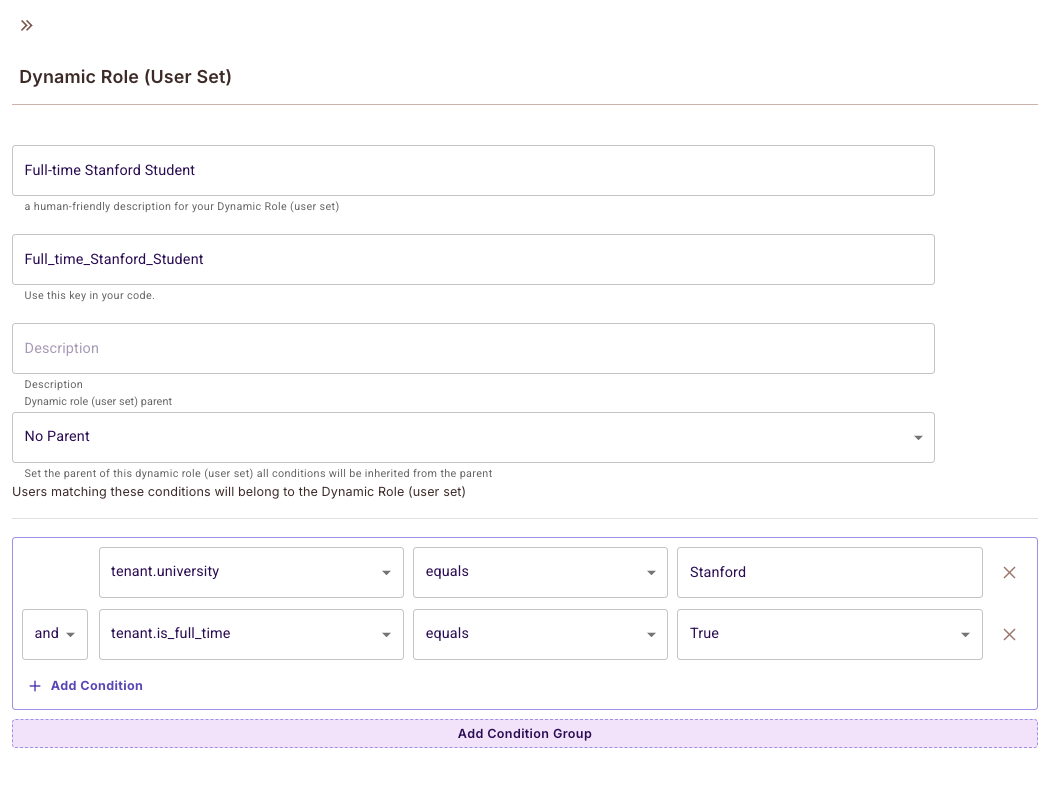
For our example, we'll create a user set for Full-time Stanford Students:
- Click Create New ABAC Dynamic role
- Enter the Title and click
Add Condition - Set these conditions:
user.university= "Stanford"user.is_full_time= true
Important security considerations:
- Tenant boundaries are not automatically enforced for user sets
- To enforce tenant boundaries, either:
- Add a condition on
user.roles - Use tenant attributes and compare
resource.tenantin resource sets
- Add a condition on
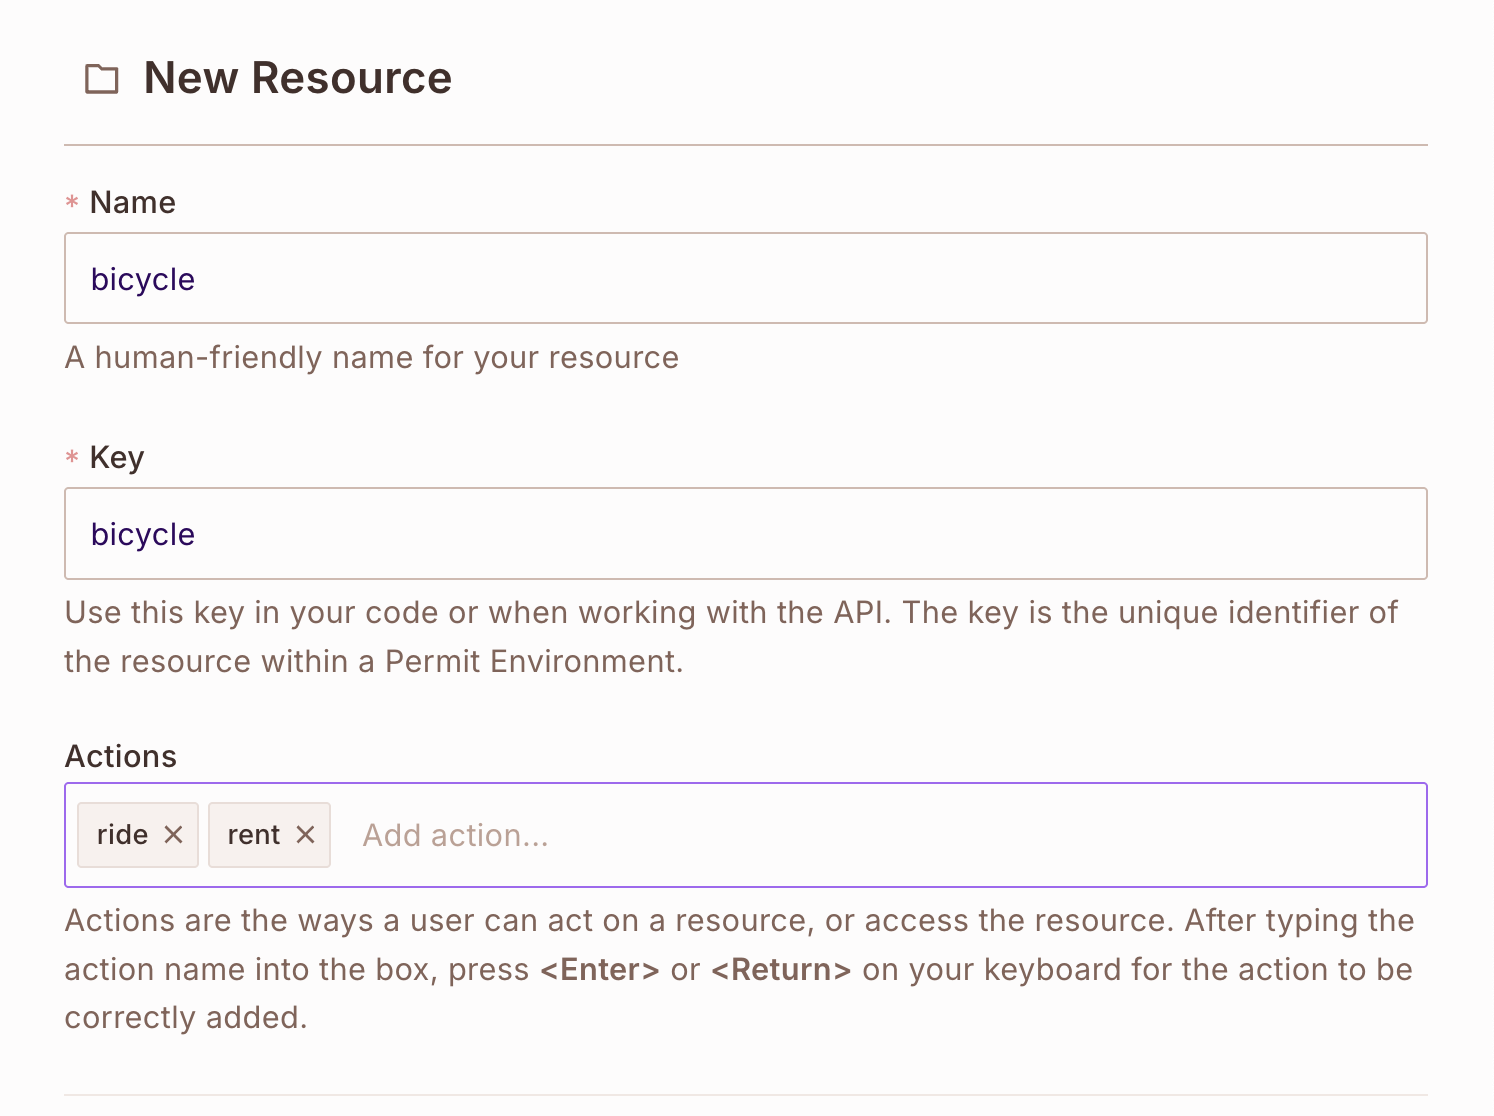
Step 4: Creating Resources
Resources are the objects or services you want to protect. Each resource can have attributes and allowed actions.
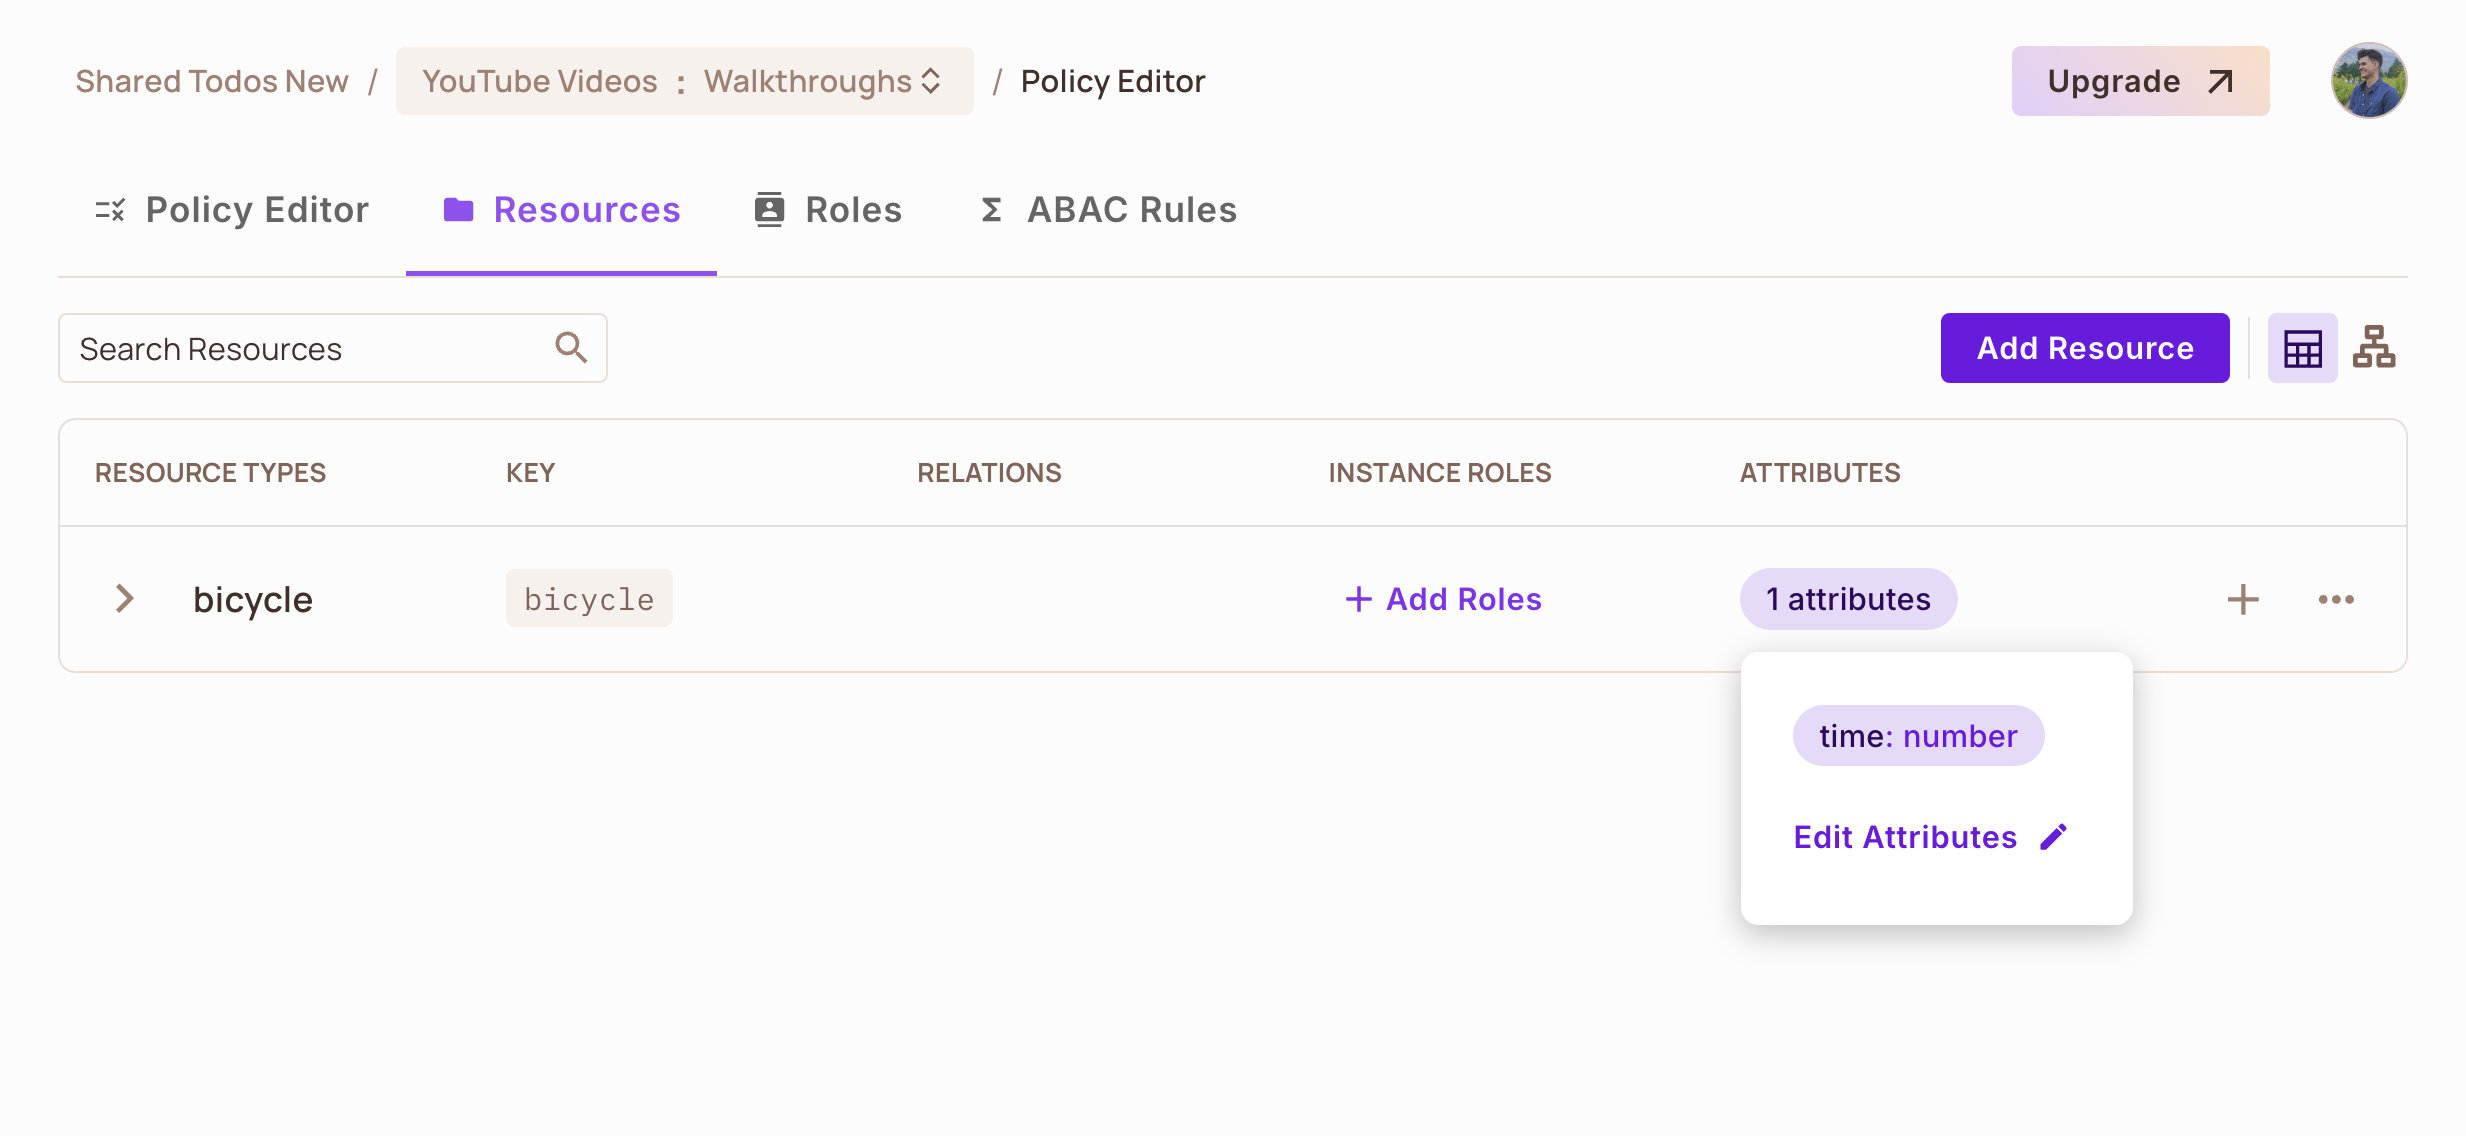
- Navigate to the Policy screen and the
ResourcesTab - Click Add Resource
For our bicycle rental system:
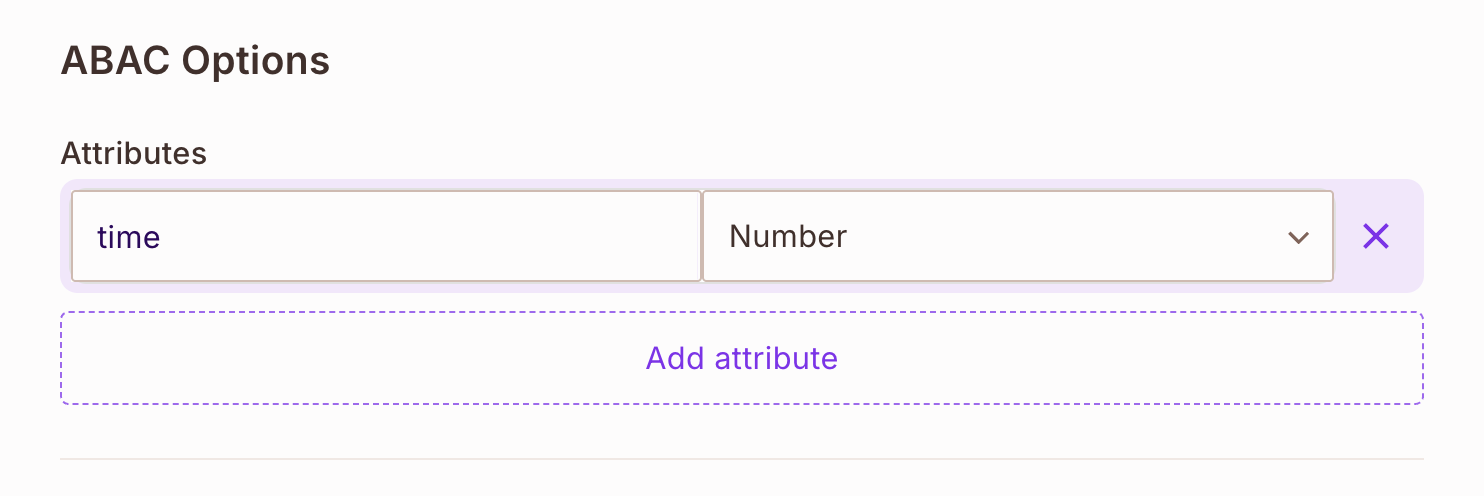
- Create a
bicycleresource - Add the
timeattribute - Define two actions:
riderent
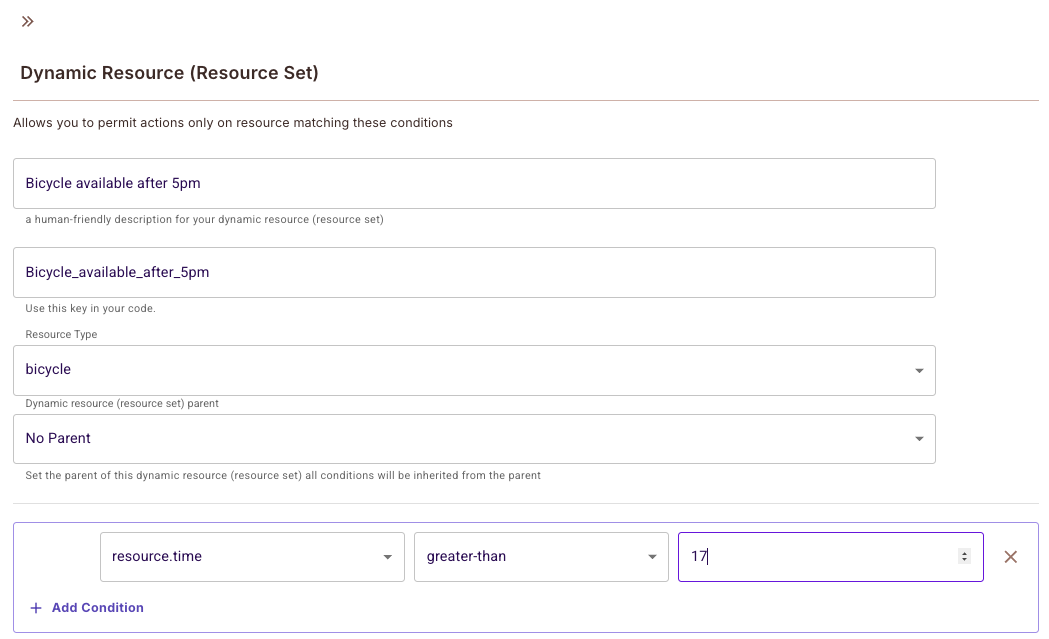
Step 5: Defining Dynamic Resource (Resource Set)
Dynamic Resources group resources based on their attributes. In our example, we need to identify Bicycles available after 5pm
Create the condition:
resource.time> "17:00"
Advanced: Comparing Resource and User Attributes
You can create conditions that compare resource attributes with user attributes using (ref) operators:
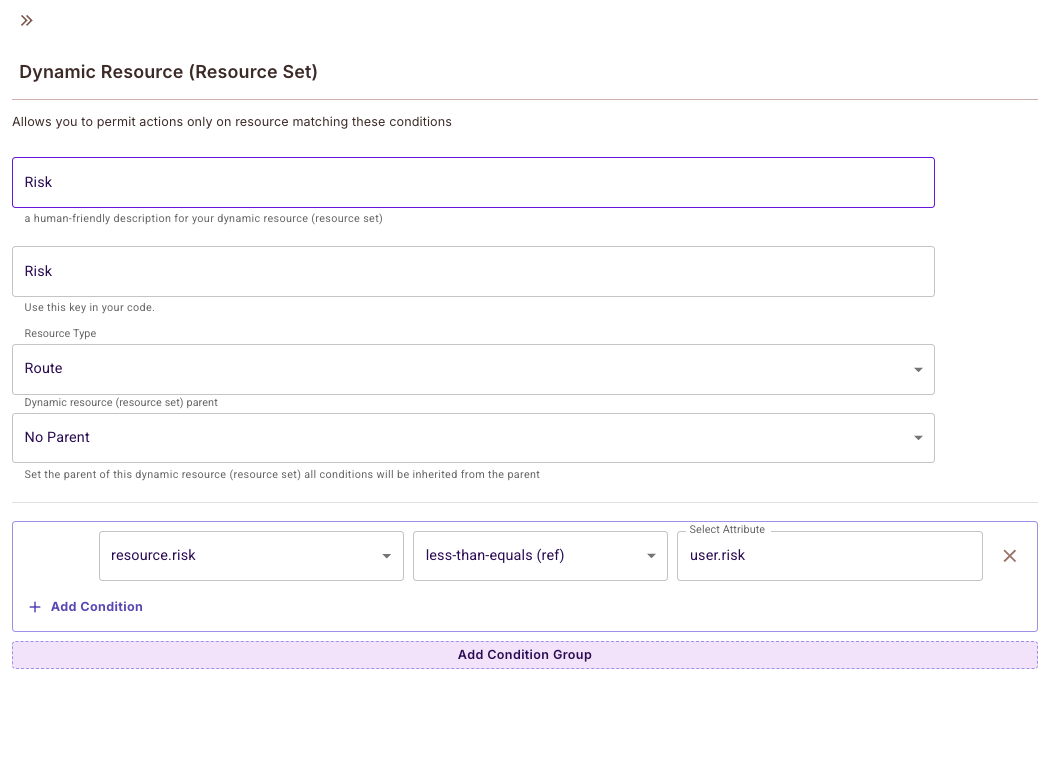
Step 6: Applying Permissions
The final step is connecting your user sets with resource sets through permissions.
- Navigate to the Policy screen
- Find your
Full-Time Stanford StudentUser Set - Locate the
Bicycles after 5pmResource Set - Check the appropriate permission boxes
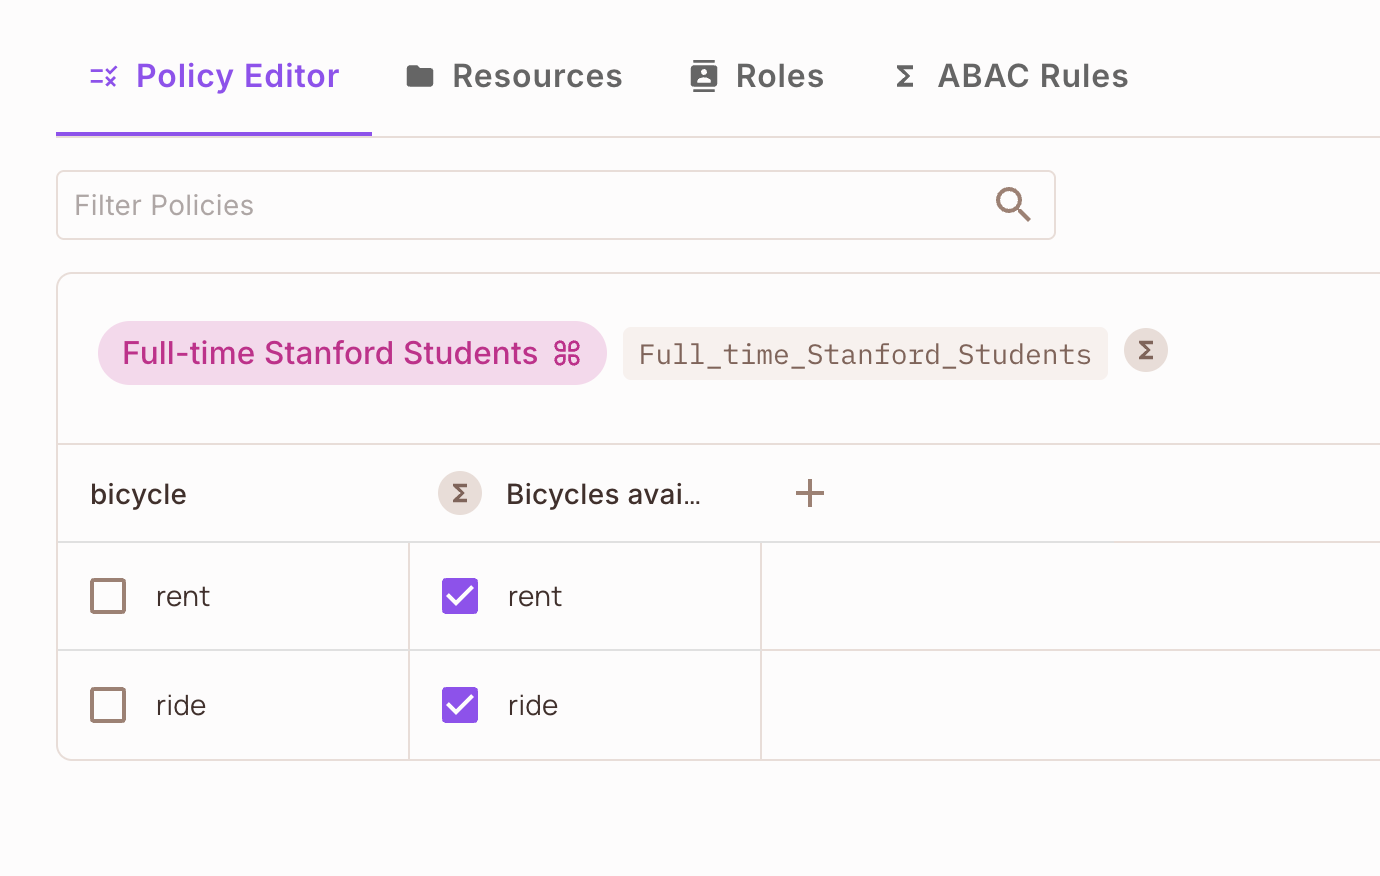
Don't forget to click Save your changes!
You cannot use the key type for any attribute you create, as it is a reserved keyword.
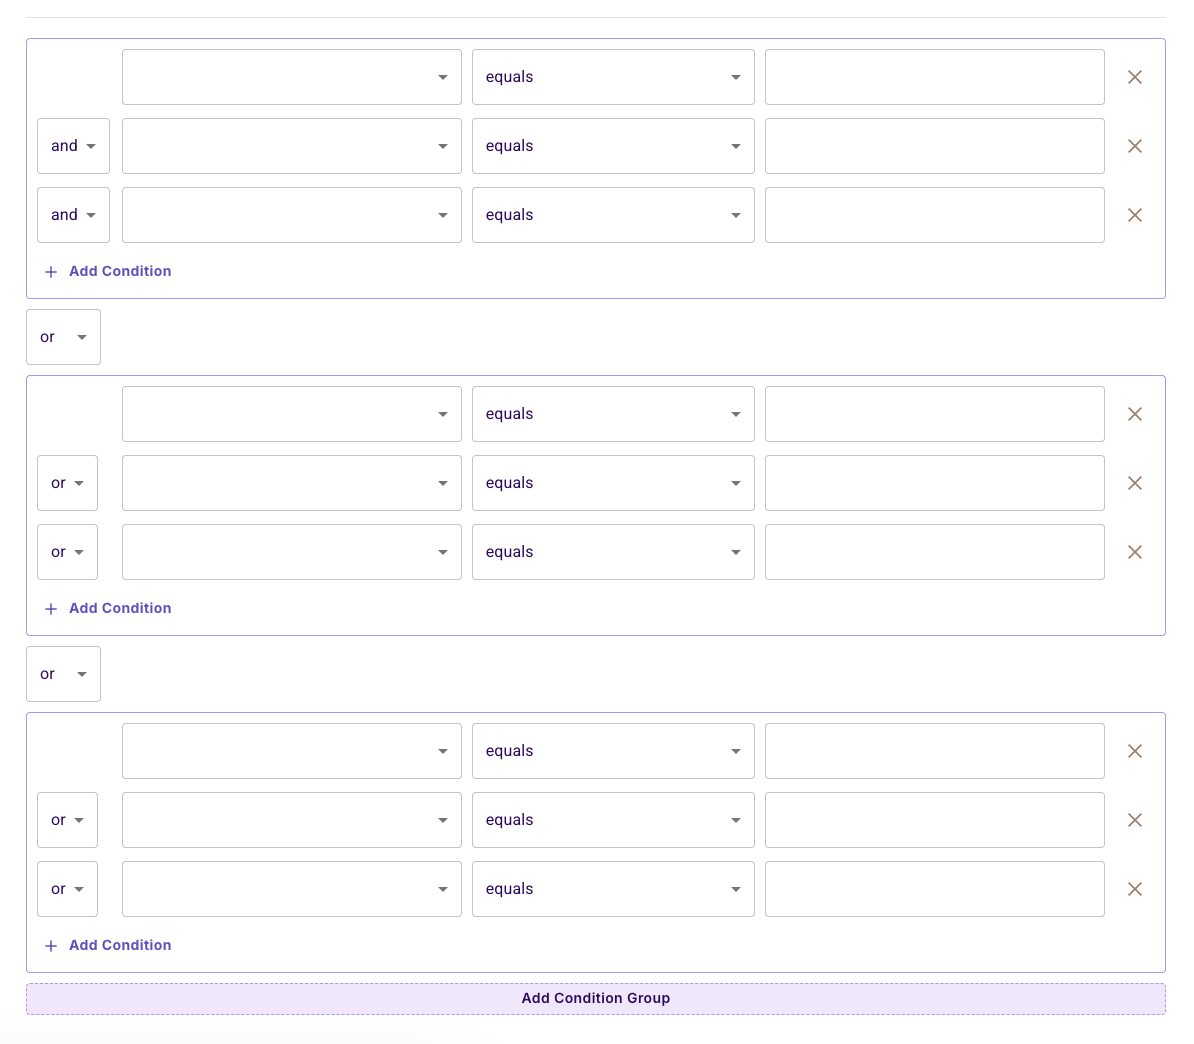
Complex Policy Support
The Permit.io UI supports complex policies with multiple condition groups and conditions: