Food Delivery System Example
This guide shows you how to build a food delivery system with Nuxt.js and implement authorization using Permit.io. We'll demonstrate how to combine three authorization models - Role-Based Access Control (RBAC), Attribute-Based Access Control (ABAC), and Relationship-Based Access Control (ReBAC) - to create a secure and scalable application.
Prerequisites
Before you begin, make sure you have:
- A Permit Project: Use an existing project or create a new one at https://app.permit.io. You will get a Permit token for the Permit project to use in the code.
- Docker: You need a valid Docker installation to run the Policy Decision Point (PDP) permission checks.
- NodeJS: Nuxt and Vue are JavaScript frameworks that work with NodeJS. To continue, you also need a working Node installation.
What we will build
This guide will walk you through building a Nuxt.js based food delivery application, demonstrating how to implement different types of authorization in a real-world scenario. The application includes:
- A customer interface for browsing meals and placing orders
- A vendor dashboard for managing meals and fulfilling orders
- A rider portal for delivering orders
- An admin panel for system management
The Tech-Stack for this application includes:
-
Frontend
- Nuxt.js application with Vue
- Pages for customers, riders, vendors, and admins
- Real-time UI updates
-
Authorization
RBACfor basic permissionsABACfor promotional offersReBACfor order assignments- Multi-tenant support
-
Backend
- Server endpoints with authorization checks
- Real-time data sync with Permit.io
- Error handling
The full application code is available at: https://github.com/permitio/permit-nuxt-example
System Architecture and Core Features
The Food Delivery System application combines three authorization models:
RBAC: Basic role-based permissions for meals and ordersABAC: Promotional offers based on order cost and rider experienceReBAC: Order assignments between vendors, riders, and customers
Order Management
Users can act on orders based on their roles:
- Customers create orders
- Vendors prepare orders
- Admins assign riders
- Riders deliver orders
Composite Permissions
The system combines all three authorization models for granular control. For example, to deliver an order:
- User must have the
riderrole (RBAC) - Order must be assigned to them (
ReBAC) - For free delivery orders, a rider must have 500+ rides (
ABAC)
Multitenant Authorization
The system uses cities (california and washington) as tenants to isolate permissions. Actions allowed in one city are not automatically allowed in another.
Continuous Data-Syncing
All data changes are synced with Permit in real-time:
- New orders from customers
- Rider assignments from admins
- Order status updates
Server Endpoints
The Nuxt server exposes these endpoints with built-in authorization:
| Method | Endpoint | Authorization |
|---|---|---|
| GET | /meals | RBAC |
| POST | /meals | RBAC |
| DELETE | /meal/:id/remove | RBAC |
| GET | /orders | RBAC |
| POST | /orders | RBAC & ABAC |
| POST | /order/:id/fulfill | RBAC & ReBAC |
| POST | /order/:id/assign-rider | RBAC |
| POST | /order/:id/deliver | RBAC, ABAC, & ReBAC |
| POST | /users | - |
| DELETE | /users | - |
Setup and Configuration
Let's set up your development environment. We'll guide you through installing the necessary tools and configuring your project step by step.
Clone the Repository and Install Dependencies
git clone https://github.com/permitio/permit-nuxt-example.git
cd permit-nuxt-example
git checkout all-features
npm install
Provide Environment Variables
- Obtain a Permit token from the project settings in the Permit Console.
- Create a
.envfile at the root of the project with the following. Put the copied token instead of the placeholder value.
PERMIT_TOKEN=permit_key_XXXXXXXXXXXXXXXXXXXXXXXXX
PERMIT_PDP=http://localhost:7766
Run the Development Server
npm run dev
Access the App
Open http://localhost:3000 in your browser. You will see the app with pages for each role's actions.
The sidebar allows you to set user IDs as current users, as well as set roles and delete users.
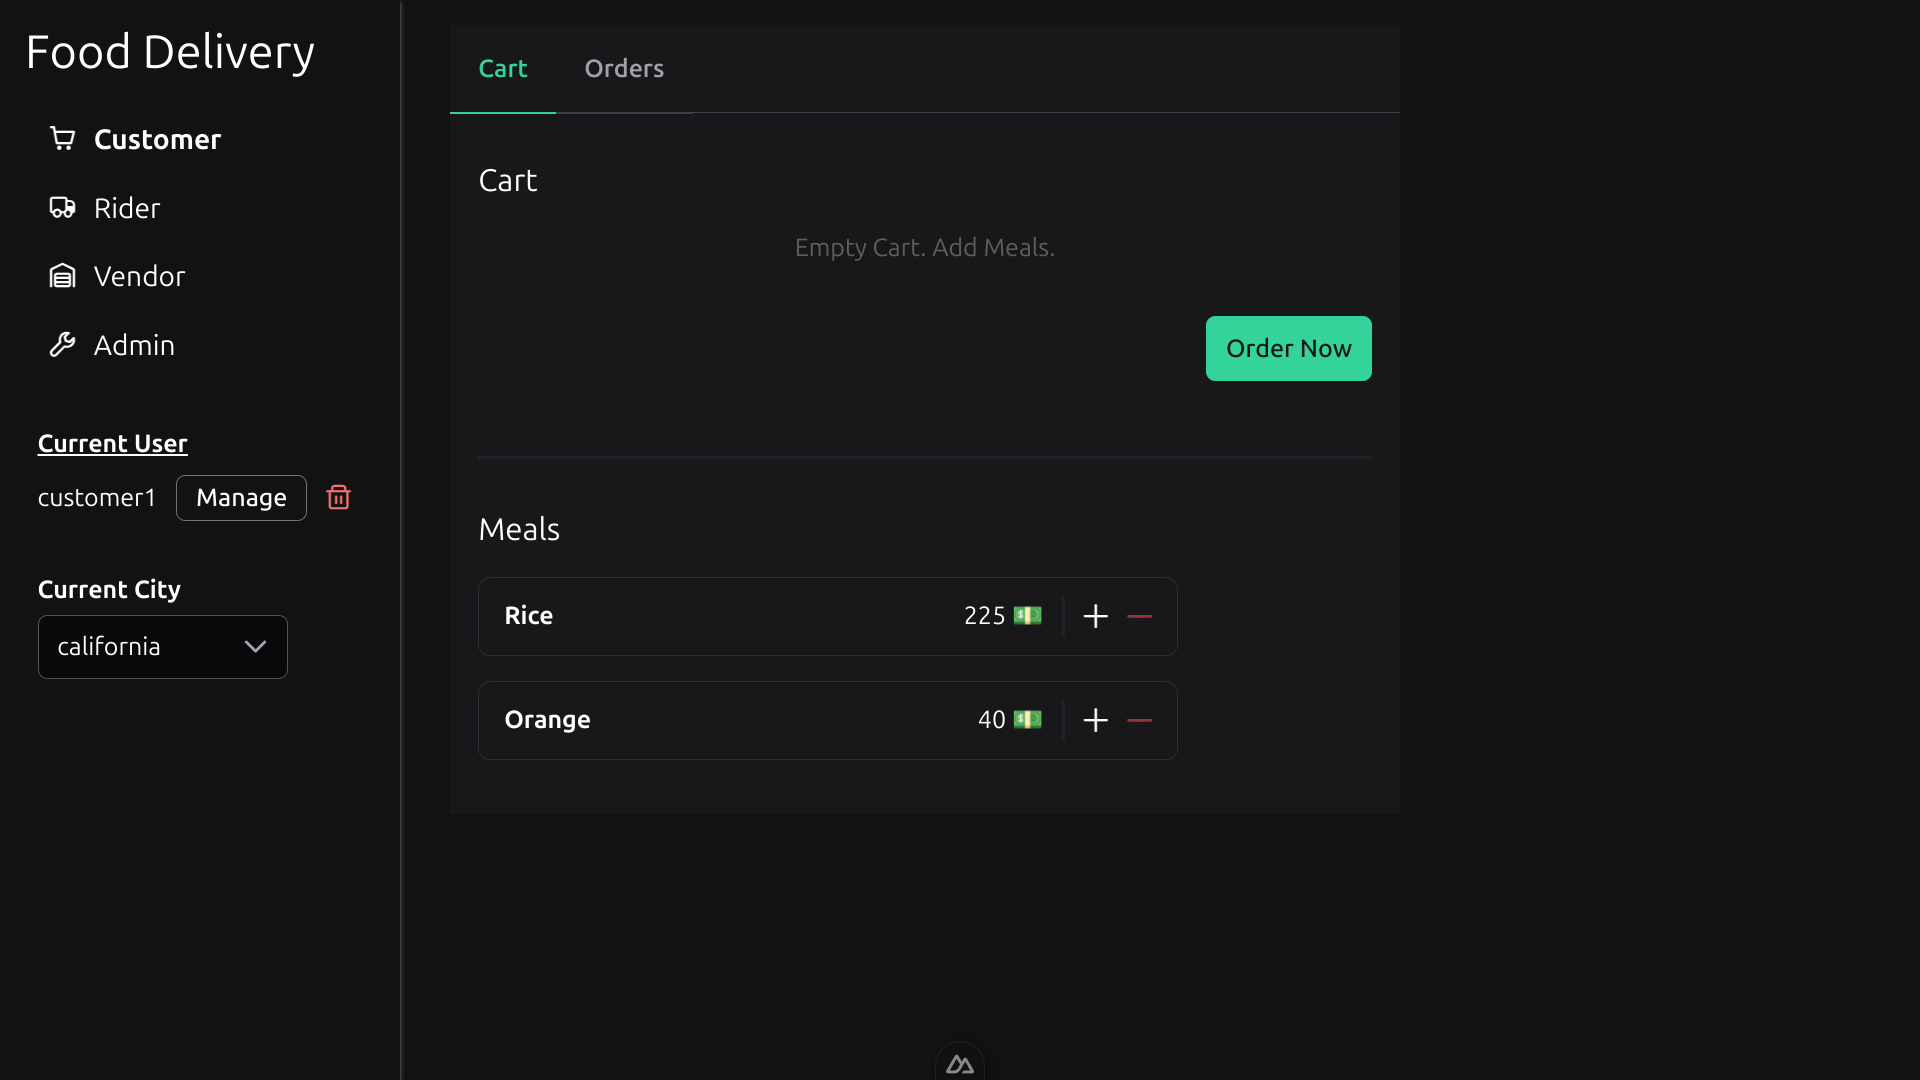
At this point, your actions will not be authorized. To complete the tutorial, you should follow the next step to configure the necessary policies to authorize your actions.
Configure Basic RBAC
Role-Based Access Control (RBAC) is usually the first layer of authorization we suggest to implementing.
Our food delivery app uses an RBAC baseline to enforce the following policies:
For Meals:
- All roles (
customer,rider,vendor, andadmin) can view (read) meals. - Only
vendors andadmins can create, update, and delete meals.
For Orders:
- All roles can view orders.
- Only
customers can create them. - Only
vendors can fulfill them (marking the orders as ready to be delivered). - Only
admins can assign riders to orders. - Only
riders can deliver them. admins can also create, fulfill, and deliver orders.
To enforce the above RBAC policies:
Create Resources
In the Resources tab of the policy section of the Permit UI, create the "Meal" and "Order" resources with their involved actions.
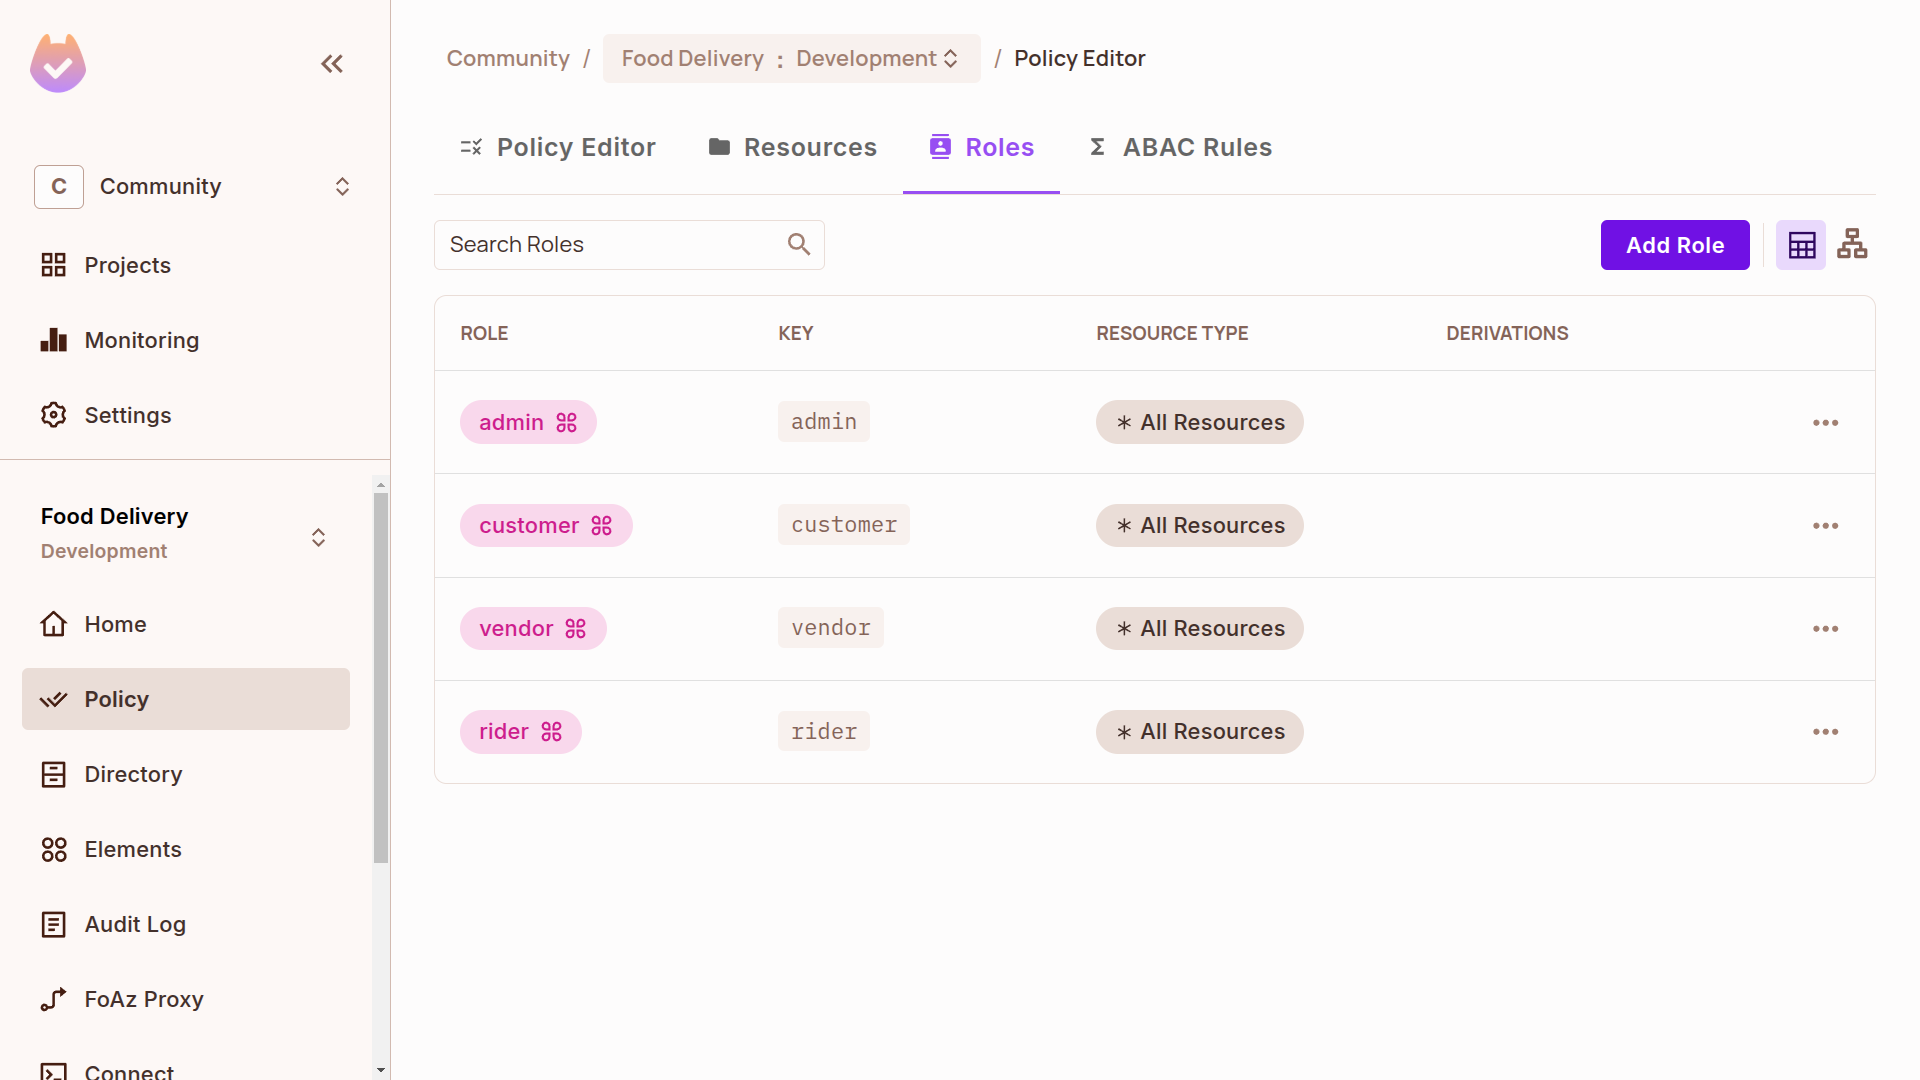
Create Roles
In the Roles tab, create the 4 roles: customer, rider, vendor, and admin.
We will use them in the policy editor to allow permissions based on the policy above.
Grant Permissions
In the policy editor, toggle the matching actions and resources in accordance with the RBAC policies defined above.
This grants the relevant permission for a role. Refresh and test the running app; you can now execute some actions.
Configure ABAC
Attribute-Based Access Control (ABAC) allows us to consider attributes as part of our access control policy, making it more granular and fine-grained. In ABAC, we check for specific condition sets on user and/or resource attributes to grant permissions. This is done by grouping attributes into condition sets, thus creating multiple user sets and/or resource sets that polices can rely on.
The food delivery app uses promotional offers to show how ABAC can be utilized. Orders with at least 500 costs are eligible for free delivery, and only riders with at least 500 rides can deliver these promotional orders. We can rephrase these ABAC policies as follows:
- A
customercan create a free delivery order if the order's cost is greater than or equal to 500. - A
ridercan deliver a free delivery order if the rider's number of rides is greater than or equal to 500.
Notice how these ABAC policies are built on top of the pre-defined RBAC ones. The ABAC policies use the roles and actions, extending them based on conditions.
To see this in action:
Add Resource Attribute and Action
- Go to the "Order" resource and edit it.
- In the list of actions, add a new create-with-free-delivery action. The app uses this for issuing free deliveries.
- Scroll down to the
ABACsection and add a newcostattribute with the type "Number" - Save the changes.
Create a Resource Set
- In the
ABACRules tab, create a new Resource Set. - Add the condition for
costbeing greater than or equal to 500. This will auto-add any resource that matches this condition to this set.
Add User Attribute
In tenant settings, update user attributes to add a number_of_rides attribute on users. It should be of type "Number".
Create a User Set
- In the
ABACSets tab, create a new User Set. - Add the condition for
number_of_ridesbeing greater than or equal to 500. - Same as with the resource set above, any user that matches this condition will automatically be part of this set.
Grant Permissions
The newly created ABAC Sets will now be part of the policy editor. With that, we can now set ABAC-related permissions.
- In the policy editor, toggle the
create-with-free-deliveryaction on "Order" by customers. - Then, for the Order
ABACresource set, toggle thedeliveraction for theABACuser set. - Refresh the running app and test that you can now create free delivery orders with meals above 500 cost.
Fulfilling and Delivering orders won't work until we configure our ReBAC policies.
Configure ReBAC
Relationship-Based Access Control (ReBAC) uses associations or relationships between users and resources to grant or deny permissions,
leveraging relationships in the overall system for access control. The food delivery app uses ReBAC to enforce the following policies:
- A
vendorcan only fulfill an order if the vendor created the meals in that order. - A
ridercan only deliver an order if that order was assigned to the rider by the admin.
To fulfill an order, vendors use two policy checks: having the vendor role and having a relationship with meals. To deliver an order, a user needs the rider role, a relationship with the order, and their number of rides to exceed a minimum.
To see ReBAC in action with the Food Delivery System:
Create Instance Roles
- Go to the "Order" resource and edit it.
- Scroll down to the
ReBACsection and create 2 instance roles:VendorandRider. They will becomeOrder#VendorandOrder#Rider.
Grant Permissions
Update the policy editor to allow "fulfill" and "deliver" actions for these new roles on orders. Refresh the app. With the right user, you can now mark orders as delivered or fulfilled.
Syncing App Data
Permit SDKs provide several methods for programmatic synchronization. In Nuxt, you can use methods on permit.api to sync data as needed. For users, create or update them with the permit.api.users.sync method in the same call.
The delete method is also available.
The food delivery app syncs users with the Permit project in the handlers of the /users endpoints as follows:
// For creating/updating user
permit.api.users.sync({
  key: userId,
  attributes: { number_of_rides: noOfRides },
});

// For deleting a user
permit.api.users.delete(userId);
In addition to users, you can also sync resources and role assignments. You can:
- Use
permit.api.resourcesmethods for top-level resource management, - Use
permit.api.resourceInstancesmethods for managing specific instances of resources, or - Use
permit.api.roleAssignmentsmethods for handling roles at both top-level (forRBAC) and at instance-level (forReBAC).
These methods are multitenant-aware. If you are building with multitenancy, provide the tenant with context. Otherwise, set "default" as the tenant. Permit also lets you sync condition sets. See more about that in the API docs.
In the Food Delivery System code, we sync orders with the Permit project and assign the related instance role to the "Order" resource where appropriate.
// Sync a new order with Permit
permit.api.resourceInstances.create({
  key: id,
  resource: "Order",
  attributes: { cost: totalPrice },
  tenant: "california",
});

// Set the Order's Vendor with Permit
permit.api.roleAssignments.assign({
  user: vendor,
  role: "Vendor",
  resource_instance: `Order:${id}`,
  tenant: "california",
});

// Sync a deleted order with Permit
permit.api.resourceInstances.delete(`Order:${id}`);
Enforce Permissions
You can check permissions in server middleware and UI parts. In middleware, you use permit.check function that is available in all Permit's SDKs. In frontend code, you use CASL together with Permit.
In the Food Delivery System, we use Permit in the middleware for combined checks of RBAC, ABAC, and ReBAC policies at once. For example, the permit.check call for permitting a rider to deliver is as follows:
// This auto-checks all policies applying to the "deliver" action
const canRiderDeliver = await permit.check(
  userId, // user
  "deliver", // action
  { type: "Order", key: orderId, tenant: "california" } // resource
);

// Prevent the rider from doing the delivery if not authorised
if (!canRiderDeliver) {
  return {
    success: false,
    message: "You are not permitted to perform this action",
  };
}
In the Vue frontend, you can bulk load permissions for a given user and toggle parts of the UI based on permissions or "abilities". Though not used in this guide's repo, you can find an example with Vue here.
<script setup lang="ts">
// ...

const fulfill = async (orderId: number) => {
  if (permit.value.check('fulfill', 'Order', {}) {
    // ...
  }
};

const assignRider = async (e: FormSubmitEvent, orderId: number) => {
  if (e.valid && permit.value.check('assign-rider', 'Order', {}) {
    // ...
  }
};

const deliver = async (orderId: number) => {
  if (permit.value.check('deliver', 'Order', {}) {
    // ...
  }
};
</script>

<template>
  <!-- ... --->

  <Button
    label="Fulfill"
    v-if="!order.fulfilledTime && permit.check('fulfill', 'Order', {})"
    @click="fulfill(order.id)"
  />
  <Button
    label="Deliver"
    v-if="!order.deliveredTime && permit.check('deliver', 'Order', {})"
    @click="deliver(order.id)"
  />
  <Form
    @submit="(e) => assignRider(e, order.id)"
    v-if="
      permit.check('assign-rider', 'Order', {}) &&
      !order.riderAssignedTime
    "
    class="flex gap-4 items-end"
  >
    <!-- ... --->
  </Form>

  <!-- ... --->
</template>
Conclusion
In this tutorial, we combined multiple policy models for the same action in an example food delivery app. When building permissions in Nuxt / Vue, you can always reference the code as a guide.
Testing Your Implementation
To verify everything works as expected:
-
Start the PDP and application:
docker run -it -p 7766:7000 --env PDP_API_KEY=your-permit-api-key --env PDP_DEBUG=True permitio/pdp-v2:latestnpm run dev -
Test the authorization rules:
- Log in as a customer and try to create an order
- Switch to a vendor and verify you can fulfill orders
- Test as a rider to deliver orders
- Try creating a free delivery order (cost ≥ 500)
- Verify that riders with 500+ rides can deliver free delivery orders
- Check that vendors can only fulfill their own orders
- Confirm that riders can only deliver assigned orders
-
Test multi-tenant isolation:
- Create orders in different cities
- Verify that permissions are isolated between cities
We are looking forward to hearing from you on our Slack community. Feel free to ask questions and share what you are building with Permit.io.