Groups UI
Use the Groups UI to manage relationship-based permissions for your resource instances and users. Through the UI, you can easily create, edit, and manage groups without writing API calls.
Accessing Groups
Navigate to User Management in your Permit dashboard and select the Groups tab to view and manage your groups.

The Groups view displays all your existing groups with the following information:
- Group Instance Key: The unique identifier for the group
- Group Tenant: The tenant the group belongs to
- Resource Type: The type of resource the group is associated with
Creating a New Group
To create a new group, click the + Create Group button in the top right corner.

Required Fields:
- Group Instance Key (Required)
- A unique identifier for the group instance
- Example:
marketing,support,eng-team
- Tenant
- Select the tenant that the group belongs to
- Default:
Default Tenant
- Resource Type Key (Optional)
- The key of the resource type that the group belongs to
- This connects the group to a specific resource type in your policy
The Group Instance Key should be descriptive and follow your team's naming conventions for easy identification.
Editing Groups

Click the three-dot menu (⋮) next to any group to edit it. The Edit Group interface provides several configuration options:

Group Information
The basic group information (Group Instance Key and Tenant) is displayed at the top and cannot be modified after creation.
Managing Users

Add users to the group by typing their email addresses in the Users field. You can:
- Add multiple users at once
- Remove users by clicking the × next to their email
- Users added to the group will inherit permissions based on the group's role assignments
When you add users to a group, they automatically receive the permissions assigned to that group. For example, if you create a marketing group and assign it a member role, all users added to this group will automatically become members with the associated permissions.
Instance Access

The Instance Access section allows you to grant the group permissions on specific resource instances:
- Resource Type: Select the type of resource (e.g.,
document,social_media,campaign) - Resource Instance: Specify the instance key (e.g.,
marketing_plan,training_video,sales_proposal) - Role: Assign the role for this instance (e.g.,
editor,viewer,admin)
Following the previous example, we can create another group in our marketing group titled social_media.
This group will contain resource instances of marketing materials. We can assign this newly created group the role of editor.
The Groups feature creates an automatic derivation between the social_media#editor role and the marketing#member role - meaning all users with the marketing#member role will automatically be assigned with the social_media#editor role.
New resources added to social_media will be accessible to edit by members of the marketing group, and new users added as members to the marketing group will automatically have editor access to social media assets.
Click Add Instance Access to grant permissions on additional resource instances.
The description reads: "Grant a user permissions per resource instance, as defined by the associated policy, limited to a single tenant."
Child Groups
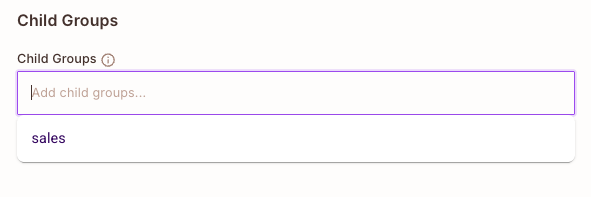
The Child Groups section allows you to create hierarchical group structures by adding child groups to the current group:
- Add existing groups as children by typing their keys
- Child groups inherit relationship configurations from parent groups
- This enables complex organizational structures (e.g., a
companygroup containingmarketing,engineering, andsalessubgroups)
The description reads: "Add child groups to the group (same tenant only)"
Use Child Groups to model your organizational hierarchy. For example, if you have a company group, you can add department groups like marketing, engineering, and support as children.
Assign Group to Group
Current behavior:
The "Assign Group to Group" functionality currently supports only groups that belong to the same resource type.
Extended support for this function may be added in the future to allow assignment between groups with different resource types.
Example Workflow: Marketing Team Access
Let's walk through a practical example of setting up group-based access for a marketing team:
Step 1: Create the Marketing Group
- Click + Create Group
- Set Group Instance Key:
marketing - Select Tenant:
default - Optionally set Resource Type Key:
teams - Click Create Group
Step 2: Add Team Members
- Click the three-dot menu (⋮) next to the
marketinggroup - In the Users section, add team member keys:
alice@company.combob@company.comcarol@company.com
Step 3: Assign Instance Access
- In the Instance Access section, click Add Instance Access
- Configure access:
- Resource Type:
social_media - Resource Instance:
training_video - Role:
editor
Now all members of the marketing group will have the editor role on the training_video instance!
Step 4: Add Child Groups (Optional)
If you have specialized subteams:
- In the Child Groups section, add:
content-teamdesign-teamanalytics-team
These child groups will maintain the relationship hierarchy while allowing for more granular permission management.
Key Benefits of Using Groups UI
- Visual Management: Easily see all your groups and their configurations at a glance
- Hierarchical Structures: Create parent-child group relationships for complex organizational models
- Automatic Permission Derivation: Leverage automatic role derivation to maintain consistent access control
- Instance-Level Control: Grant permissions on specific resource instances to entire groups
Best Practices
- Naming Conventions: Use clear, consistent naming for group keys (e.g.,
team-marketing,dept-engineering) - Group Hierarchy: Design your group structure to reflect your organization's structure
- Regular Audits: Periodically review group memberships and permissions
- Documentation: Document the purpose and permissions of each group for team reference
- Start Simple: Begin with basic groups and add complexity as needed
Next Steps
- Learn more about Groups API for programmatic management
- Explore ReBAC Overview for relationship-based access control concepts
- Check out ReBAC API Calls for additional examples