Embedding Elements
Integrate UI components into your application to enable comprehensive access control and user management functionality.
Overview
Embedding Permit Elements into your application is a straightforward process that can be easy to understand by this flow diagram:

Example Project
To help you get started, we have created an example project that demonstrates how to embed Permit Elements into your application 🚀.
Creating a new element
In this example, we will create and embed a new User Management element using the FrontendOnly login method.
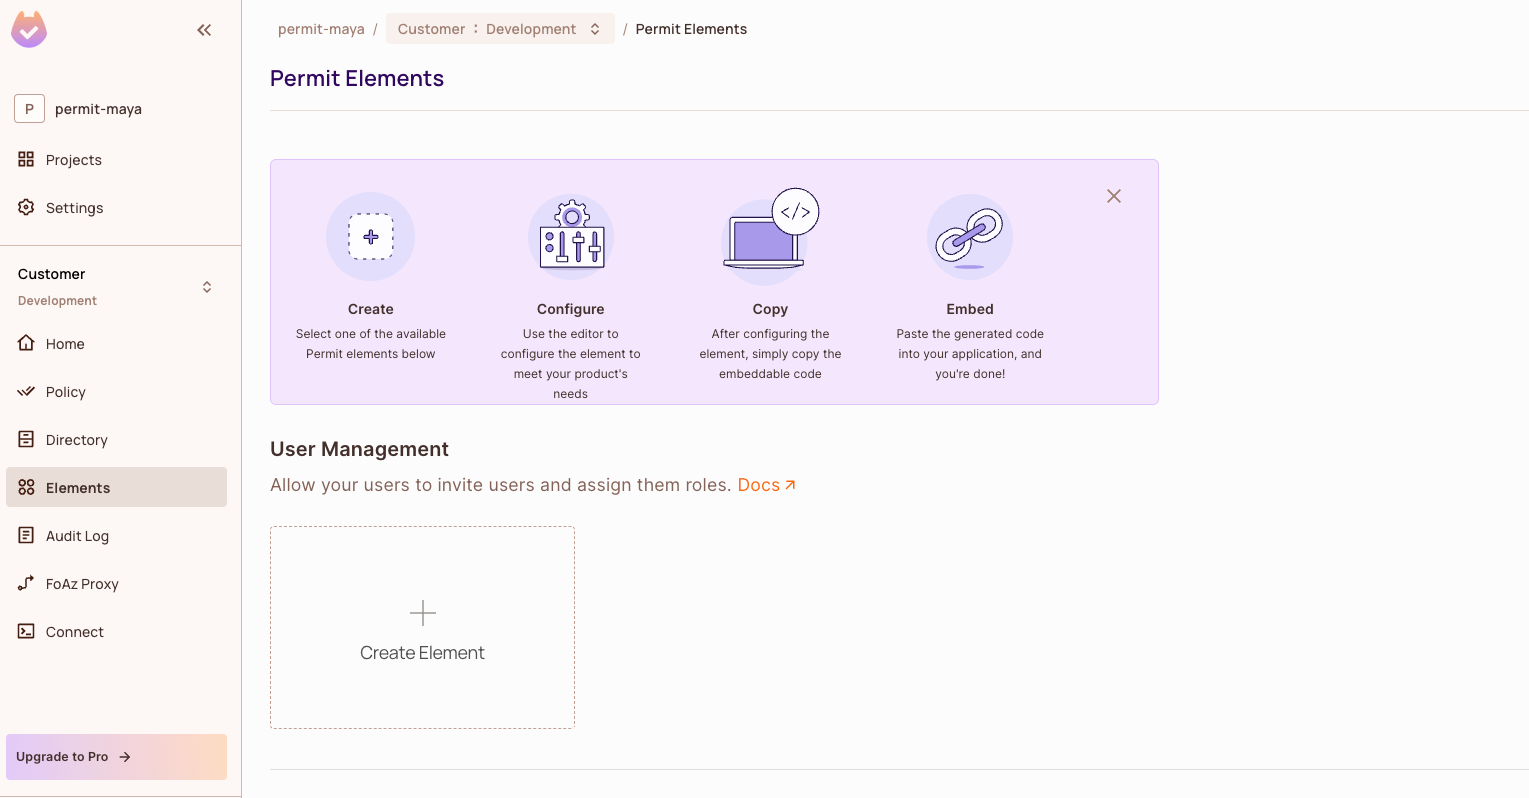
First, navigate to the Elements section in Permit UI and click on Create Element located just below the User Management element.
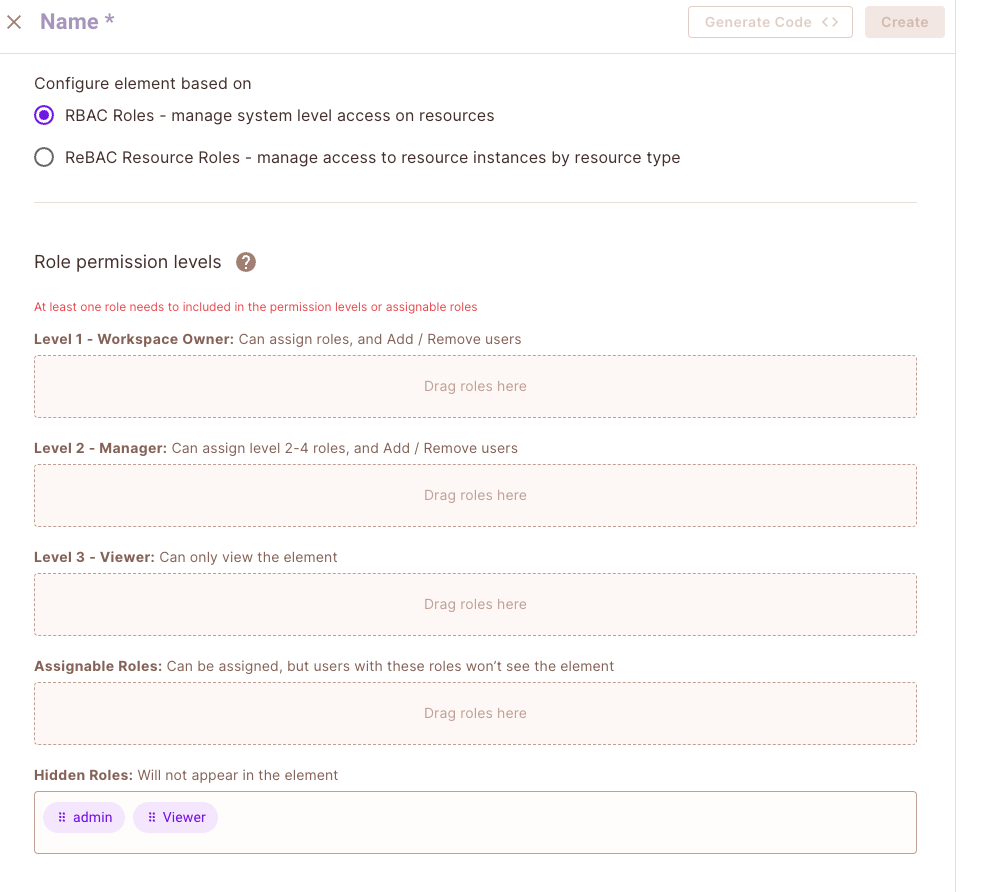
Next, you will be prompted to fill in the details of the new element. The following fields need to be completed:
- Name: The name of the element.
- Permission Model: The permission model for the element (RBAC / ReBAC).
- Roles Levels: The role levels for the element.
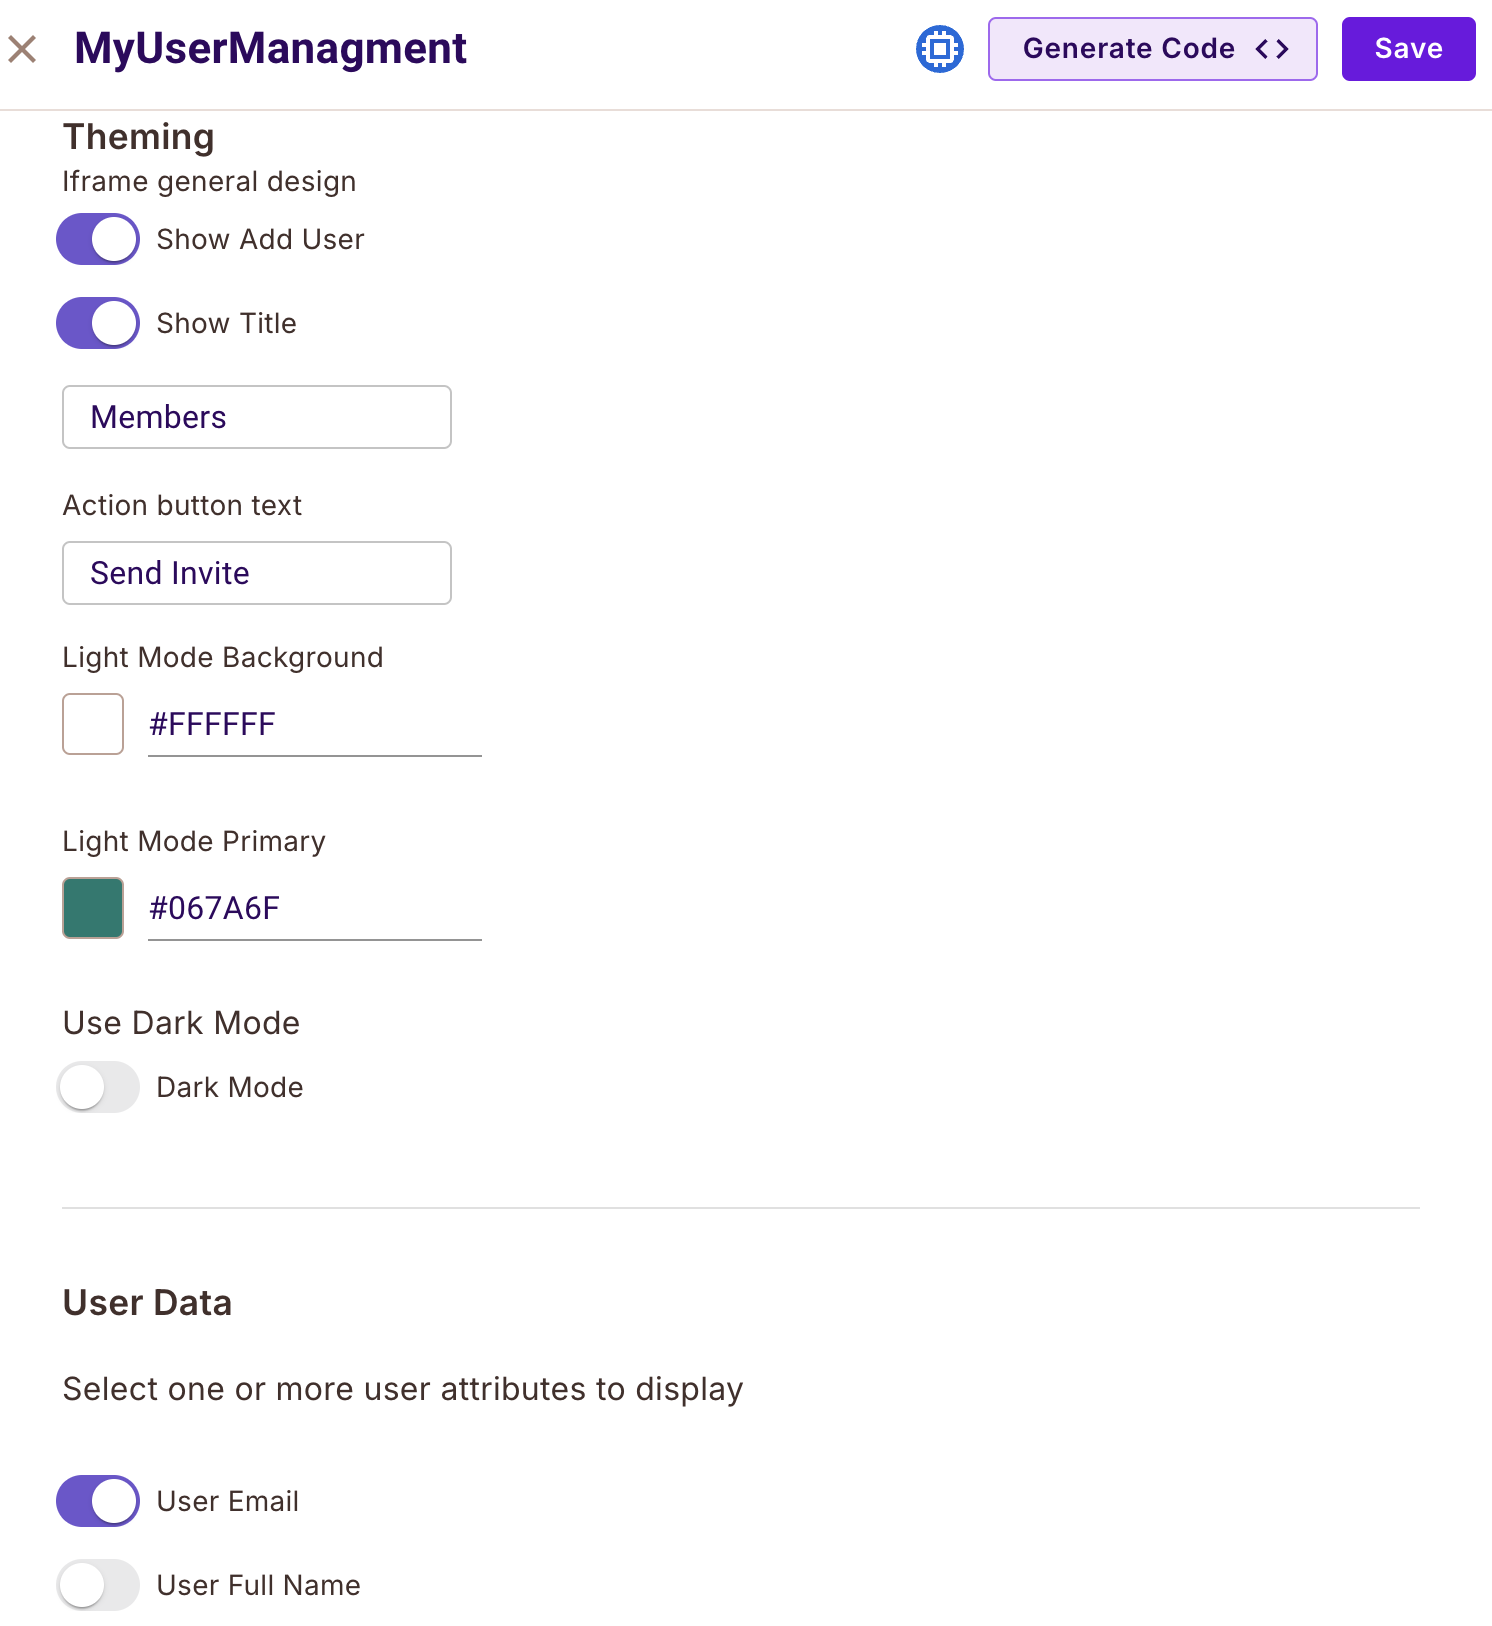
Additionally, you can manage the default settings of the element and customize the iframe's general design:
- Change the background and primary color of any element to match your brand.
- Assign a title to the element that makes sense to your end user, or choose to hide it entirely.
- Show or hide the "Add User" field in the UI. Please note that this is purely a visual change and does not affect the functionality of the element.
- Decide whether to display your users' email, full name, or both on the element.
- Configure webhooks to receive automatic updates on actions taken by your users. For more information about webhooks, refer to the Permit Webhooks documentation.
Previewing the element
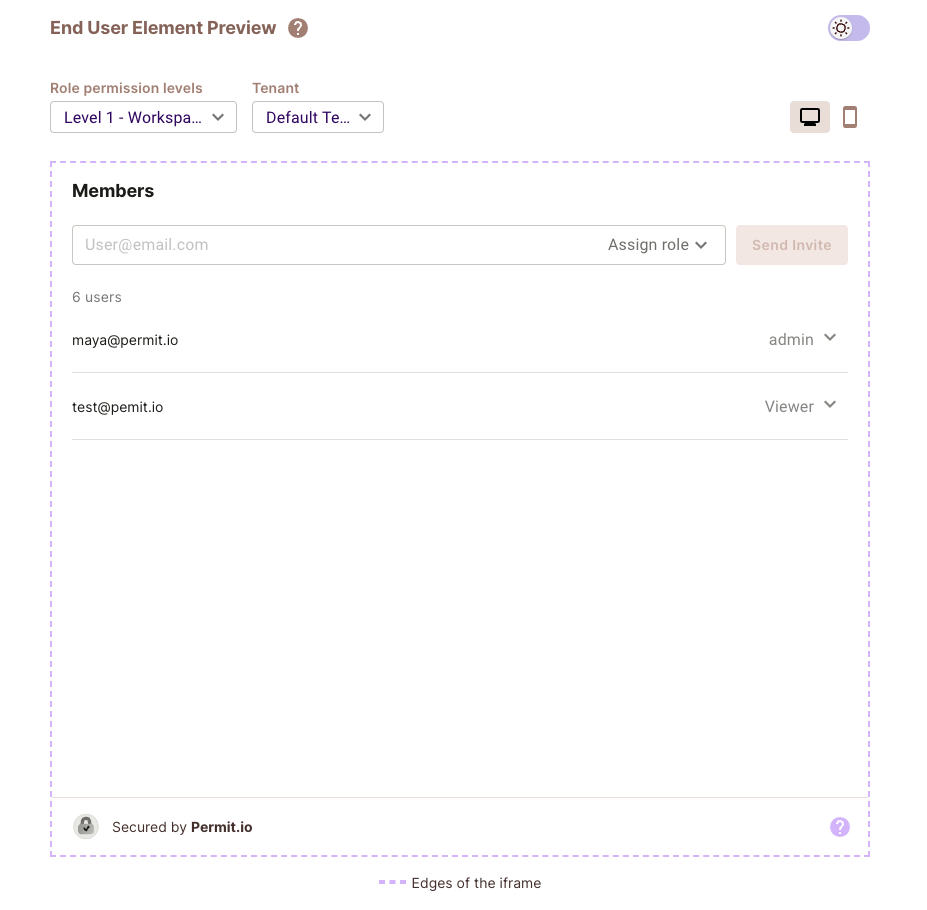
On the right side of the screen, you will see the End User Element Preview, which displays how the element will appear in the end user's dashboard.
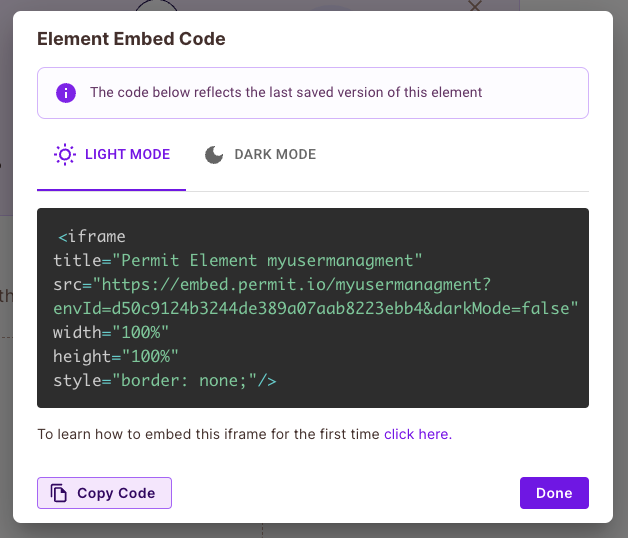
After clicking on Save, the element will be created, and you will be redirected to the element's page. Now, you can click on the
**Get Code** button to obtain the Element Embed Code. This iframe code will be used to embed the element in your application.
Configuring JWKS for your environment
First, open your Permit Dashboard and go to the Settings page. Then click on JWKS Config on the upper sidebar and configure your JWKS for the environment you want to use. Paste your JWKS in the text dialog and click Save.
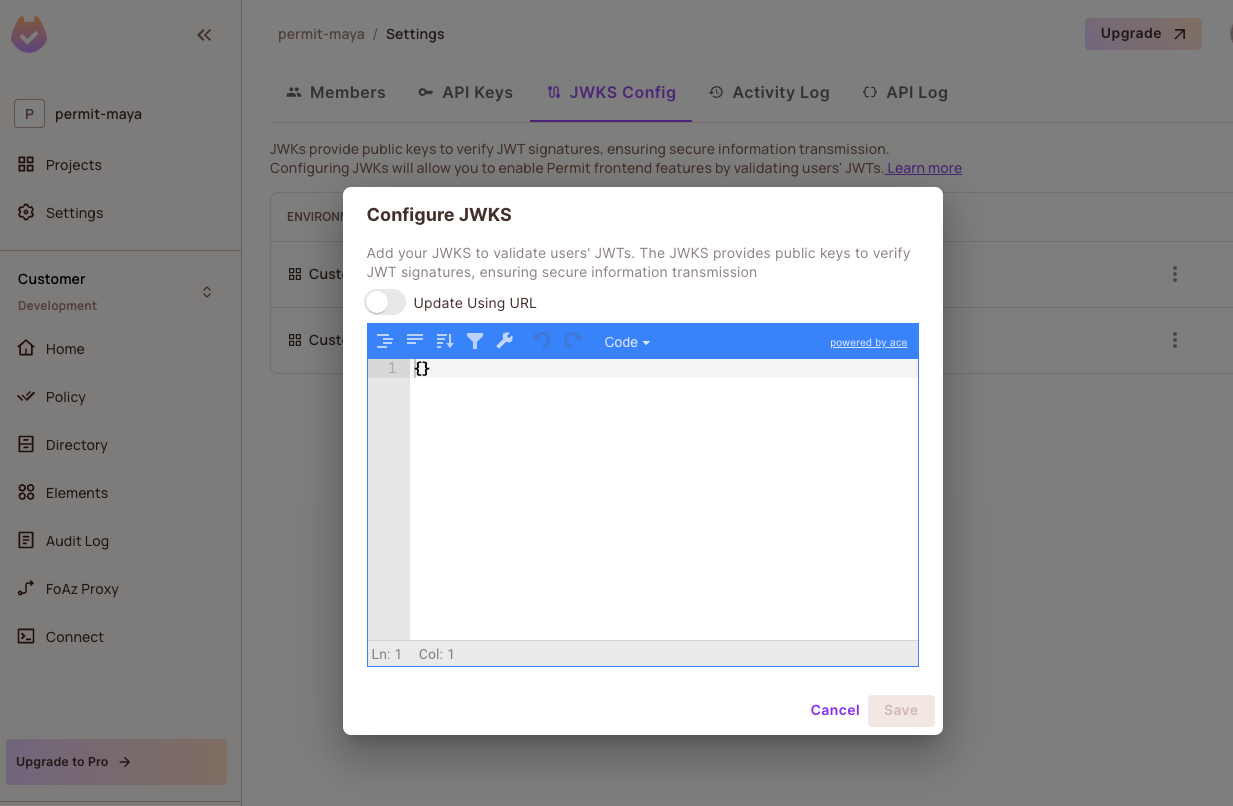
Make sure your Permit user key is the same as the JWT sub. You can see your Permit user key on the Users page in the Permit Dashboard. You can see your JWT sub with sites like jwt.io. Just paste your JWT token into the text dialog and check the left side of the sub field.
For more information about the JWKS configuration, you can read the Permit JWKS Configuration documentation.
Installing Permit-js
Once your application is ready, you need to install Permit’s JS SDK. This will give you access to our prebuilt embeddable element components.
Run the following command to install the Permit-js SDK in your project:
npm install @permitio/permit-js
Client side login method using FrontendOnly
To successfully integrate Permit’s login functionality into your application, you'll need to configure several key parameters. Below are detailed instructions on how to set these parameters correctly:
The loginMethod should be set to: LoginMethod: LoginMethod.frontendOnly.
- userJwt should be set to the current user token.
- tenant should be set to the tenant you want to access. The current user must have a role assigned to them in this tenant.
- envId should be set to the environment ID you want to access. Ensure you have set the JWKS in this environment. You can get your environment ID with this API call or from the "Get Code" dialog in the Permit Elements Dashboard.
- userKeyClaim (optional) - This is optional for the
frontendOnlylogin method. If your user key in Permit isn't the same as the JWTsubclaim, you need to pass the key of the claim here.
permit.elements
  .login({
    loginMethod: LoginMethod.frontendOnly,
    userJwt: "<YOUR_USER_JWT>",
    tenant: "<YOUR_TENANT_KEY>",
    envId: "<YOUR_ENV_ID>",
  })
  .then((res: any) => {
    console.log("success", res);
  })
  .catch((err: any) => {
    // you can handle the error either here or in your BE
    console.log("err", err);
  });
After you run the login successfully, you will receive a cookie called permit_session, which will enable you to load your
Permit Element securely and successfully.
Client-side logout method
This function should be called along with the logout logic within your app to ensure the user no longer has access to the Permit Element.
This logout method should be called as part of the process of logging your user out with your authentication solution.
permit.elements.logout();
Login Errors
There are a few possible errors you might find yourself come across while working with the embedding of Permit Elements.
| Error | Description |
|---|---|
USER_NOT_FOUND | This error can appear if you are trying to log in as a particular user, but that user does not exist within Permit. You can also experience this login error when you are trying to login a user into a tenant that he does not belong to. |
TENANT_NOT_FOUND | This error can appear when you are passing in a tenant, either in the frontend permit.elements.login function, or in your backend URL endpoint, where the tenant has not been created in Permit. |
INVALID_PERMISSION_LEVEL | This error will emerge when you are trying to access part of the Element which you have not been given access too. This usually means the role that the person obtained has remained in the Hidden Roles permission level. |
FORBIDDEN_ACCESS | This error will emerge when you are trying to login to an Element you have not been given permission to see. |