Sync Users and Roles
Introduction
Auth0 is one of the leading authentication platform for developers. While Permit.io is the leading authorization platform for developers.
You can use this guide to sync all the users from Auth0 to Permit.
Prerequisites
- Auth0 account
- Permit account
- Auth0 management API Key
- Ability to run python script
Let's get started
Step 1: Get Auth0 management API Token
- Go to Auth0 dashboard and click on "Applications" in the sidebar.
- Click on the "Auth0 Management API" application.
- Click on the "API Explorer" tab and copy the "Token" value (you can set below the "Token Expiration" value if you want to use this script more then once).
Step 2: Export users from Auth0
You can follow the Auth0 documentation to export all the users from Auth0.
Or you can do the following steps:
2.1 Perform this post request to get the export job id:
curl --location 'https://[your auth0 domain].auth0.com/api/v2/jobs/users-exports' \
--header 'authorization: Bearer [Auth0 management API Key]' \
--header 'Content-Type: application/json' \
--data '{
    "connection_id": "con_1234567890",
    "format": "csv",
    "limit": 999999,
    "fields": [
        {"name": "email"},
        {"name":"user_id"},
        {"name":"given_name"},
        {"name":"last_name"},
        {
            "name": "identities[0].connection",
            "export_as": "provider"
        }
    ]
}'
You need to replace the following values:
- [your auth0 domain] - your auth0 domain
- [Auth0 management API Key] - the token you copied in step 1
- con_1234567890 - the connection id you want to export users from (you can get it from the Auth0 dashboard) -> Authentication -> Database -> your database -> Settings -> Social / Database -> Click on the connection name -> copy the id from the url or near the Identifier field.
You will get back the job_id value that looks like this: job_abcdefghijk
2.2 Get the exported link from the job:
curl --location 'https://[your auth0 domain].auth0.com/api/v2/jobs/users-exports/[job_id]' \
--header 'authorization: Bearer [Auth0 management API Key]'
You need to replace the following values:
- [your auth0 domain] - your auth0 domain
- [Auth0 management API Key] - the token you copied in step 1
- [job_id] - the job id you got from the previous request
When the job status is "completed" you will get back a link to download the users csv file compressed in a gz file. The link will look like this:
"location": "https://peu2-auth0-export-users-eu-west-1.s3.eu-west-1.amazonaws.com/job_....
2.3 Download the file and extract it.
Step 3: Prepare your environment to run the python script
- Clone the python script from here to the same folder you extracted the users csv file to.
git clone git@github.com:permitio/admin-scripts.git
- Move the users.csv file to the same folder you cloned repository to under the
auth0folder. - Install the python requirements:
pip install -r requirements.txt
- Set the following environment variables in the .env file:
-
- PERMIT_SDK_TOKEN - your permit api key, follow those instructions
-
- AUTH0_DOMAIN - your auth0 domain
-
- AUTH0_MGMT_ACCESS_TOKEN - the token you copied in step 1
Step 4: Run the python script
By running the python script you will sync all the users from Auth0 to Permit.
python auth0_sync_users_with_permit.py
- Fill the name of the csv file you downloaded from Auth0 (users.csv)
- Fill the name of the tenant that you want us to sync the users to, if you have only one tenant you can leave it empty and we will use the
defaulttenant. - If you don't have all the roles inside the permit environment the script will ask you if you want to create them, if you choose
noyou will need to create them manually before running the script again.
Step 5: Verify the users were synced to Permit
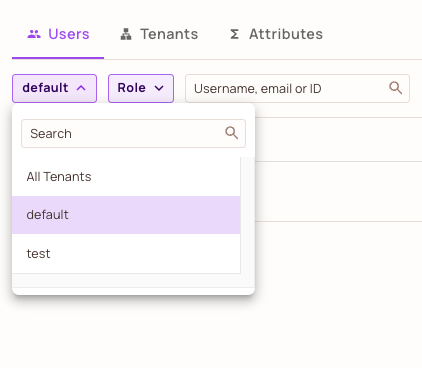
- Go to Permit User Management and choose the right tenant.
