Model Ownership
Ownership plays an important role in managing and securing access to resources - this guide explains how to setup ownership using Permit
As we always want to ensure that data owned by a user is accessible to them and to those given the privilege by them, ownership is on of the first building block of fine-grained authorization.
There are two primary methods that can be employed to model ownership of resources - Attribute Based Access Control (ABAC) and Relationship Based Access Control (ReBAC). Both approaches offer unique advantages and cater to different requirements for managing access controls.
Let's take a look at a simple example:
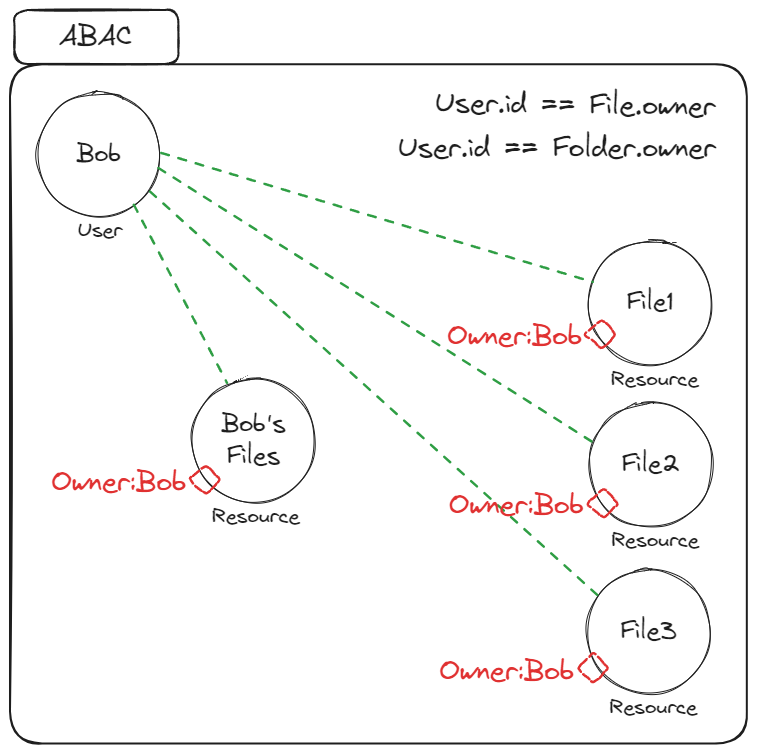
Bob, a user in our system, needs to have access to his own files based on his ownership of them.
There are two possible ways to create policies that would enforce Bob's ownership of his files:
Technically, it is possible to setup ownership by using roles. Using roles for ownership, we would need to set up access per user and per resource - making it highly inefficient and unscalable.
ABAC
ABAC utilizes attributes as the basis for access control decisions. These attributes can be associated with users, resources, or the environment.
In the context of granting a user access to files based on ownership, ABAC involves adding an Owner attribute to each file and folder.
The user is then granted a role that permits them access to any file or folder where the Owner attribute matches their ID.
Pros & Cons
While offering a very granular way of managing ownership on a per-resouce level, ABAC lacks the ability to rely on existing application-level relationships (Such as a file residing within a folder). This can result in a rather meticulous ownership assignment process only fit for specific scenarios.
Setting up ABAC based Ownership in Permit
For the purpose of this example, let's try and setup the following policy:
Bob can Read, Upadte, and Delete every file he is an Owner of.
To setup an ABAC based ownership policy in Permit's UI -
- Login to your Permit account at app.permit.io
- For the purpose of this tutorial, we setup a resource called
Fileand a role calledUserin advance. - Go to the
Resourcestab underPolicy. Locate your resource, and click "Add Attributes".
- In the resource editor, under
ABAC Options, click onAdd Attribute.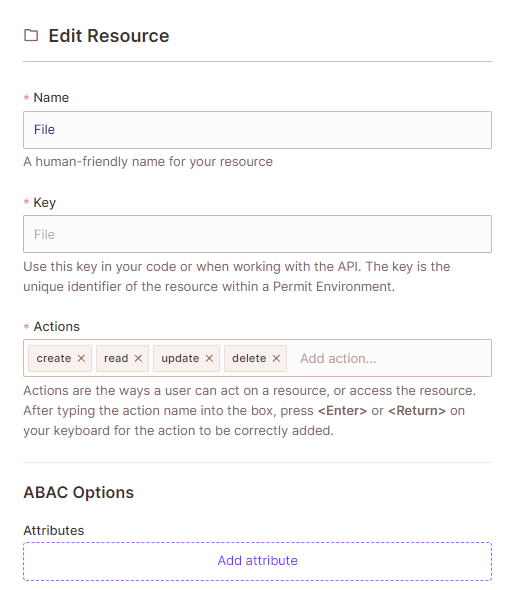
- Name the attribute, and set it as a string. Click save.
- Go to the
ABAC Rulestab, and enable ABAC Options. - Create the following ABAC Resource Set:
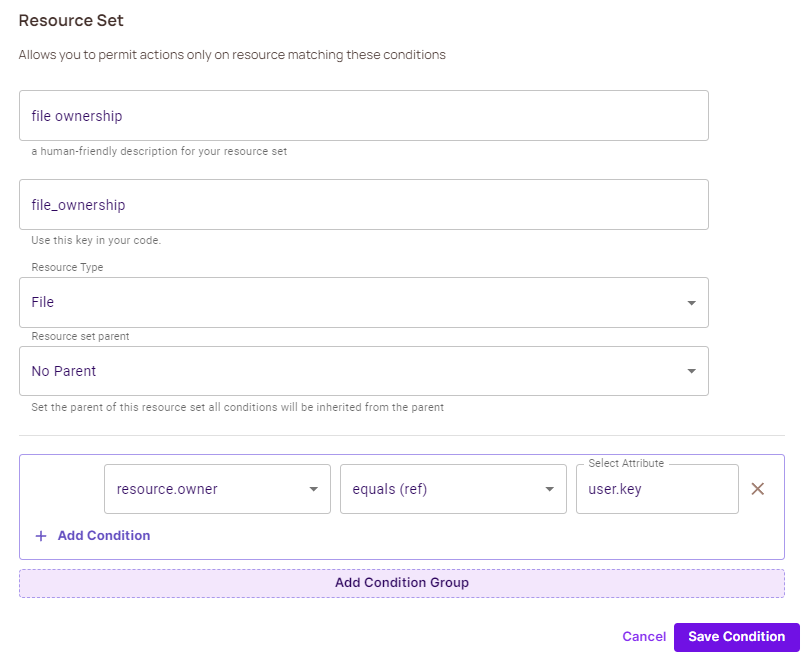
- Go back to the policy editor screen. You should now be able to see a new file-ownership resource set you can manage the permissions for.
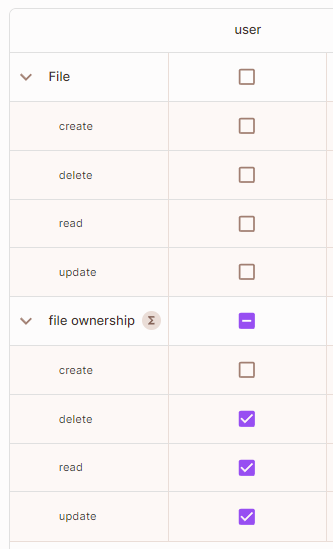
The ABAC condition will compare the file_ownership attribute (On the resource) is equal to the user.key of the user trying to perform the action.
ReBAC
ReBAC allows us to implement ownership in a more effective way by leveraging existing application-level relationships and creating simple policies based on hierarchies and groupings.
By creating Parent-Child hierarchies, ReBAC allows us to nest resources under other resources. Such a relationship allows us to derive roles based on the relationship between two resources:
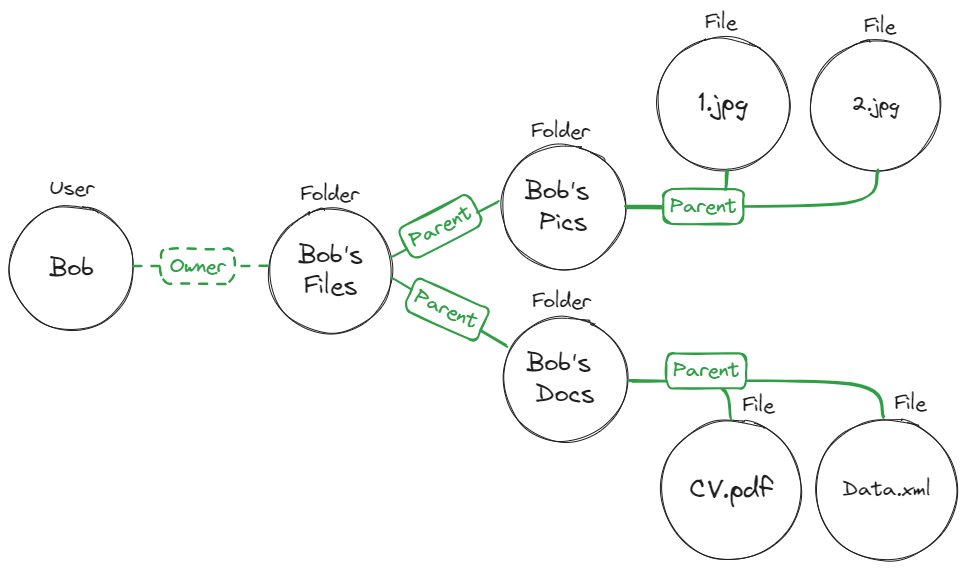
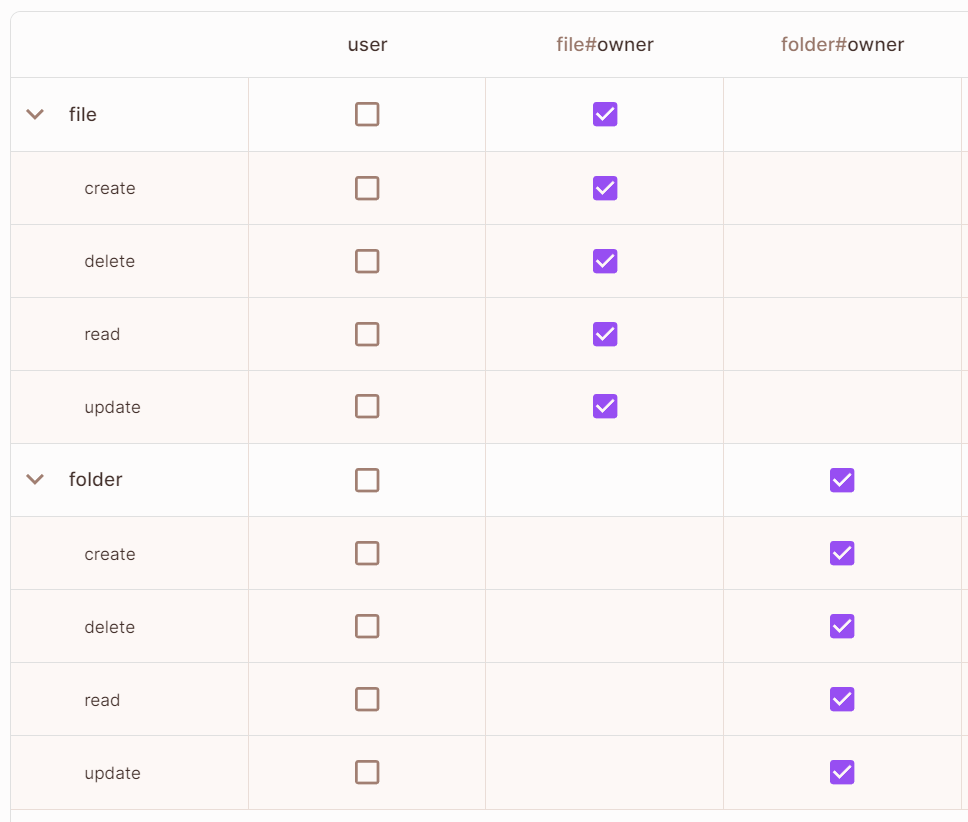
The ReBAC policy for this graph will look like this:
A user who is assigned the role Folder#Owner will also be assigned the File#Owner when the Folder instance is the Parent of a File instance.
In simpler words, if a file resides inside a folder (That’s the Parent-Child relationship), and a user is assigned the owner of that folder, they will also be the owner of the files.
Pros & Cons
While providing the obvious benefit of managing hierarchical ownership scenarios, ReBAC might be a little more complex to model.
Setting up ReBAC based Ownership with Permit
For the purpose of this example, let's use the same one from before:
Bob can Read, Upadte, and Delete every file he is an Owner of.
To setup a ReBAC based ownership policy in Permit's UI -
- Login to your Permit account at app.permit.io
- For the purpose of this tutorial, we setup a resource called
File, a resource calledFolder, and a role calledUserin advance. - In the
Policysection, go to theResourcestab. Click onAdd Roles.
- Under "ReBAC Options", add a resource role named "owner" to both the
FileandFolderresources. In theFolderresource, add the following relation: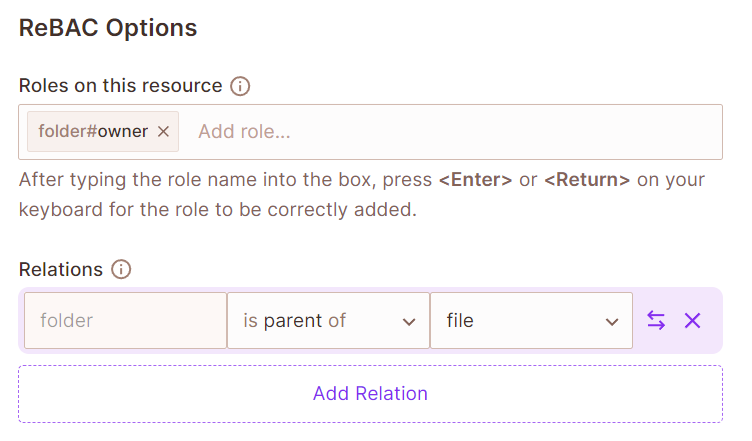
- In the
Direcrorysection, click onAdd User. Create a new user who you want to give access to the specific file instance. In our case, we created a user namedBoband gave him the recource roleBobs_Files#owner.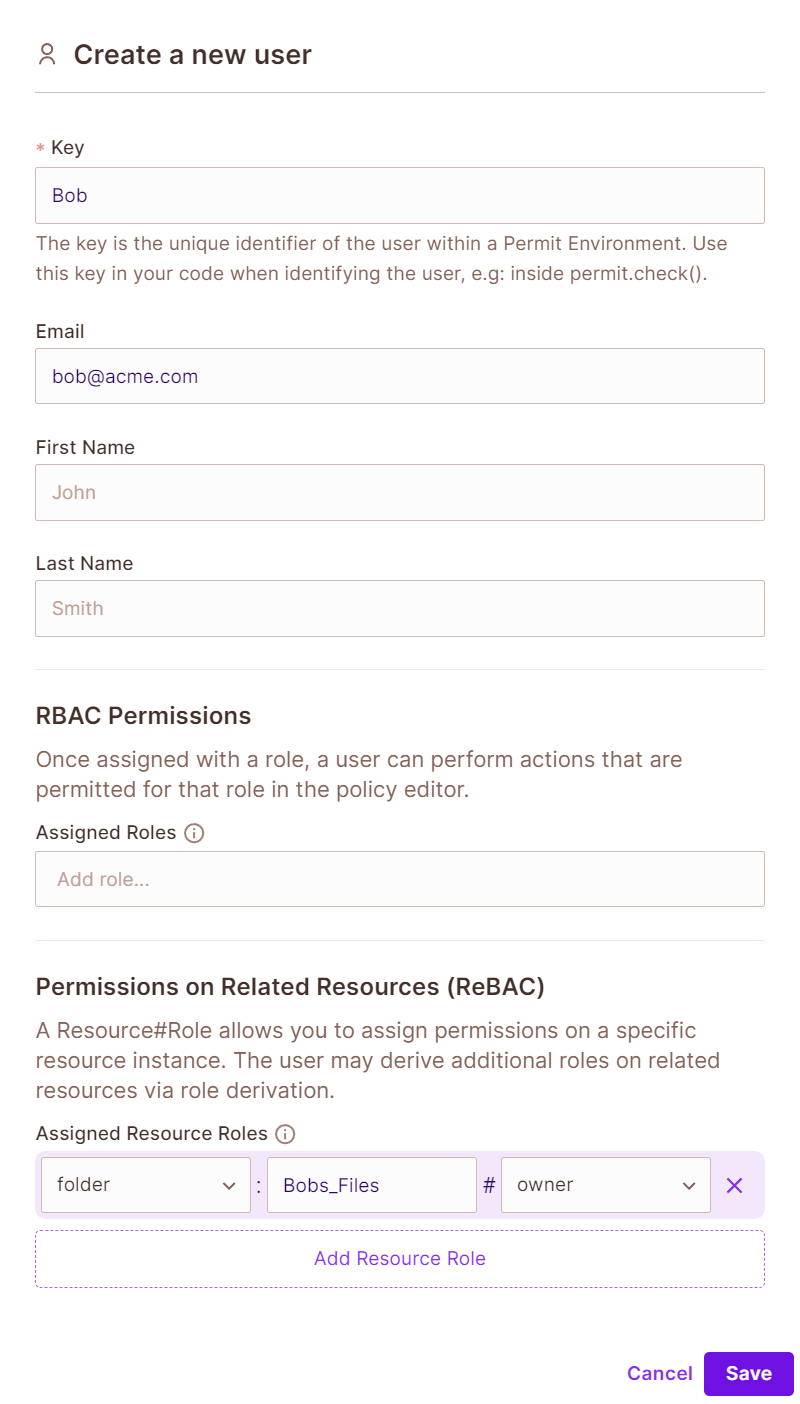
- Go to the
Policysection and click onResource instances. Click onAdd instanceand fill out the form. This will create our file instance, adding the relationships to it.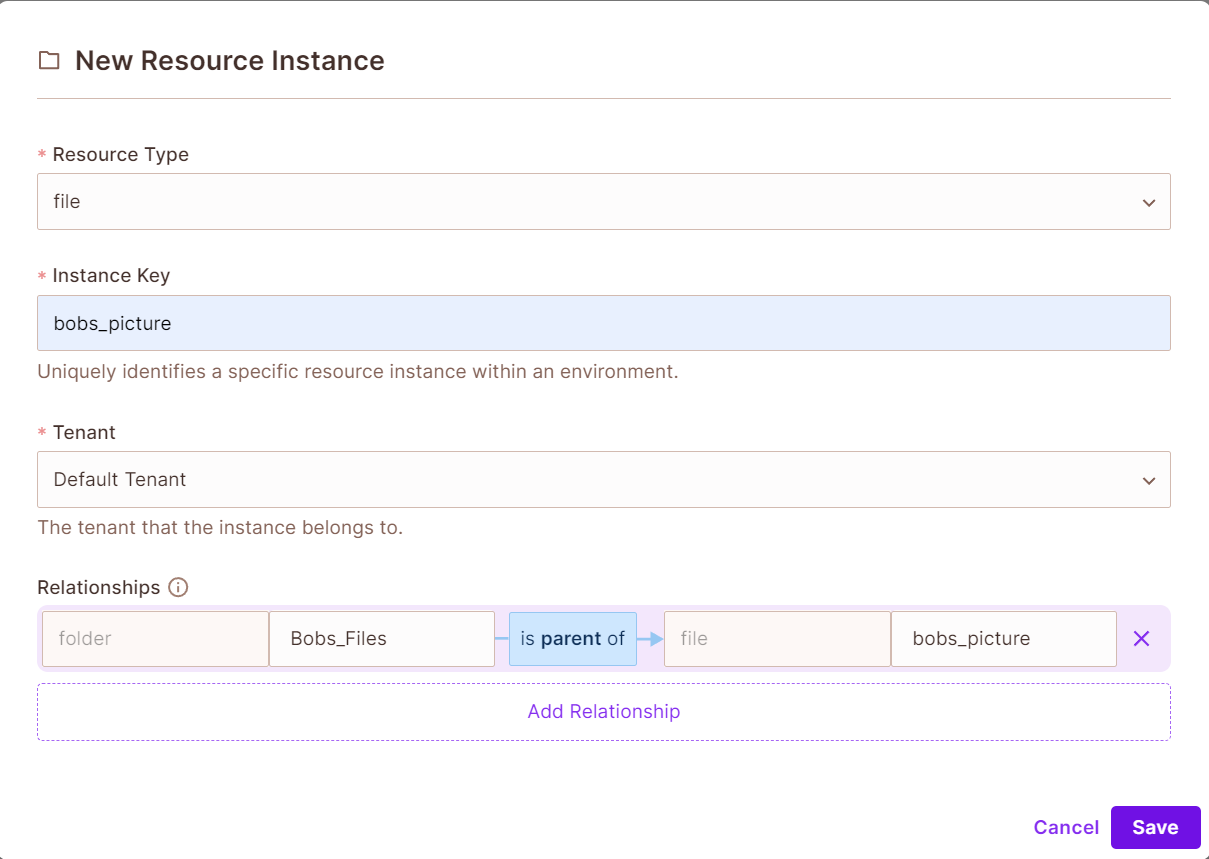
- Going back to the
Policy Editorscreen, you will be able to see thefile#ownerrole and thefolder#ownerrole. Asfileis set as parent offolder, all permissions set on afolderwill automatically propogate tofileswithin those folders as well.