Sync your Application Data
Welcome to your step-by-step guide for syncing application data into Permit.io. By the end of this walkthrough, you'll understand the nuances of managing user data, including roles, tenants, and permissions. You'll also explore JWT handoff points, SCIM integration, and API-driven synchronization methods.
Before we start: Understanding Users vs. Members
Before diving into the technicalities, let’s clarify two key concepts in Permit.io: Users and Members.
Think of Users as the people using your app and Members as your team managing the Permit platform. Confusing them can lead to authorization headaches!
Users
Users are the end entities (human or automated) whose access to your application you want to control. Each user has an identity for authentication and authorization, can belong to multiple tenants, and be assigned roles and permissions.
Example:
Imagine Sarah, your app user, who is part of the “Marketing” tenant. She needs “Editor” access to create content. That’s where roles and permissions come into play.
Members
Members are your team members working within the Permit app, governed by Permit's own access control (Authorization for Authorization). By default, only members can access Permit and author or edit policies.
Before we start: When to sync your users?
The recommended point to sync users into Permit is during the sign-in or sign-up process. This occurs right after your authentication solution verifies the user's identity. At this stage, it’s crucial to map their organizational role—such as Head of Marketing, Customer, Consultant, or Patient—and any relevant claims from their JSON Web Token (JWT) to the appropriate application-level roles, attributes, and relationships.
By syncing users at this point, you ensure their permissions and access control are immediately aligned with their role and context within your application. This step not only streamlines their onboarding experience but also establishes a clear structure for managing access based on their identity and organizational context.
timeline-start
Syncing Users into Permit
Now that we understand the distinction between Users and Members, let's explore how to add new users to Permit. There are three main methods:
-
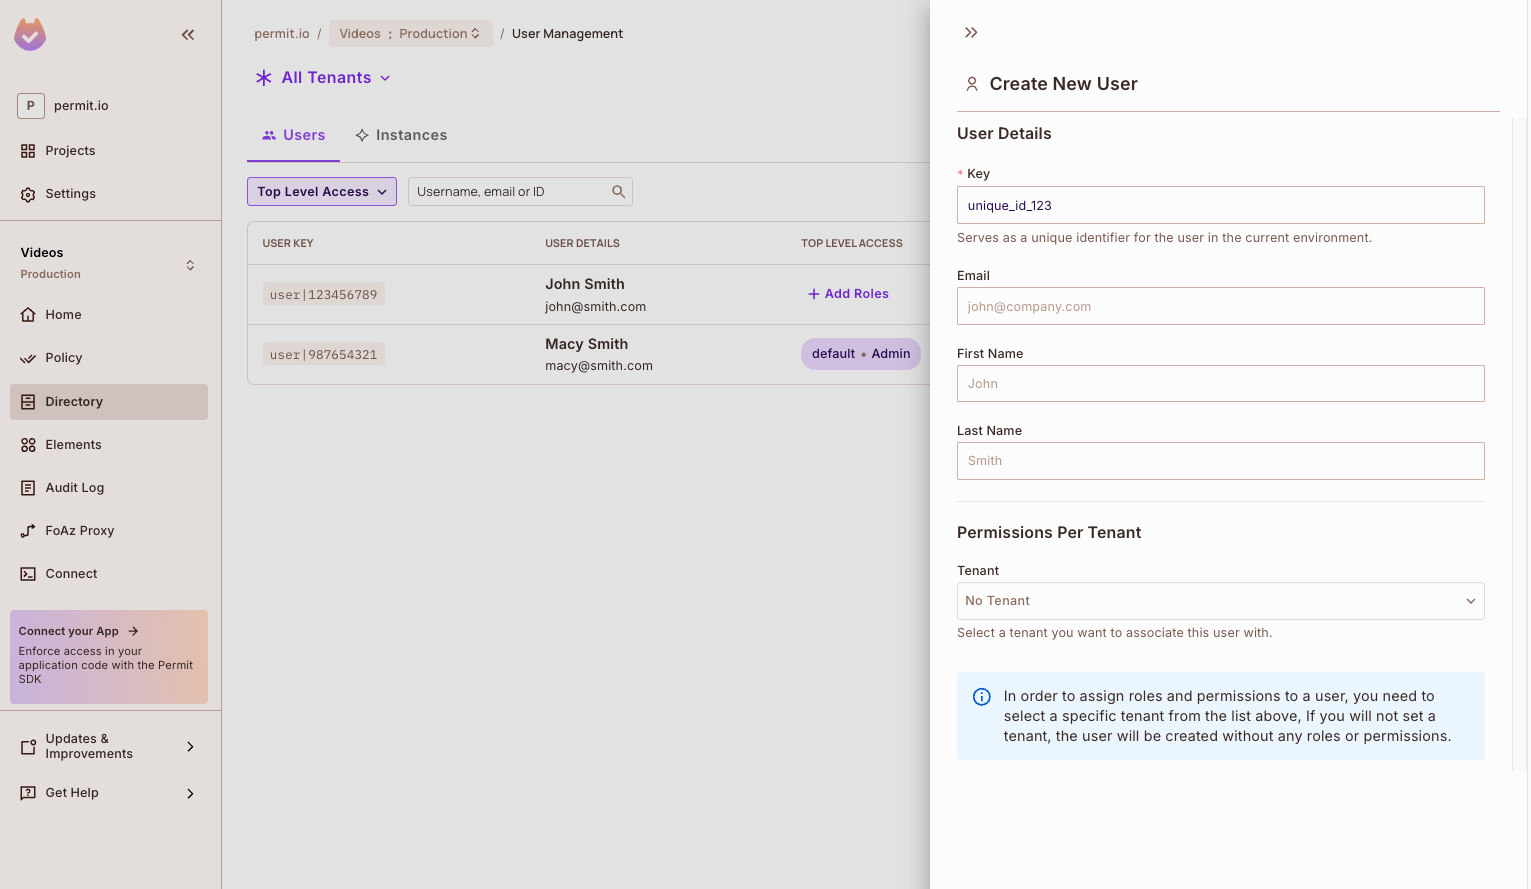
User Management Screen: Use the built-in UI to manage and add users directly within the Permit dashboard.
-
syncUserFunction in SDKs: Leverage the syncUser function in Permit’s SDKs to programmatically add users during your application workflows, such as during sign-up or profile updates. -
API: Use Permit’s API to integrate user management into your custom workflows or backend processes, providing maximum flexibility and control.
Below is an example of adding a user via the Permit UI.
timeline-stop
Further Reading
Bulk User Synchronization
If you need to migrate an entire database of users to Permit, there are two primary approaches to achieve this.
Script-Based Bulk Syncing
Create a script that leverages the Permit API or SDK to iterate through your user dataset and push all users into Permit. This approach allows you to transfer your existing database in one go, ensuring all users are immediately available in Permit. However, it may require additional effort for scripting and execution, and you’ll need to handle any potential errors or data inconsistencies during the process.
Incremental Syncing at Login (Recommended)
A more efficient and seamless method is to sync users incrementally at the handoff point—the moment users interact with your system. Specifically, during the login process, as soon as a user's identity is verified, they are synced into Permit.
This approach eliminates the need for pre-loading an entire dataset, reducing upfront work and ensuring only active users are synced. Over time, as users log in, the entire user base will naturally sync into Permit, aligning with real-world activity in your system.
Incremental syncing aligns with user behavior, ensuring your database stays current and avoids syncing inactive or outdated users.
What is the handoff point?
The handoff point acts as a middleware layer that bridges authentication and authorization, ensuring a smooth transition between the two. Here's how it works:
Authentication Confirmation
The authentication provider verifies the user's identity.
Session and JWT Issuance
A session is created, and a JWT containing the user's unique identifier is issued.
User Synchronization
The user's identity, derived from the JWT, is synced into Permit.io as a new user entity.
Role Assignment
The system assigns an appropriate role to the user based on the application’s policies.
SCIM for automation
SCIM (System for Cross-domain Identity Management) is your go-to solution for large-scale user management.
Why Use SCIM?
- Efficiency: Automates user provisioning and updates.
- Consistency: Ensures uniform user data across systems.
- Security: Minimizes manual interventions.
How SCIM Works
SCIM (System for Cross-domain Identity Management) acts as a bridge between Identity Providers (IdPs) like Okta and Service Providers (SPs) such as Permit.io, automating the transfer of user identity data between them. This integration ensures that when updates happen in the IdP—whether it’s a new hire, a role change, or an account deactivation—those changes are immediately reflected in the SP.
For example, imagine a new employee, Lisa, joins your company. The HR team creates Lisa’s profile in the organization’s IdP, such as Okta, including her name, email address, and role as "Marketing Specialist." SCIM takes over from there, securely transmitting Lisa’s information to Permit.io. The system then syncs her identity, creates a corresponding user account, and assigns her predefined roles and permissions.
This process is instantaneous, so when Lisa logs into the app for the first time, she has the exact access she needs without any manual intervention from IT or administrators. Similarly, if Lisa’s role changes or her account needs to be deactivated, SCIM handles the updates automatically, ensuring consistent and secure access management across systems.
By leveraging SCIM, businesses streamline user management, eliminate manual errors, and ensure that access controls remain aligned with organizational policies in real time.
What did you learn?
As we are at the end of the walkthrough, you should now understand:
-
The Difference Between Users and Members: Users are the end-users of your application, while Members are your team managing Permit.io itself.
-
The Importance of Syncing Users at the Right Time: Syncing during the sign-in or sign-up process ensures immediate alignment of user roles and permissions, streamlining onboarding and maintaining security.
-
Methods to Sync Users: Use the User Management Screen for manual syncing, syncUser in SDKs for programmatic syncing, or Permit’s API for complete control over user management.
-
Bulk User Synchronization: Incremental syncing at login is the recommended method, as it aligns with user behavior and ensures your database reflects active users.
-
SCIM Integration: SCIM automates large-scale user management, ensuring consistency across systems while reducing manual errors and enhancing security.
Did you know that SCIM was born out of the chaos of managing user data across multiple systems in the early days of SaaS? Back in 2011, companies were spending countless hours manually updating user records every time someone joined, left, or changed roles. Developers decided enough was enough and created SCIM to “automate the boring stuff” for identity management.
Today, SCIM doesn’t just save time—it’s estimated to reduce user provisioning effort by over 80%!